Take a Tour of Daylite
Daylite is a highly customizable application with a wide range of capabilities to make it easy for you to simplify your work life so your small business runs smoother. With centralized management of all its capabilities, Daylite helps to keep you productive, organized and focused.
This tour of Daylite will give you a basic overview of the application, and how to navigate through the different screens to find the information you need quickly and efficiently.
When you open Daylite for the very first time, you are presented with a blank slate. So where do you begin?
Why, at the beginning of course.
The Today Screen
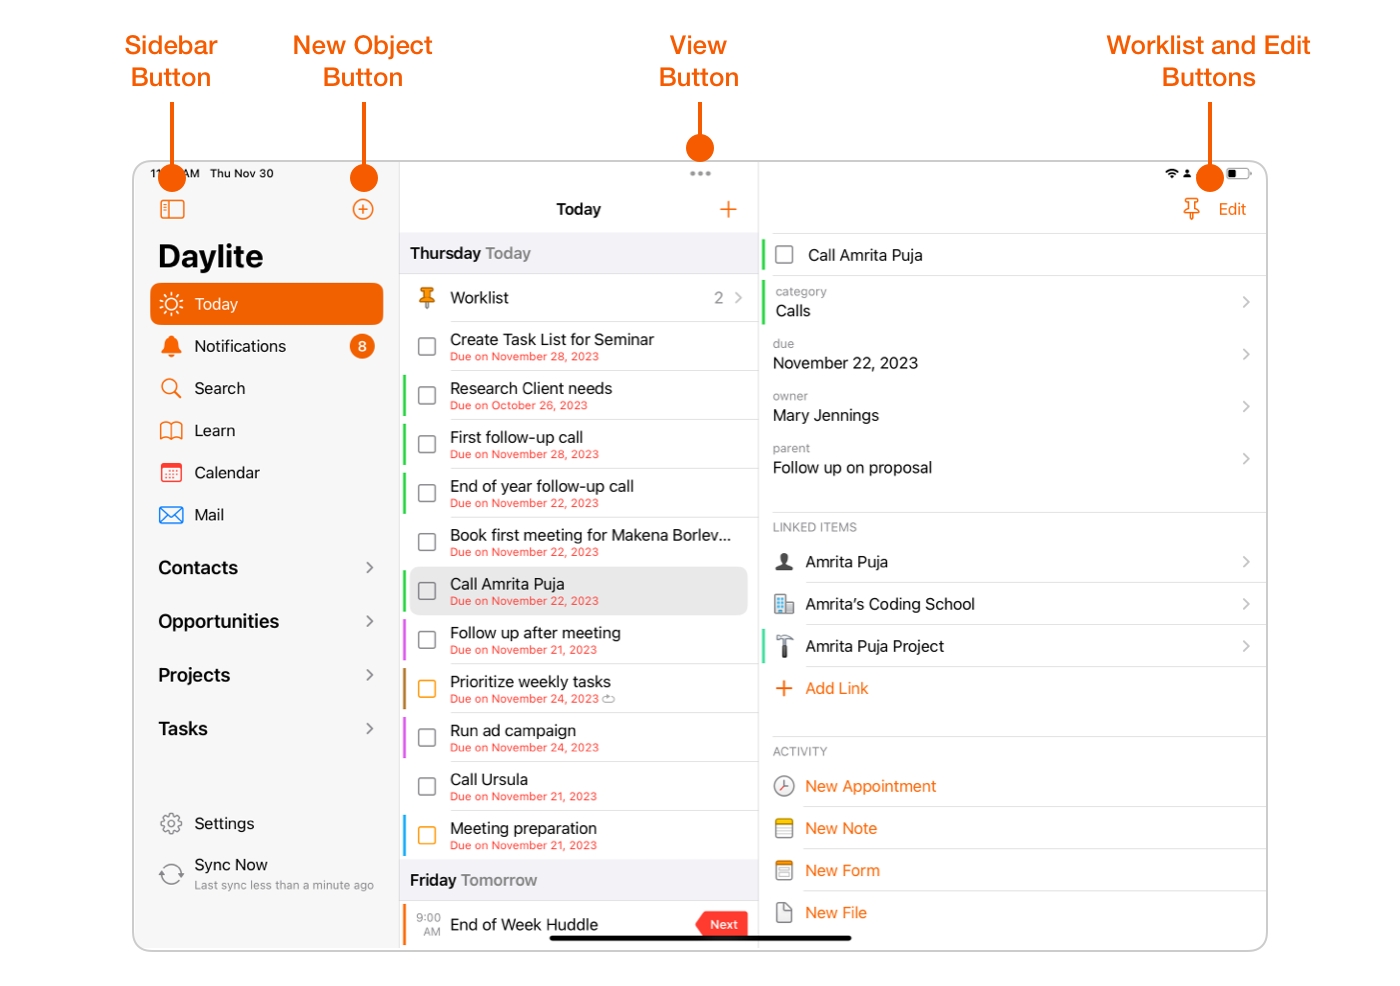
Let's start with the the Today Screen. This view is designed to help keep your day organized, and shows you everything you have planned for the day at a single glance. This dashboard view gives you a detailed view of your work day, Task list, and your upcoming work week.
At the top of the Today Screen you will find:
Sidebar Button: Show or hide your sidebar with a single click.
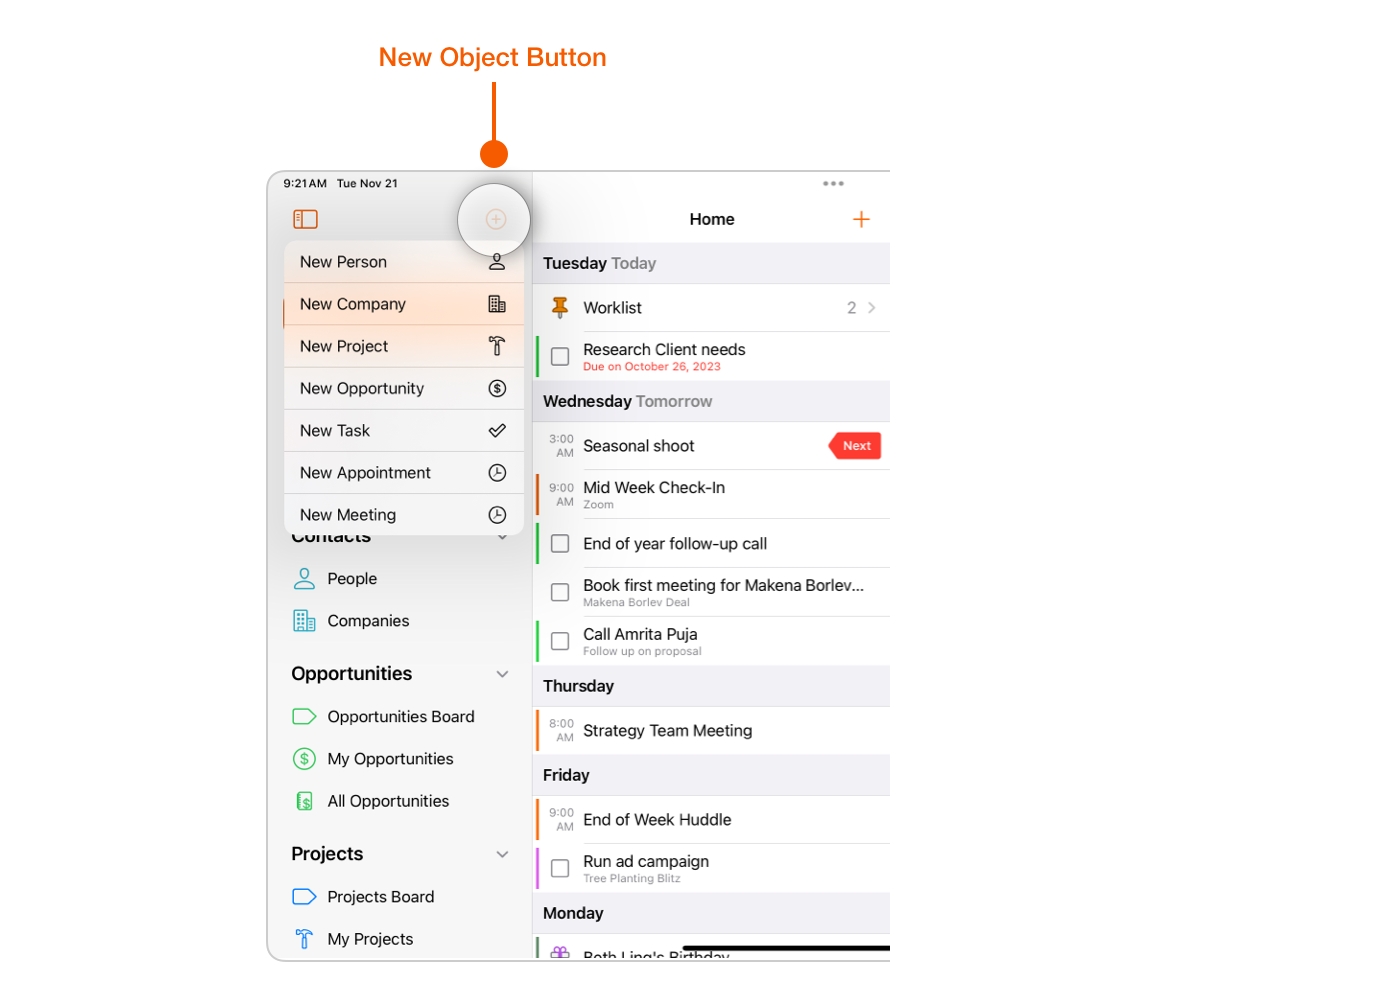
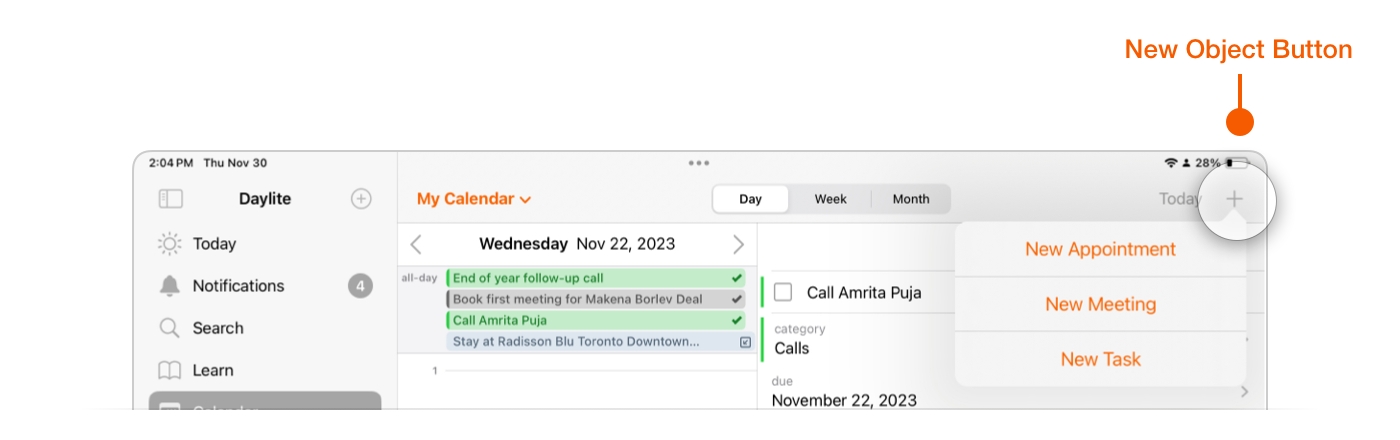
New Object Button: Create new objects from one convenient location.
View Button: Select from three different ways to display information.
Worklist and Edit Buttons: Lets you "pin" important Tasks to your Worklist and Edit details.
View Buttons
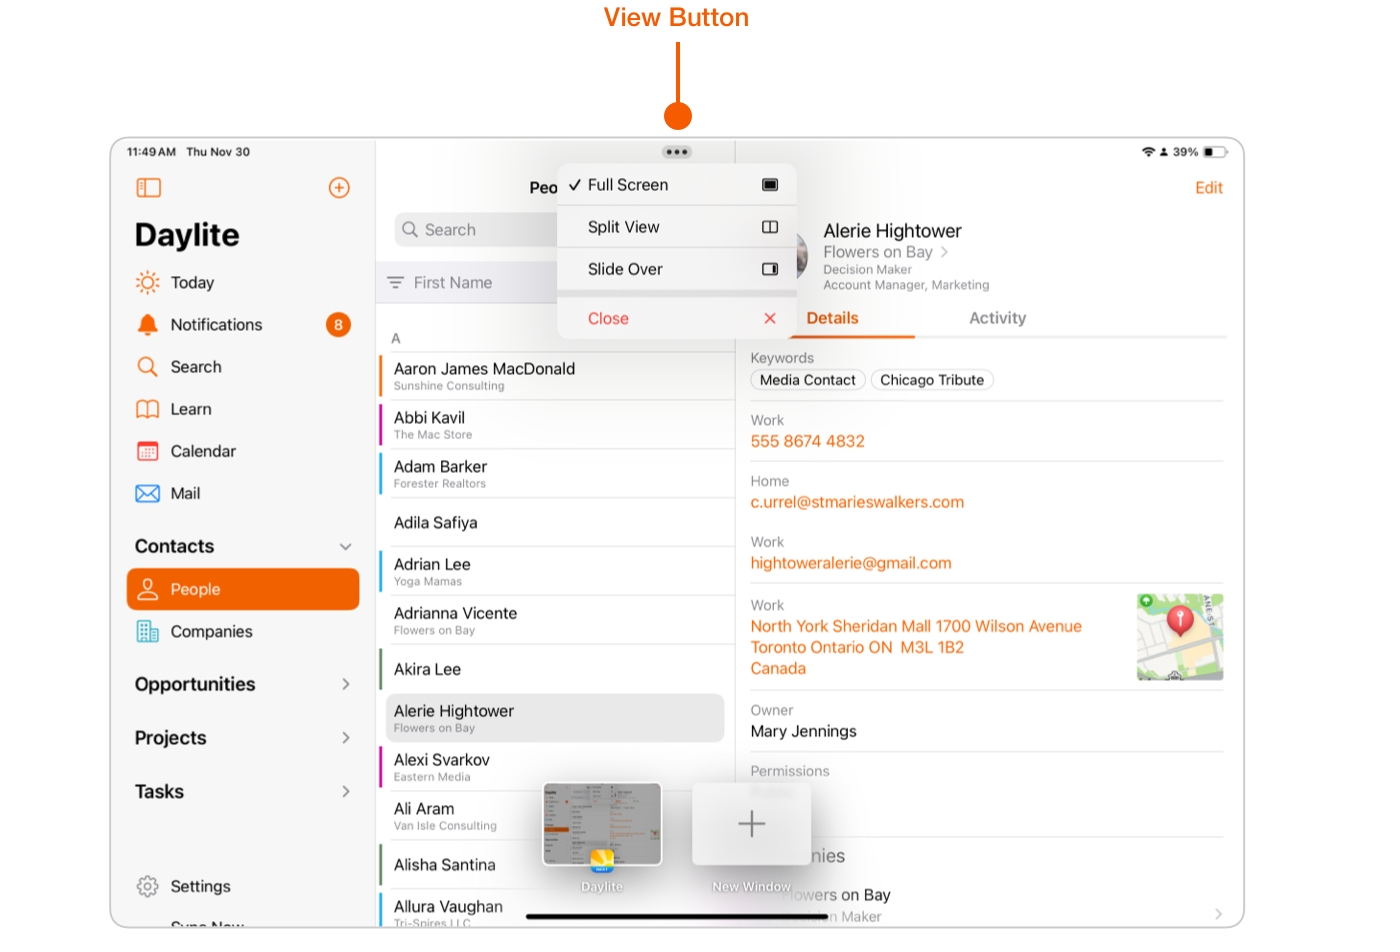
There are three different Views that you can choose from when looking at Daylite.
Full Screen - this view offers the full Daylite experience, as the app is displayed in either Landscape or Portrait mode. All of Daylite at your fingertips.
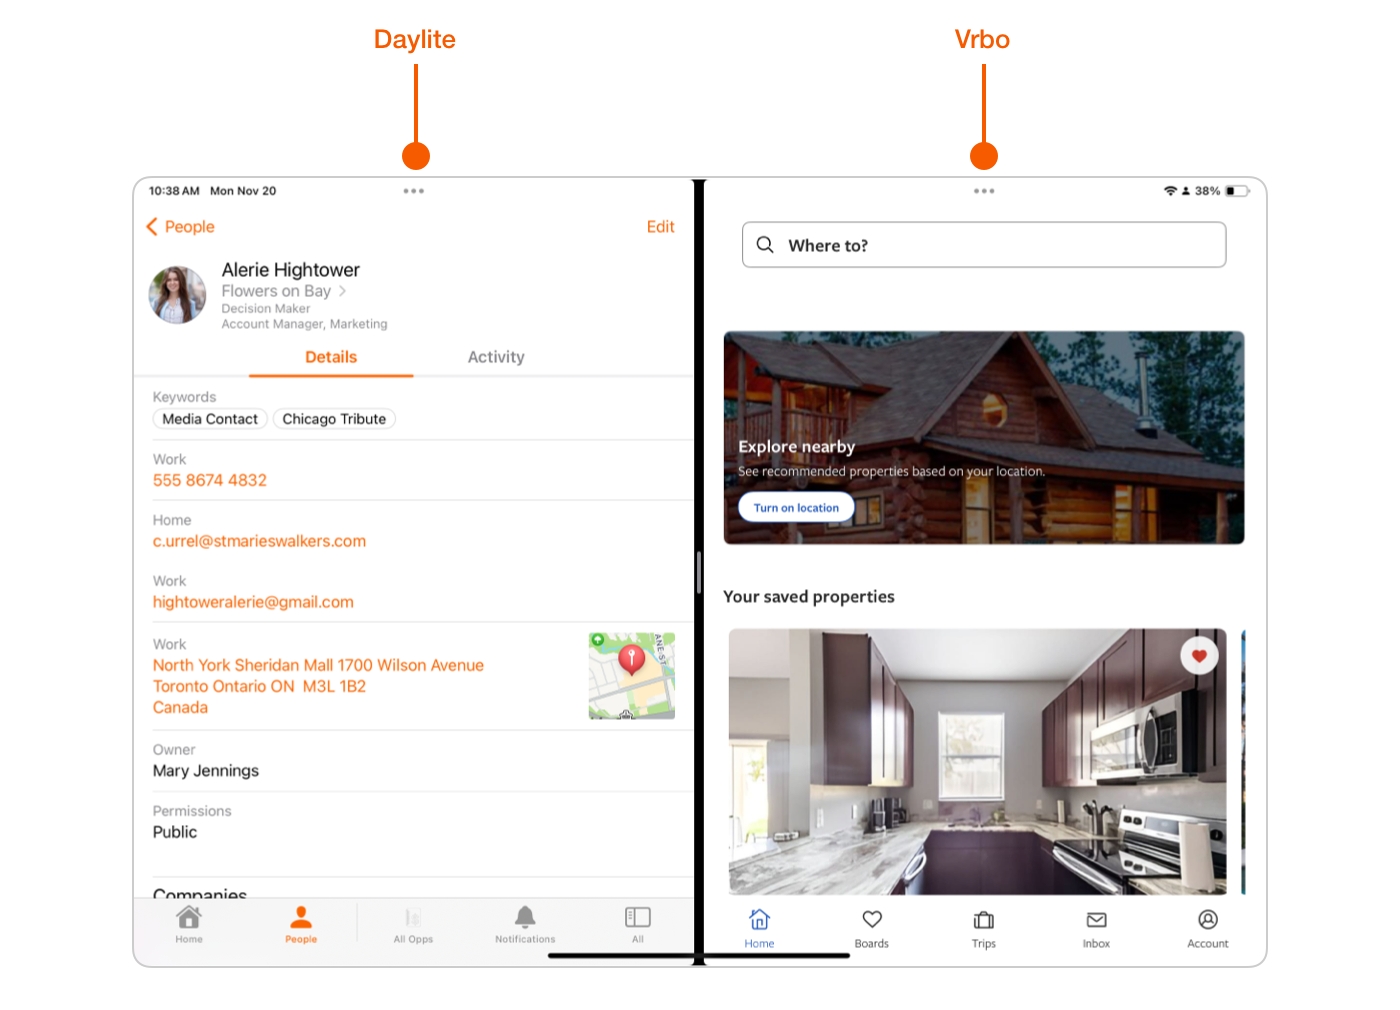
Split Screen - This View places Daylite and one other app of your choosing side by side. This can be advantageous if the second app is not part of Daylite, such as planning for a business trip on Vrbo, and then linking it to Daylite once the reservation has been made.
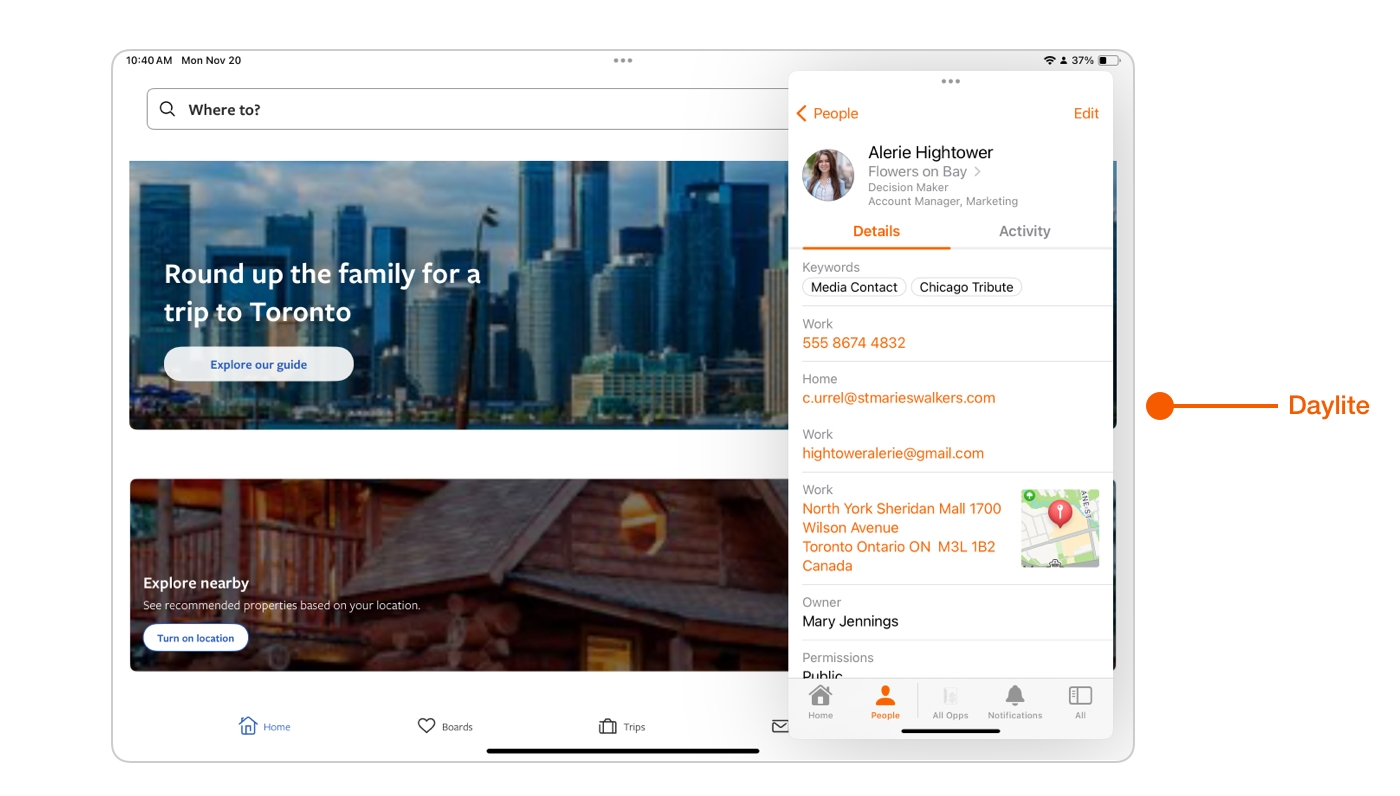
Slide Over - Daylite is overlaid onto a second app of your choice, appearing on the right hand side of your screen in either landscape or portrait mode. The second app is in full screen mode behind Daylite.
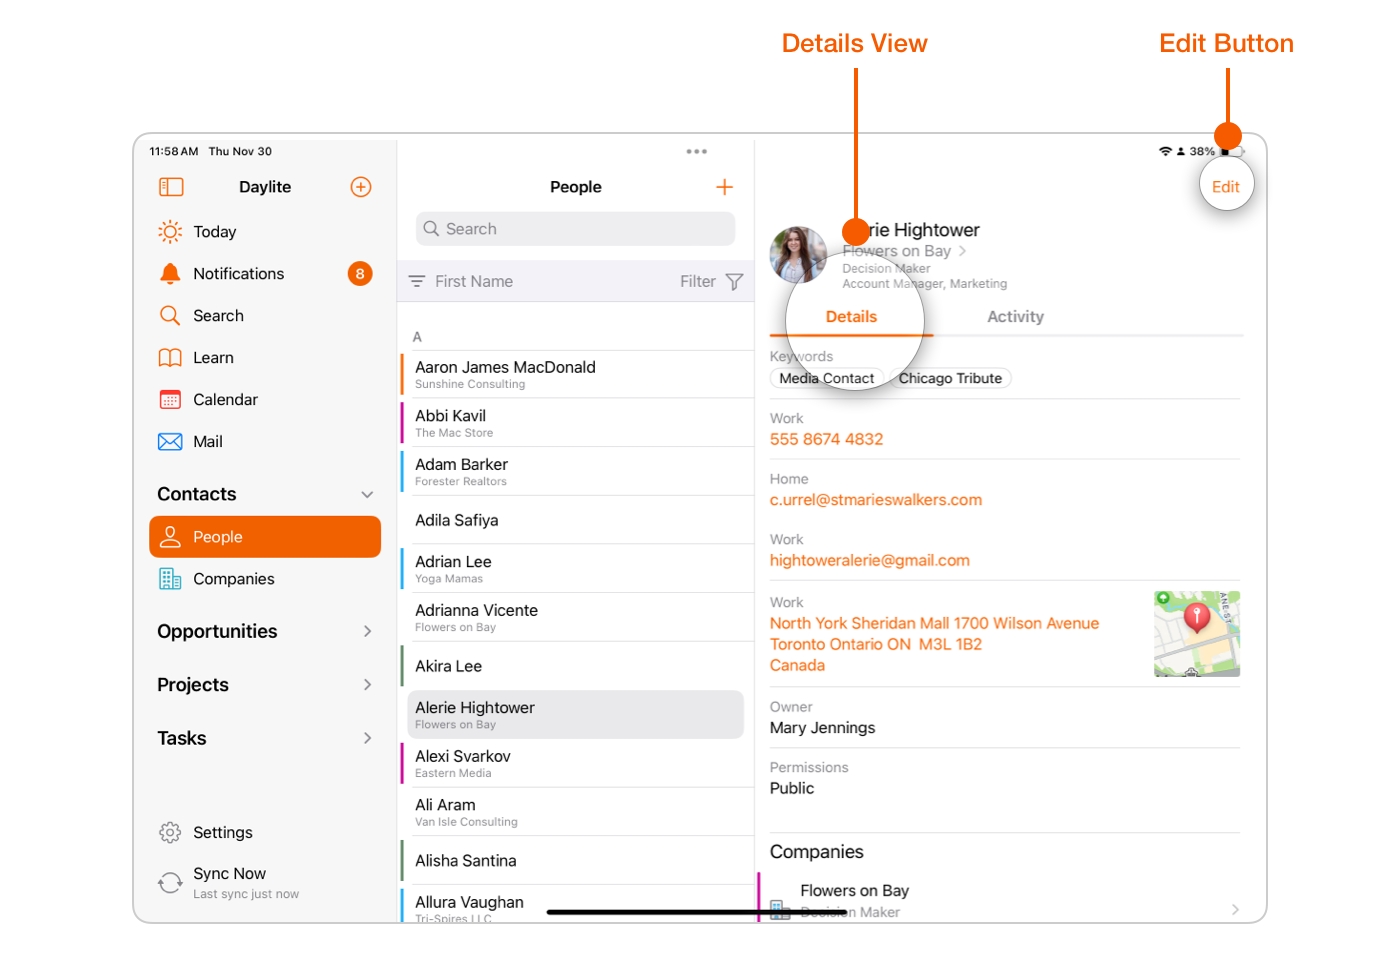
The Details View
The Details View shows information about your Contact, which may include things like Category and Keywords. These are useful when you want to search by phone number, address, the Project or Opportunity they are associated with, or who the account belongs to. These details can be altered to reflect your business needs by clicking the Edit button at the top of the Details View.
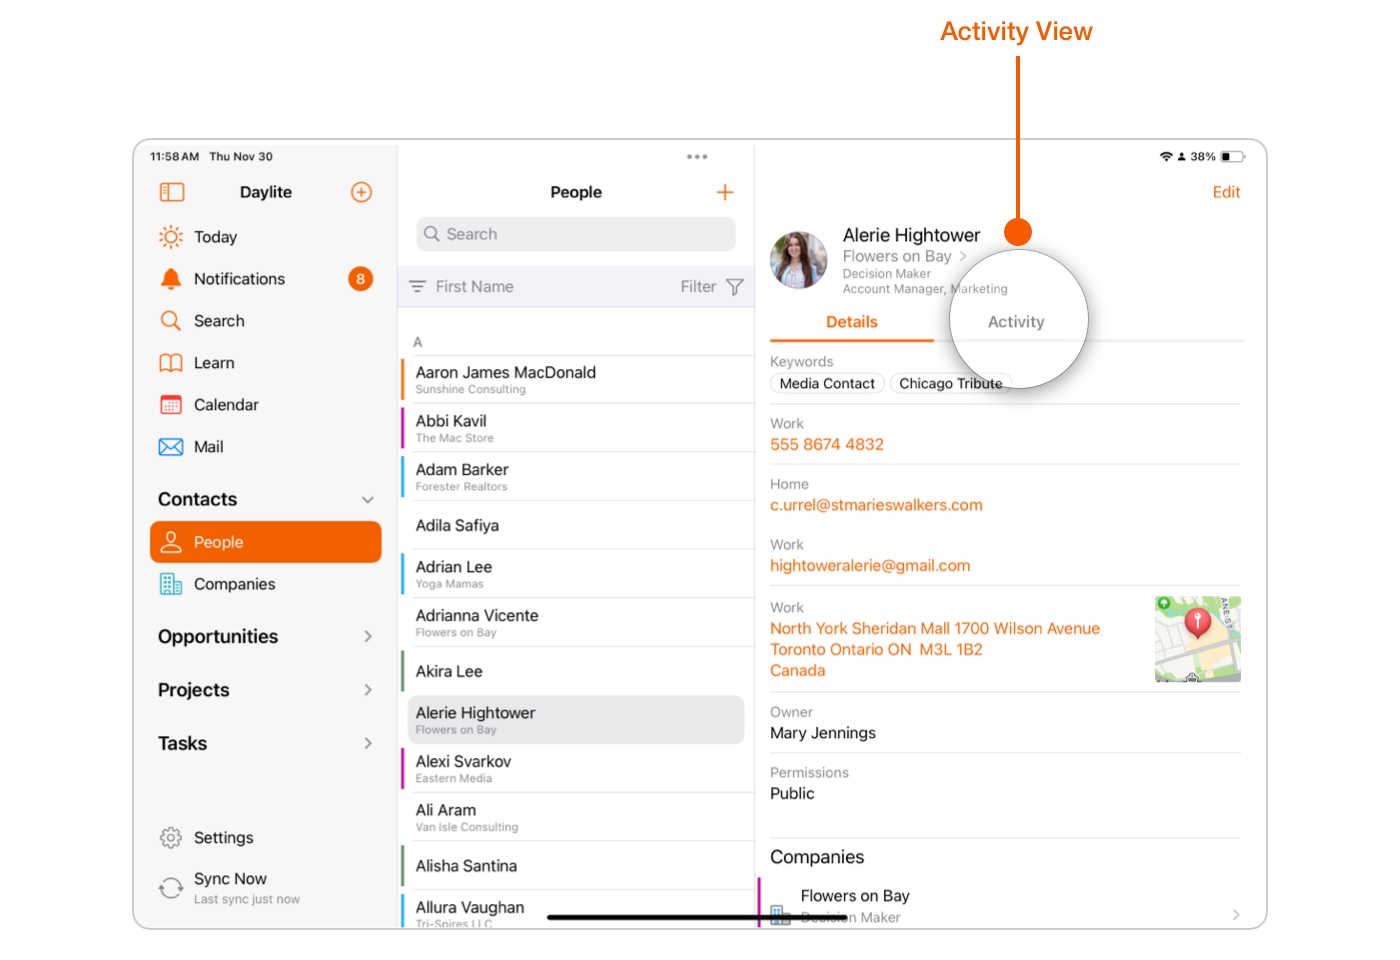
The Activity View
The Activity View shows every interaction you have had with the Contact to date. These activities could include email correspondences, follow-ups, reminders to send proposals, meeting notes and calendar appointments. The Activity View lists all these interactions chronologically by time, day and year.
By clicking on the New Object Button, you can create new Contacts, Projects, Tasks etc. You can edit this information at any time, adding to each entry as you need to.
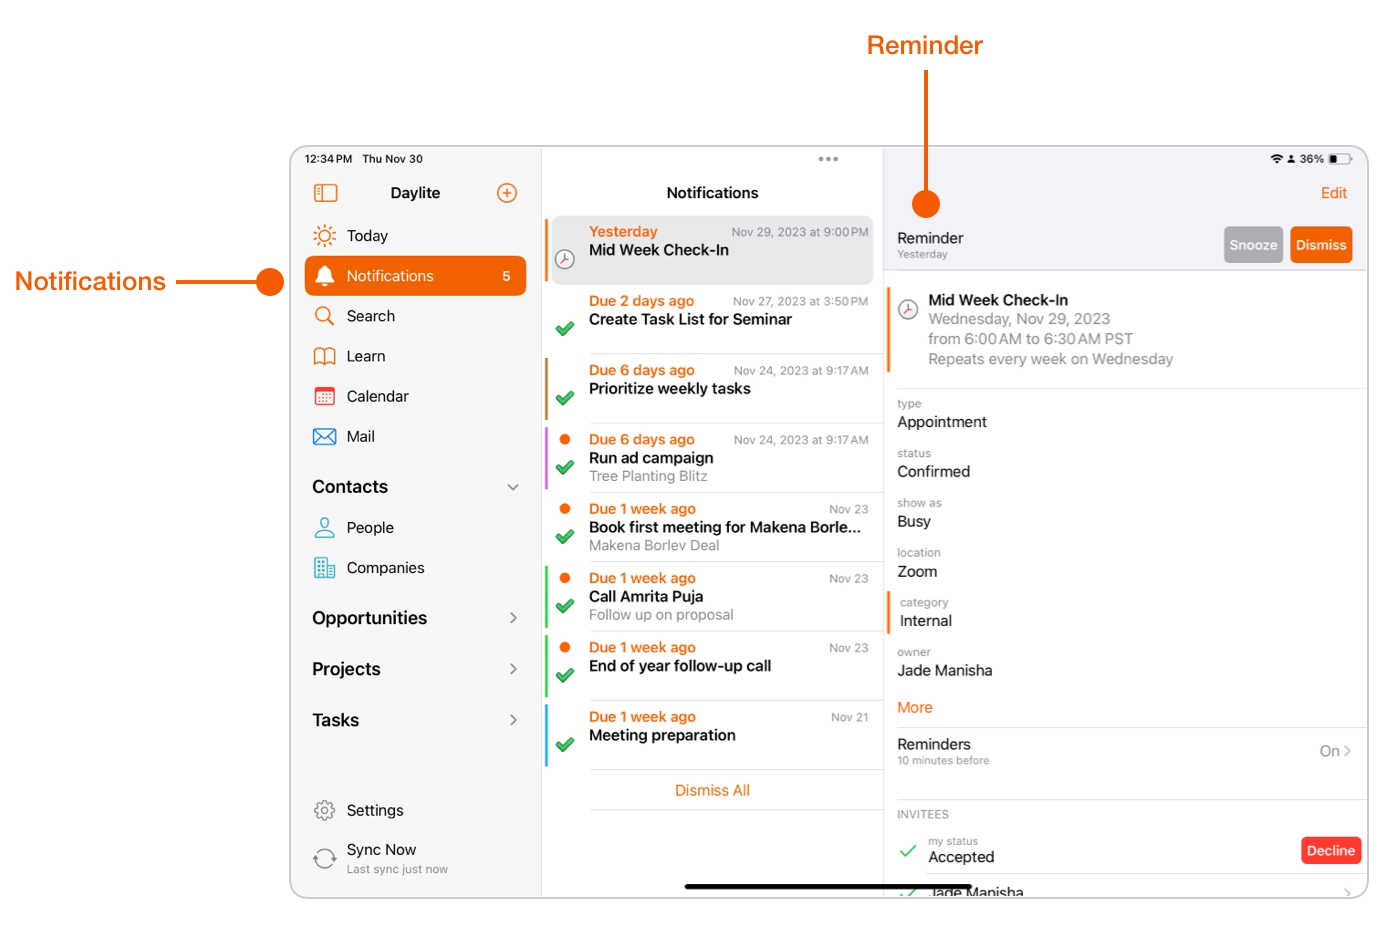
Notifications and alerts are shown in the Sidebar. If you set a reminder for the Task in the Contact's Details it will alert you at the appointed time.
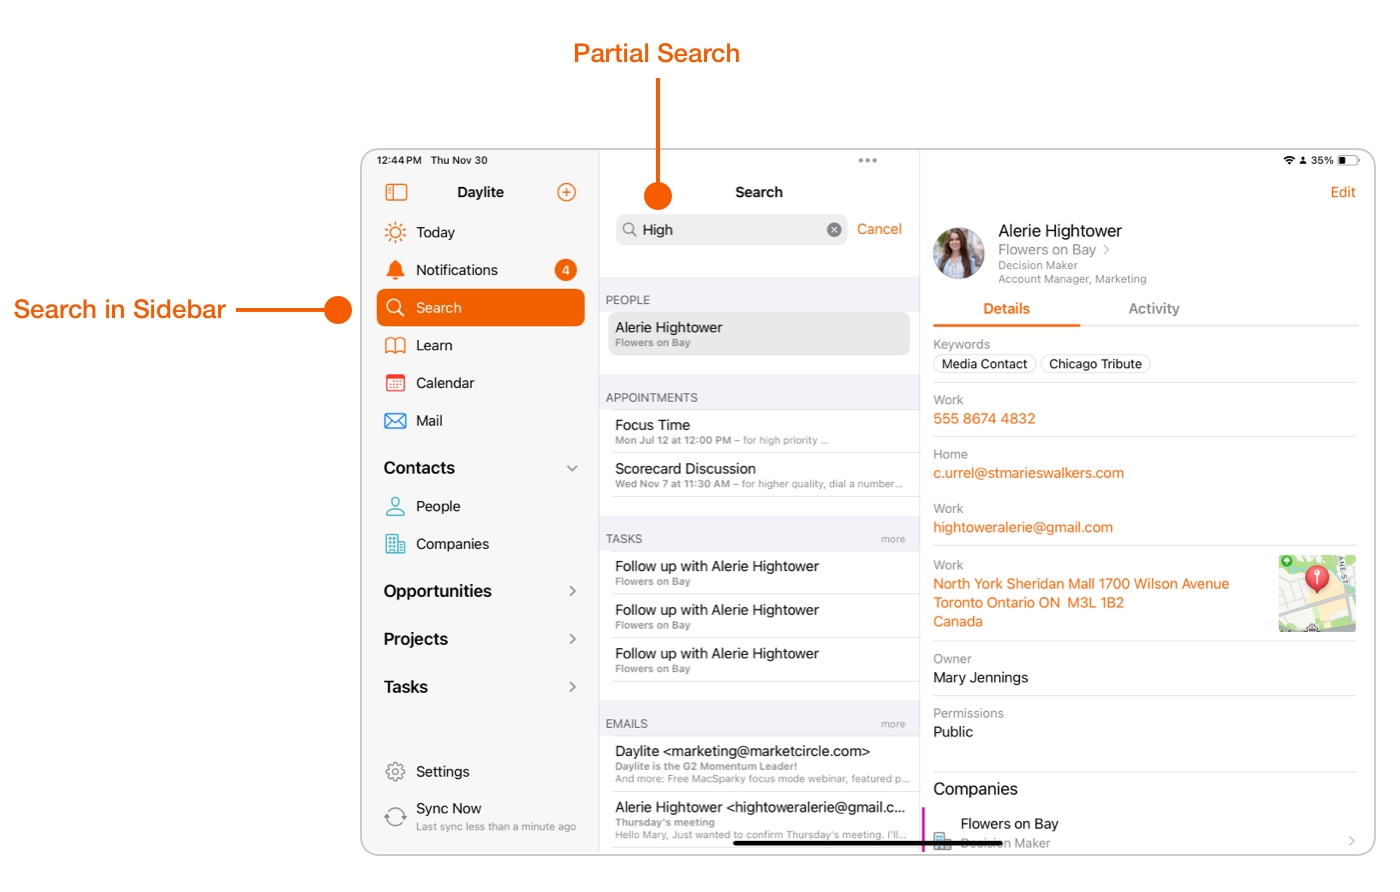
Search, Sort and Filters
Search is located in the Sidebar, and is designed to look through all of Daylite for any mention of what you type. This means even if you do a partial search, Daylite will display Contacts, emails, Tasks, Appointments and more with that information.
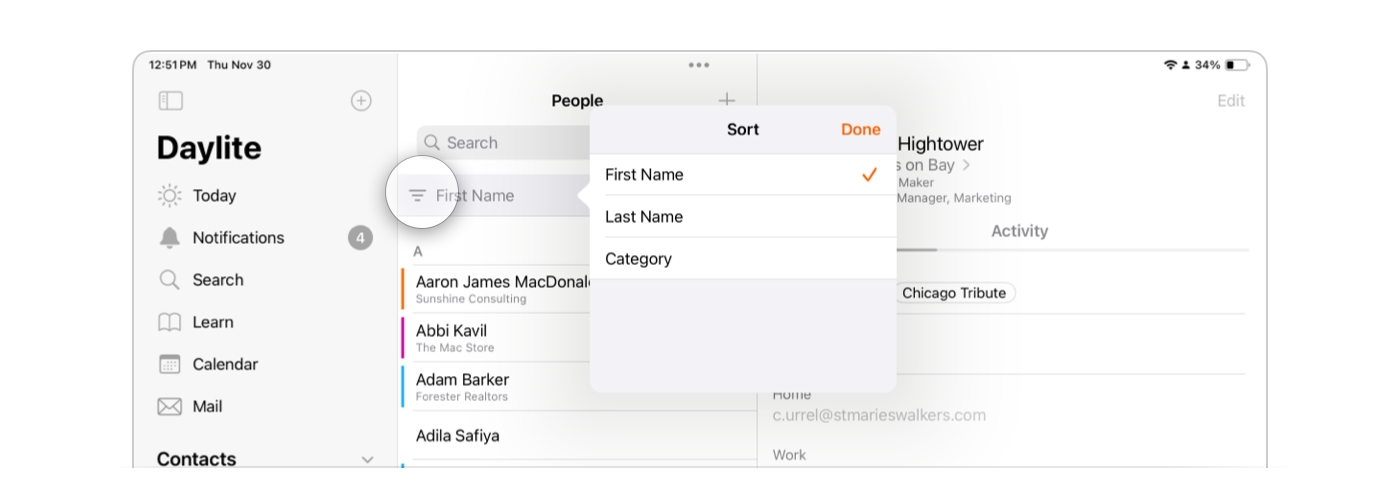
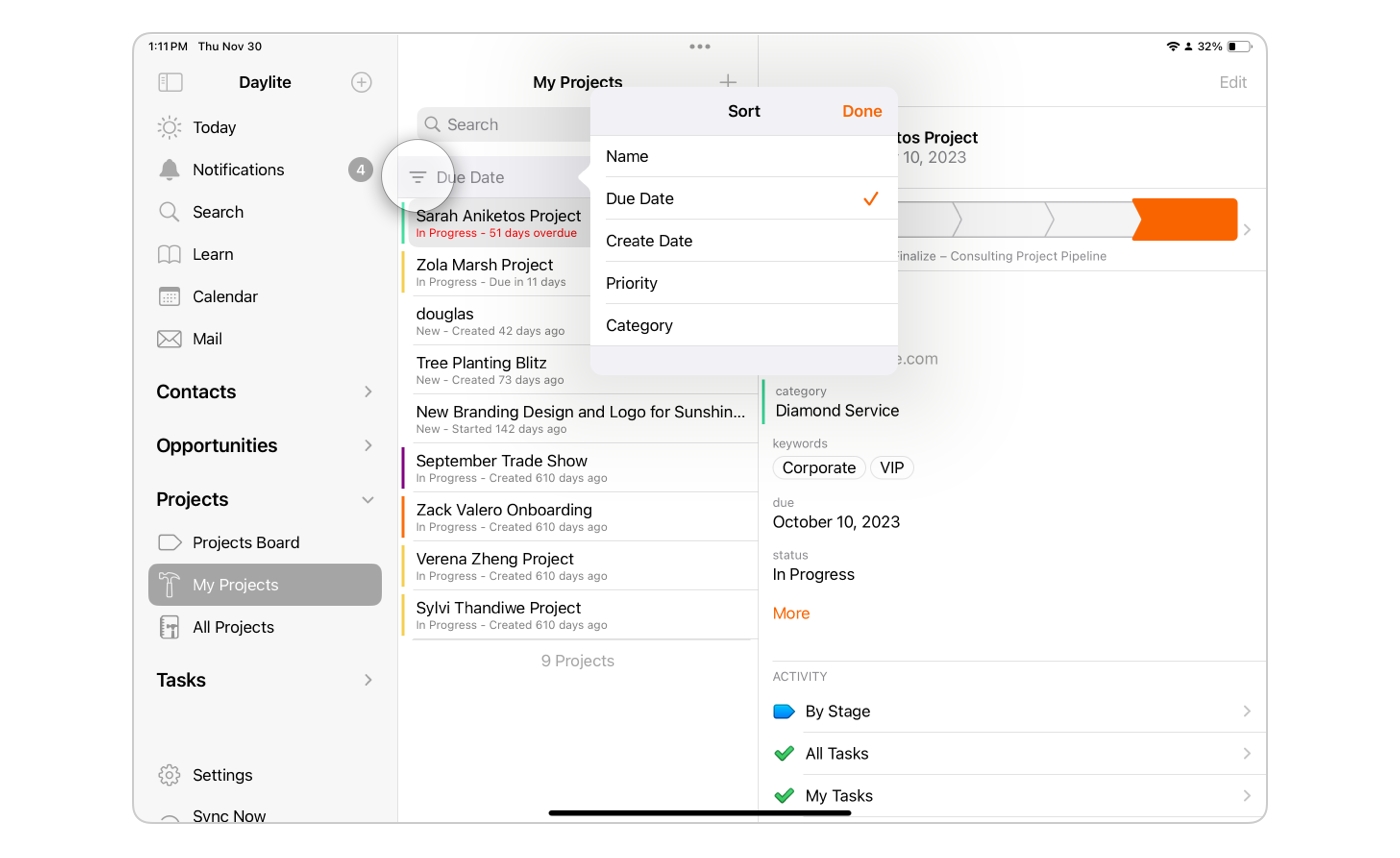
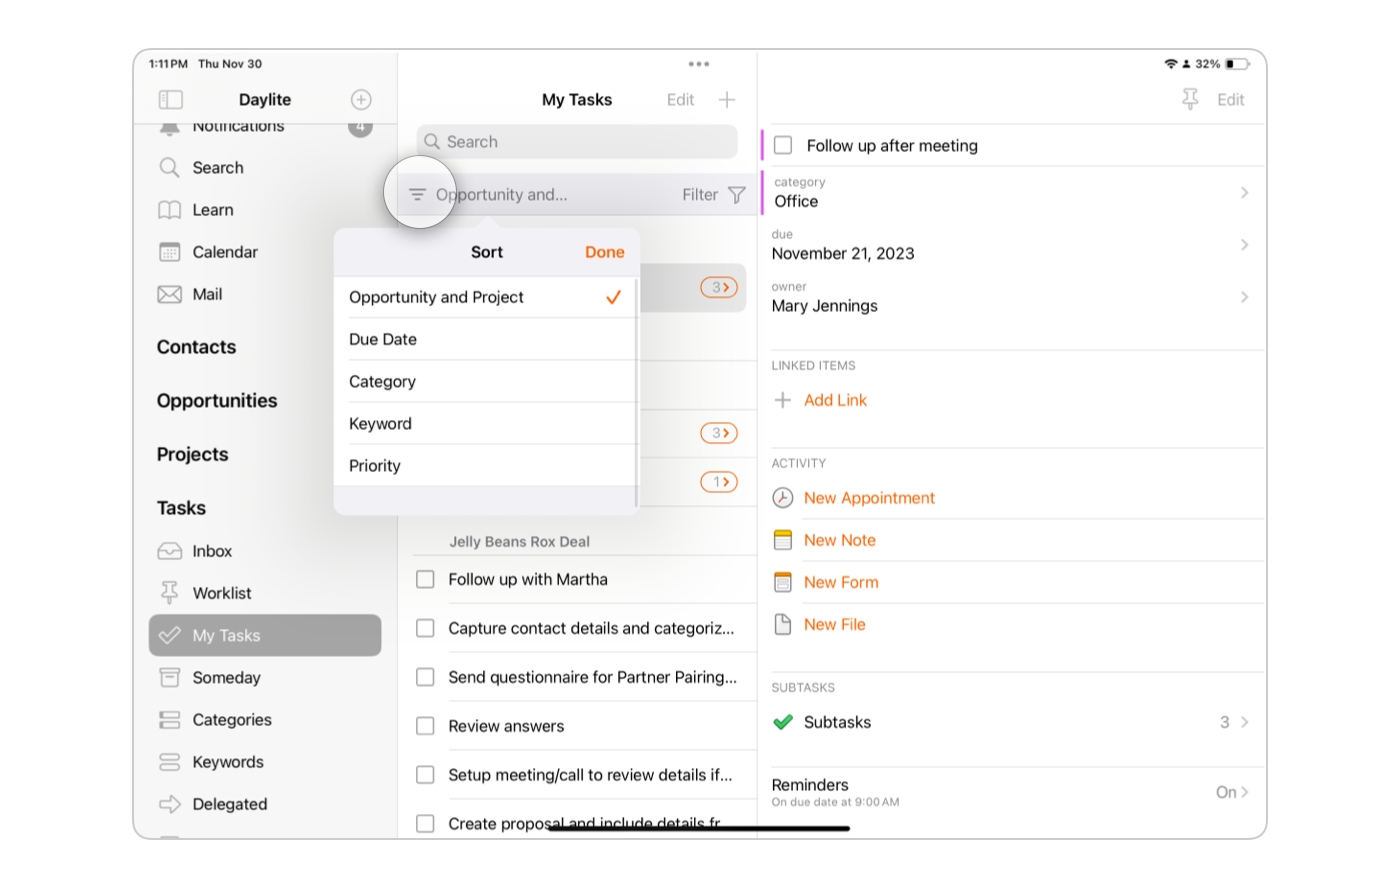
You can use Sort to display information the way you find most convenient. This feature changes depending on what Item you are looking at:
People:
First Name
Last Name
Category
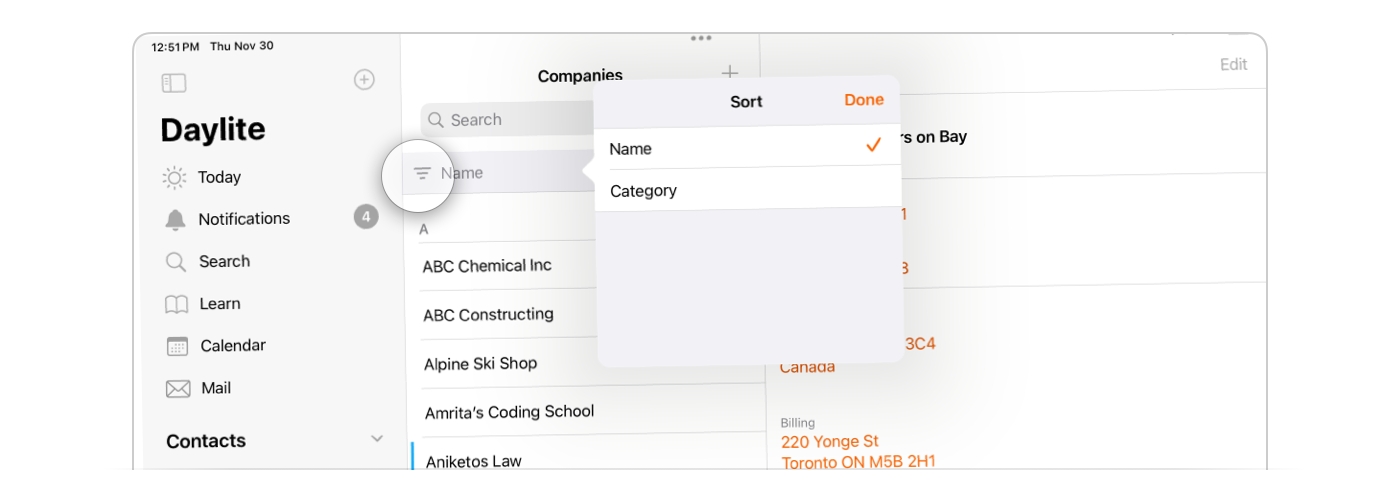
Companies:
Name
Category
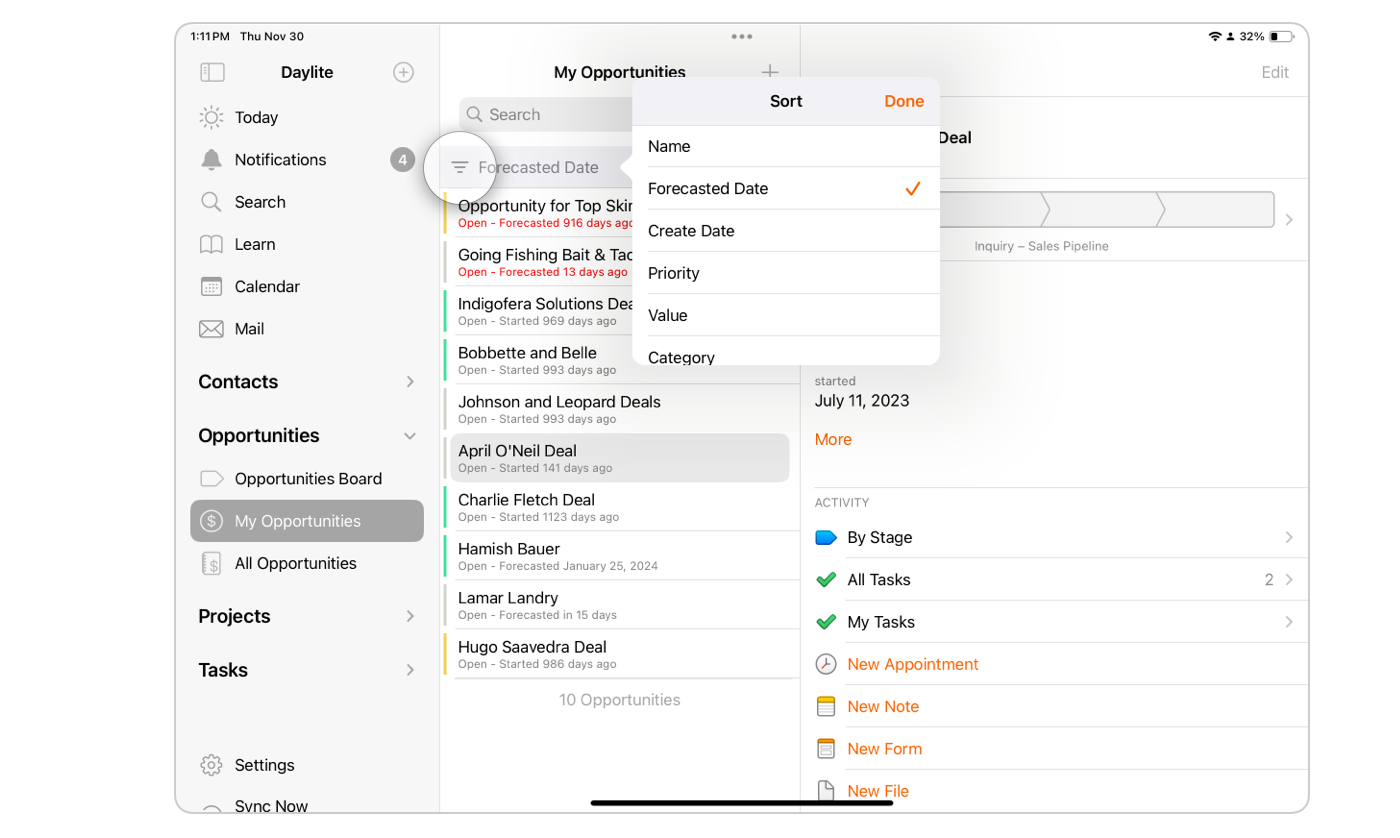
Opportunities:
Name
Forecasted Date
Create Date
Priority
Value
Category
Projects:
Name
Due Date
Create Date
Priority
Category
Tasks:
Opportunity and Project
Due Date
Category
Keyword
Priority
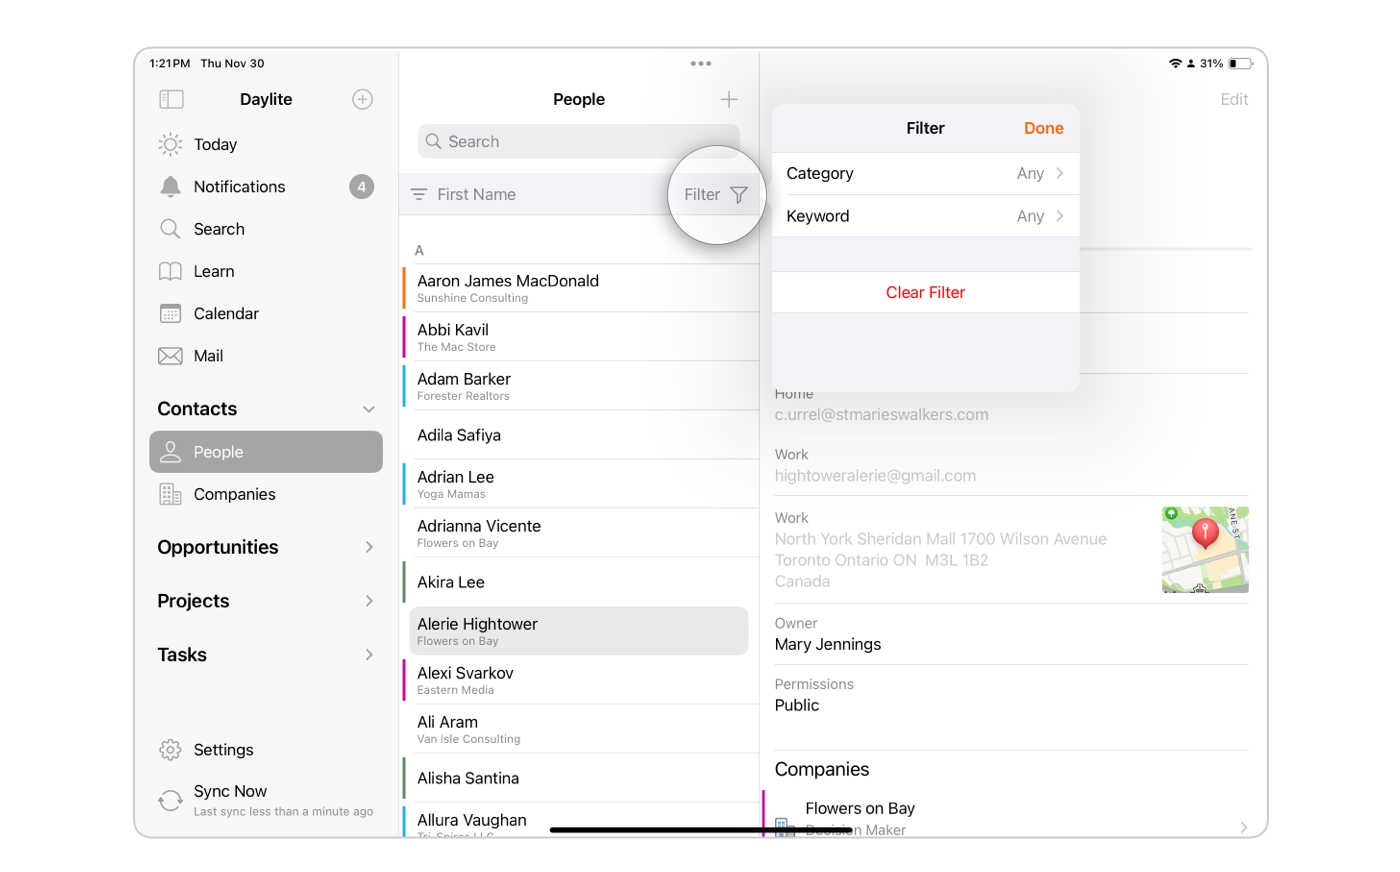
Selecting the Filter button presents you with options to filter your search based on Category and Keywords. These filters help narrow your search, as you can set multiple Categories and Keywords when filtering.
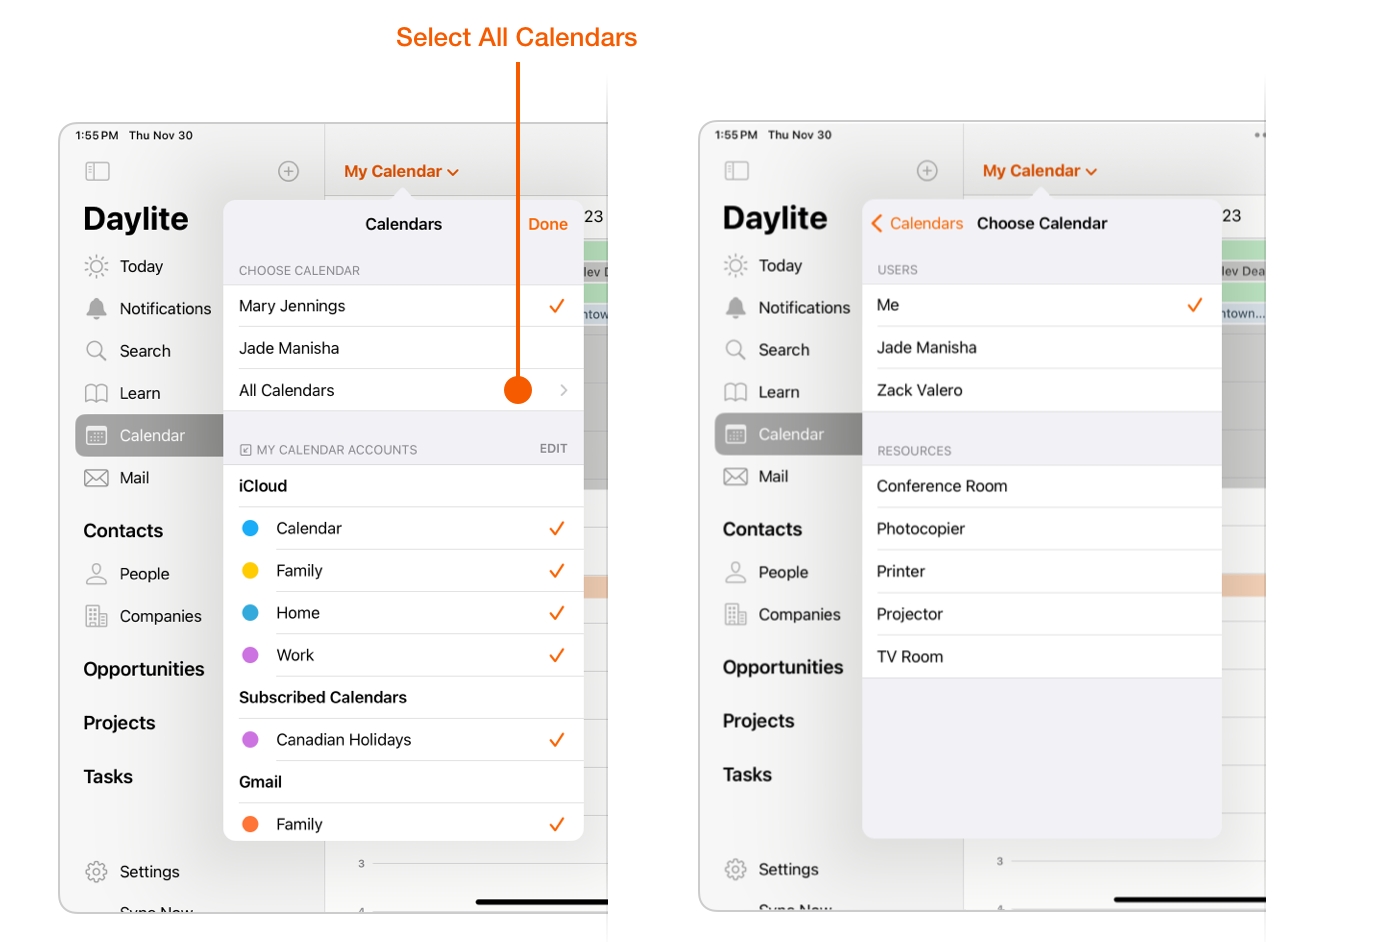
Calendars
Select Calendars in the Sidebar and you will find two versions.
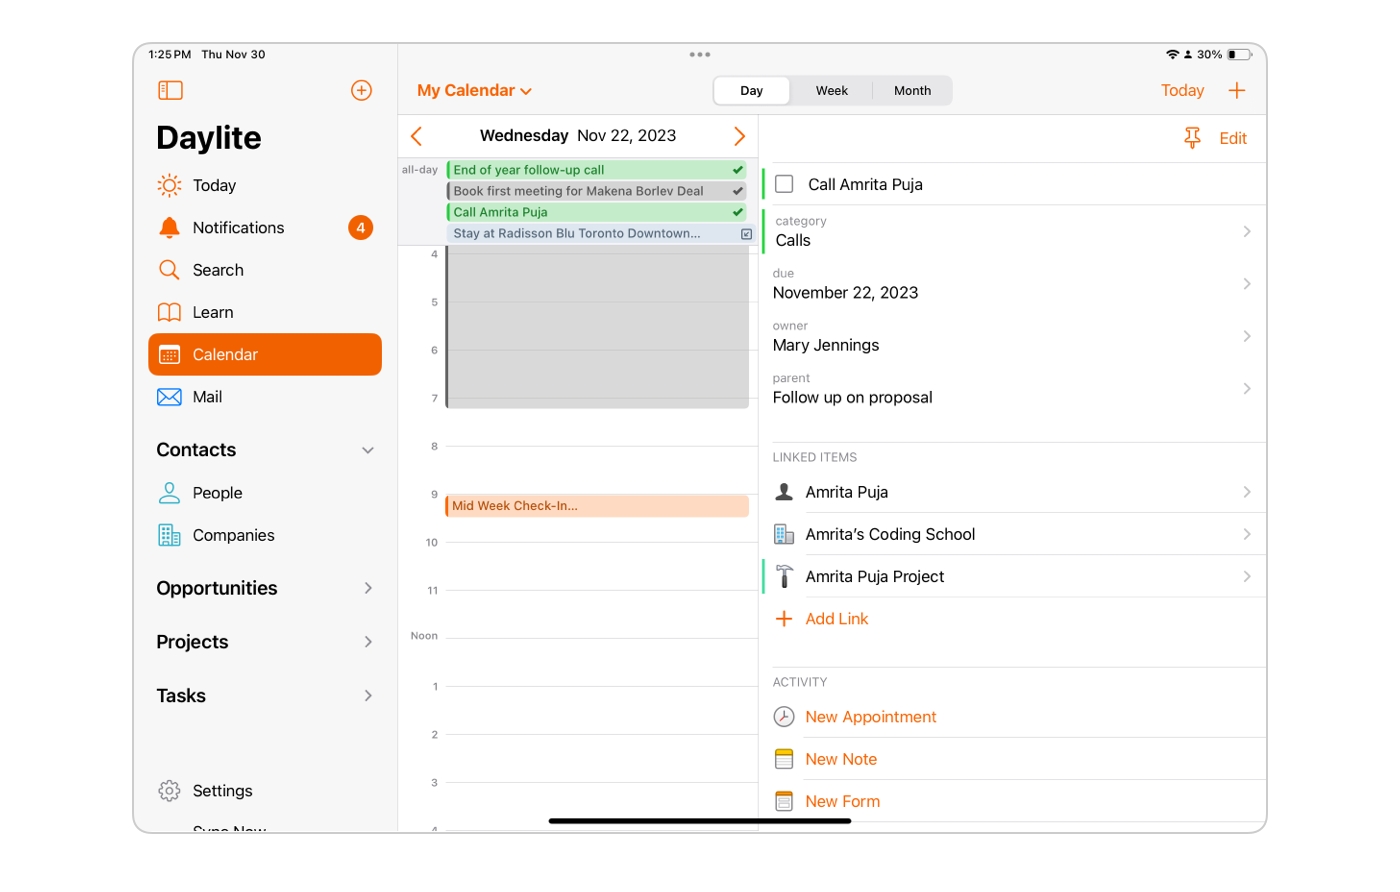
The first is your own, called My Calendar. From here you can view your daily, weekly and monthly Calendar events.
The second is called All Calendars. This is the team calendar, which lets you view, create, and edit calendars between your team. Note that the user name changes based on the Calendar selected.
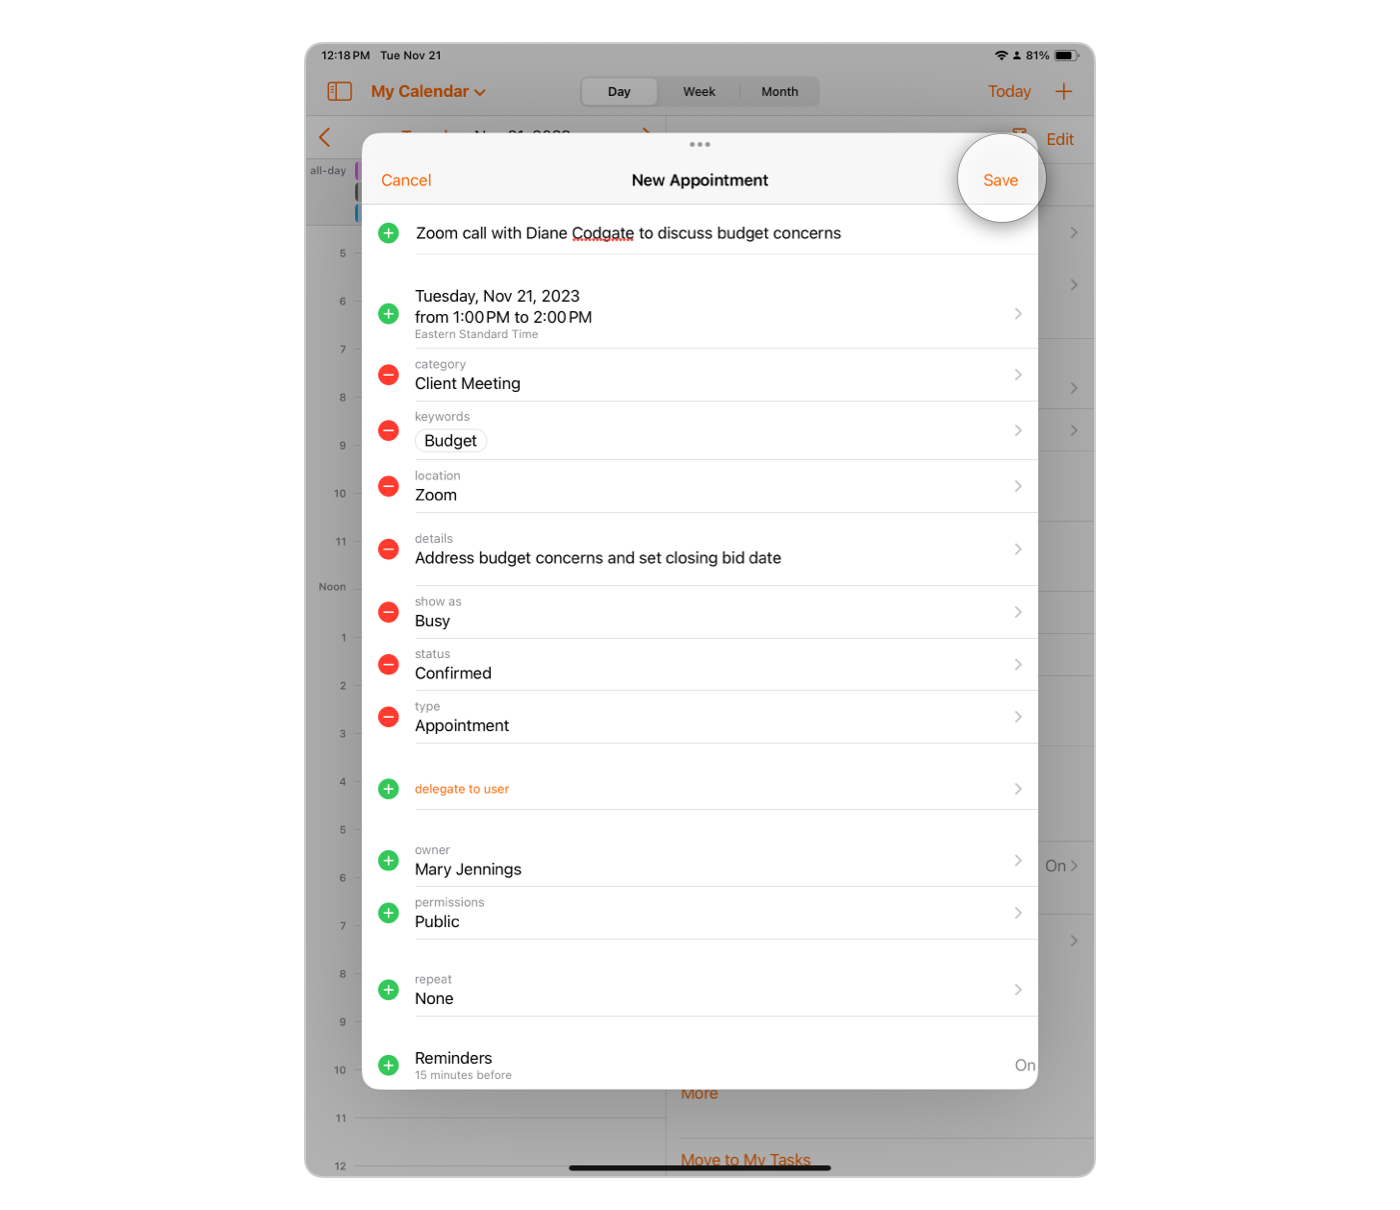
You can create a New Appointment by tapping the New Object Button on the right hand side of Daylite when you are viewing your Calendar.
Be sure to add as much information as you can, such as Title, Category and Keywords. You can also add Details, a Start and End Time, and link the appointment to an Activity such as a Task or Agenda. Tap Save when you are done.
Contacts
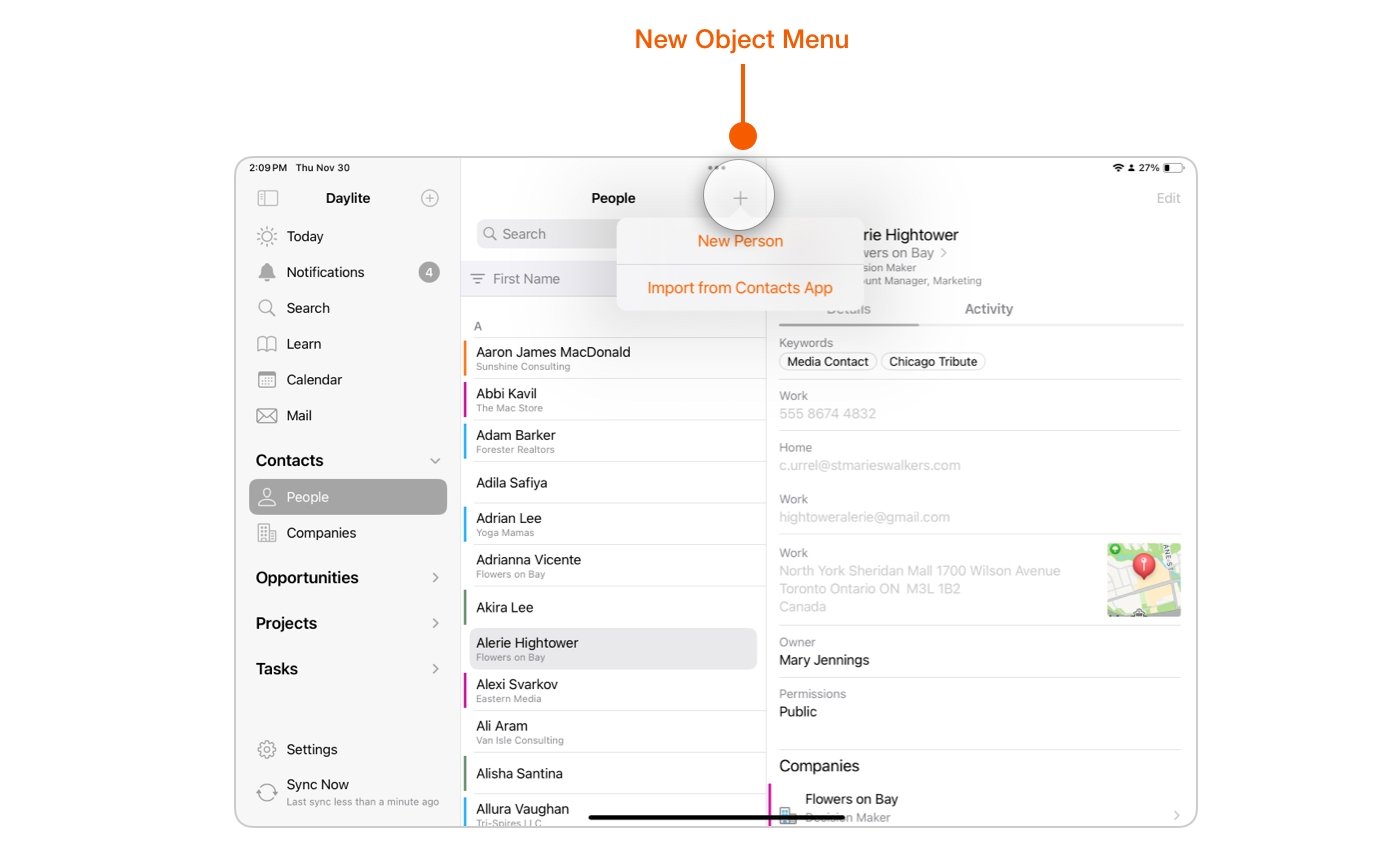
Your Contacts are located on the Sidebar, and they are organized into People and Companies.
When you select either of these two Items, the New Object menu now says either New Person or New Company, depending on which one you have selected.
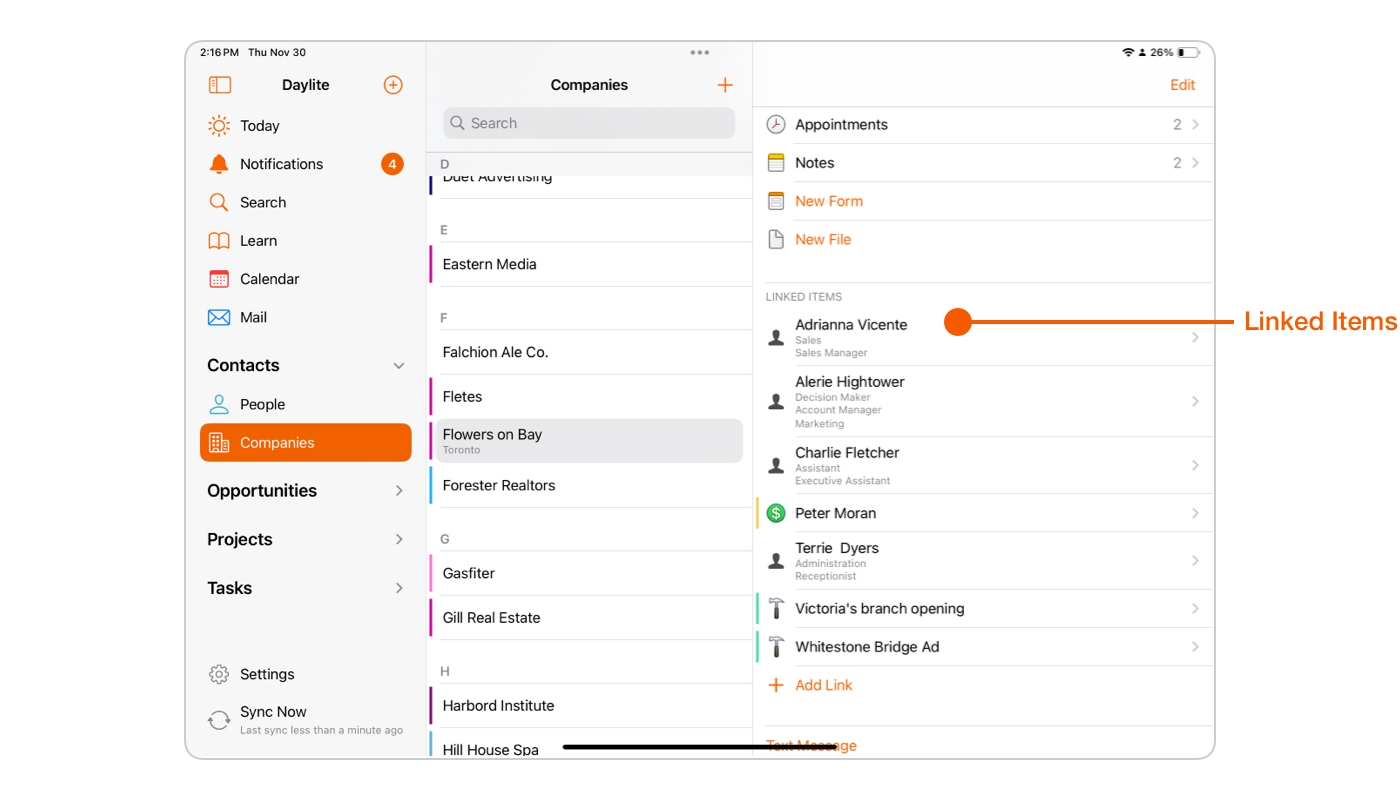
Linking
You can link People to a New Company, or add them to an existing Company by selecting + Add Link from the LINKED ITEMS section of the Contact record.
You can also link People or Companies to a People record in the same manner.
Add Roles and Job Titles to that Person, link any emails or correspondence you have had, and fill in any details you like, all of which are searchable.
Opportunities
All of your Opportunities can be found in the Sidebar. They are divided into three different sections.
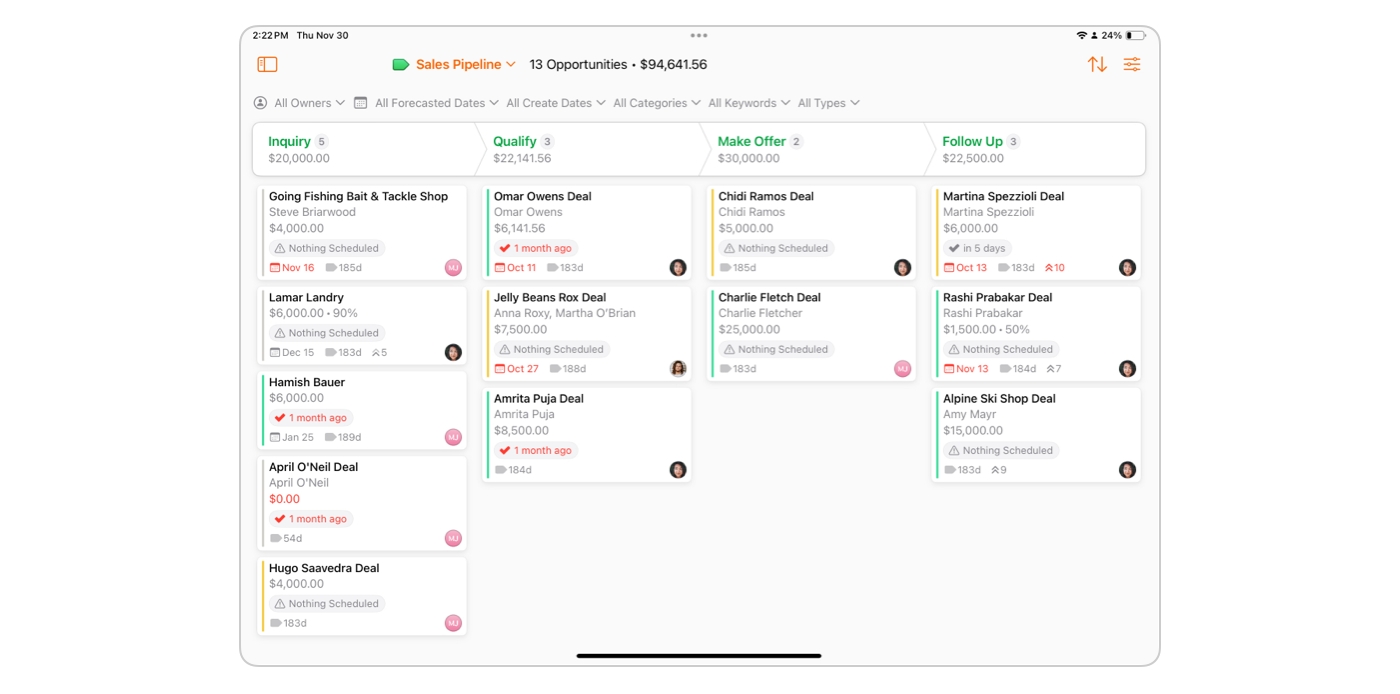
The Opportunities Board: This is a truly unique feature of Daylite. It offers a customizable view of each of your Opportunities and where they are at every Stage of your Pipeline. You will know exactly what needs to happen before moving to the next Stage, so you can accomplish your goals.
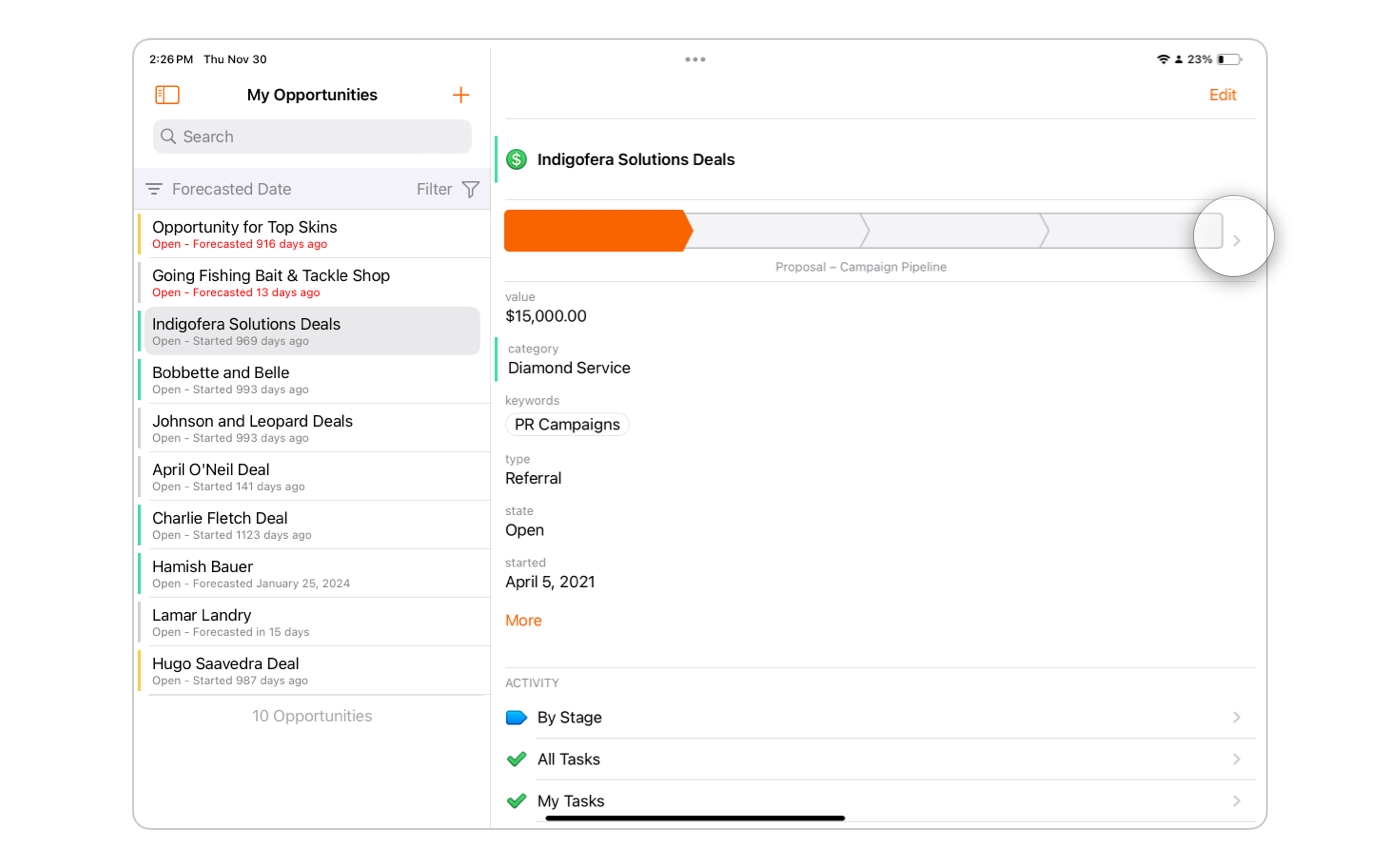
My Opportunities: displays every Opportunity you are currently working on.
Selecting an Opportunity allows you can see which Stage it is in, and if you tap the > on the right side of the Deal, you can edit the Pipeline and the Stage that the Opportunity is currently in.
By tapping the Edit button you can add valuable details to the Contact record.
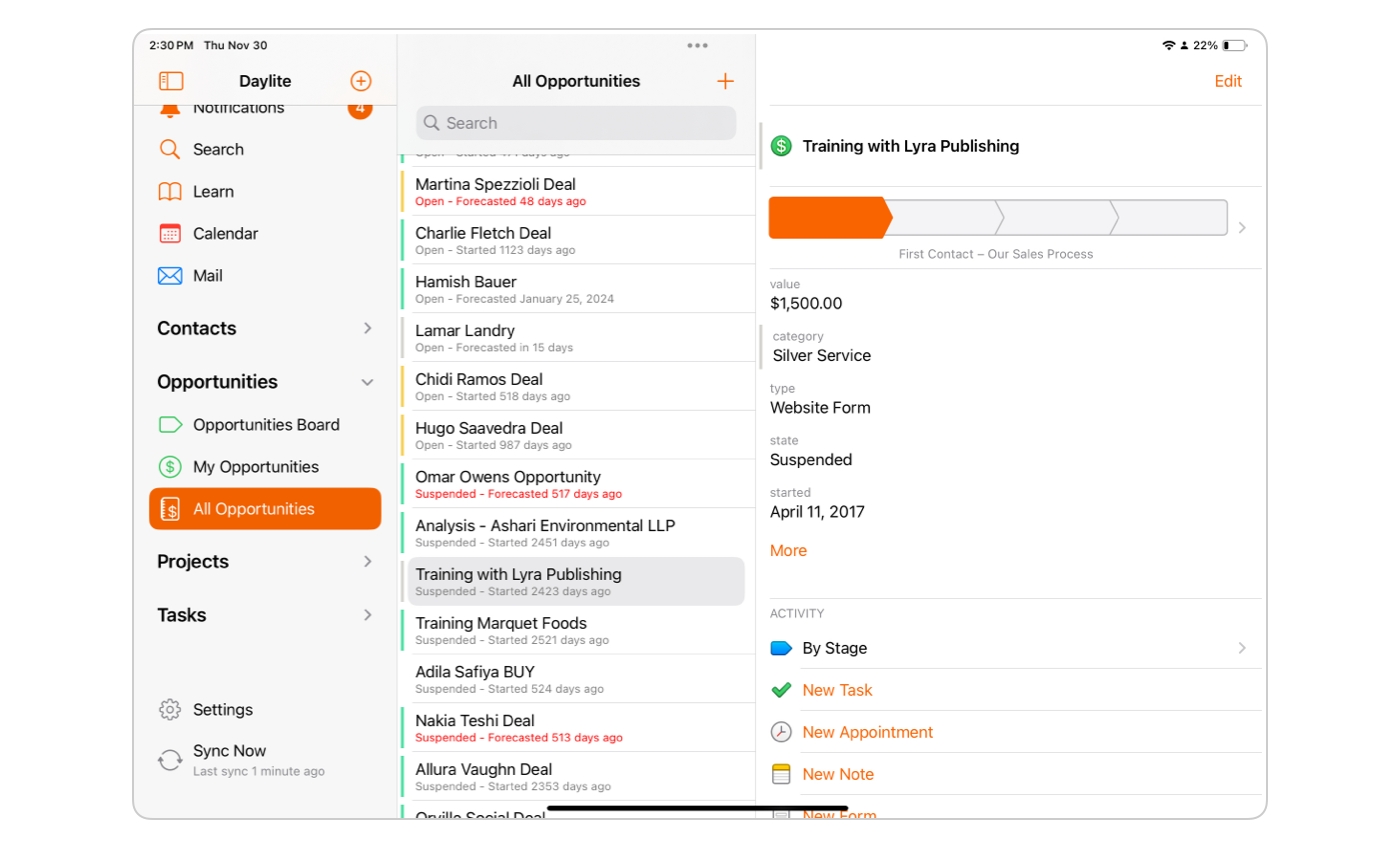
All Opportunities: allows you to see all your Opportunites, whether they are Won, Lost or Suspended. This is a great way to review, update, and pursue Opportunities that may have fallen by the wayside.
Projects
Daylite places all your Projects in one convenient location, with three different ways to view that information.
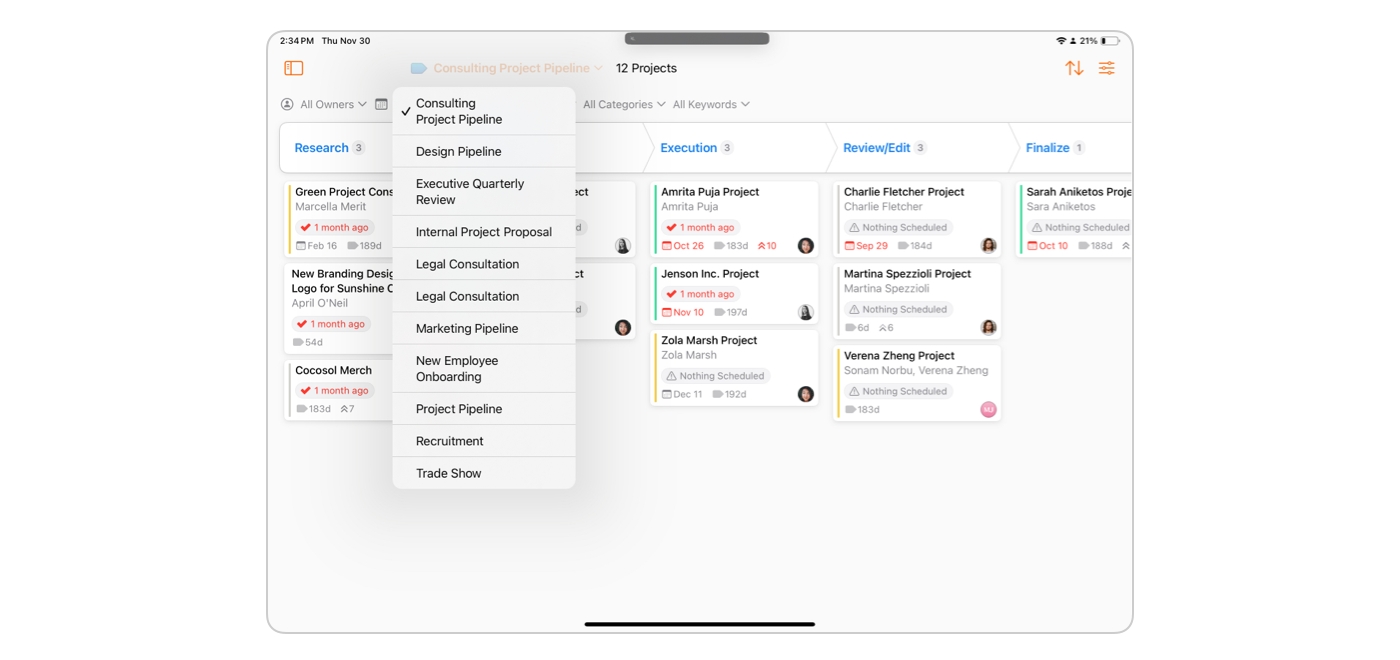
The Project Board creates a "top down" approach, where you can choose your Pipeline, and view where each one of your Projects are, and at which Stage they are sitting. You can tell at at glance if any of your Projects have been sitting for too long, and what needs to happen before they move to the next Stage.
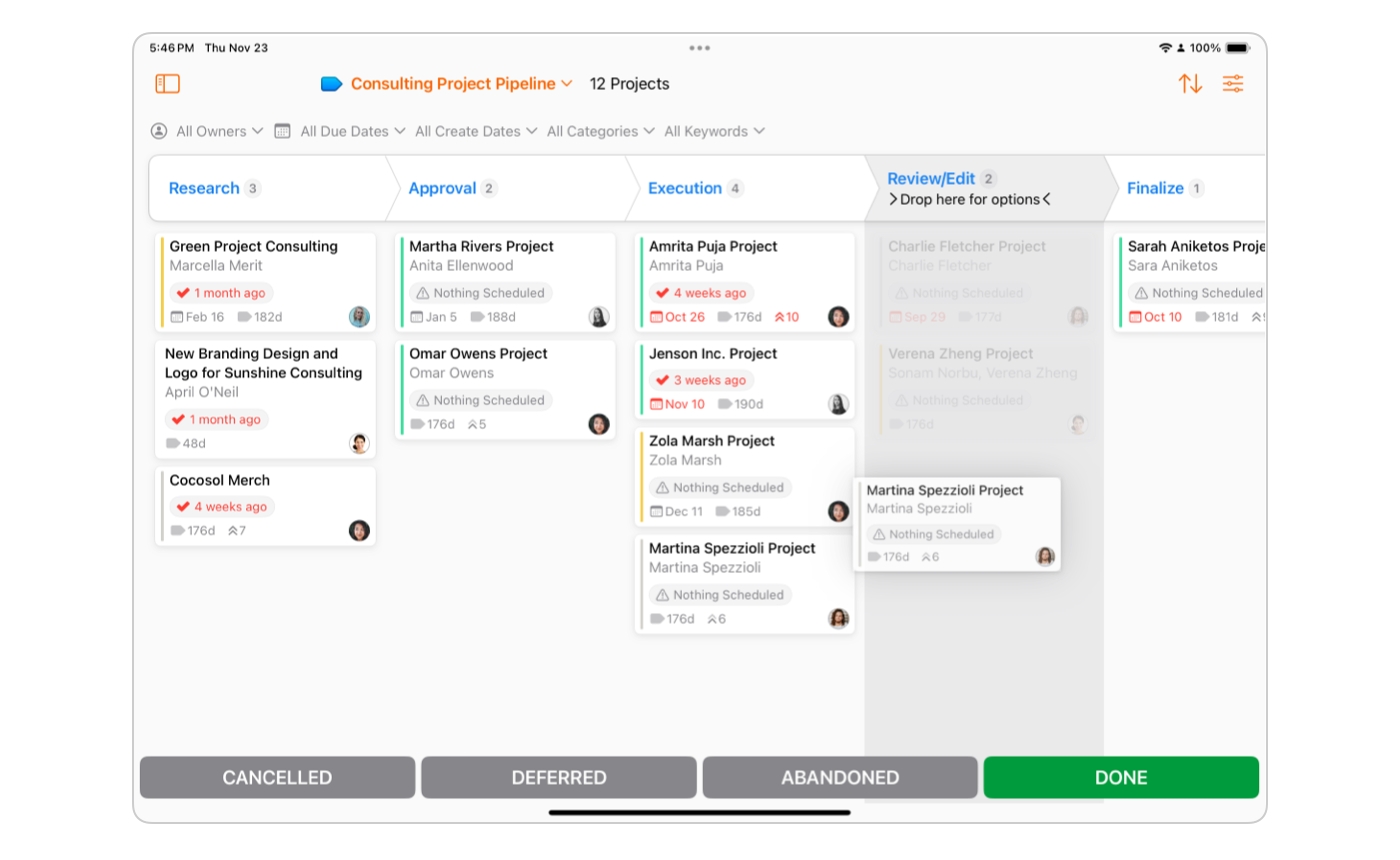
As a Project moves through each Stage you can simply drag the Project card, and drop it under the next Stage. When you select a Project and begin to move it, you will see four buttons appear at the bottom of the app. They are Cancelled, Deferred, Abandoned and Done.
My Projects shows you all Projects in list format, with your name attatched as the user. This can be either a Project you have created or one that has been delagated to you. You can see what Stage your Project is at, it's Category and Status. It let's you create New Tasks, Appointments, Notes, Forms and Files, and finally, it shows you any linked Items attached to the Project. All of these items can be edited by tapping the Edit button.
All Projects may look identical, but it shows you every Project you have worked on, in list format, regardless of it's Status. This could be useful if you need to find an abandoned Project from a year ago that may need to be revisited.
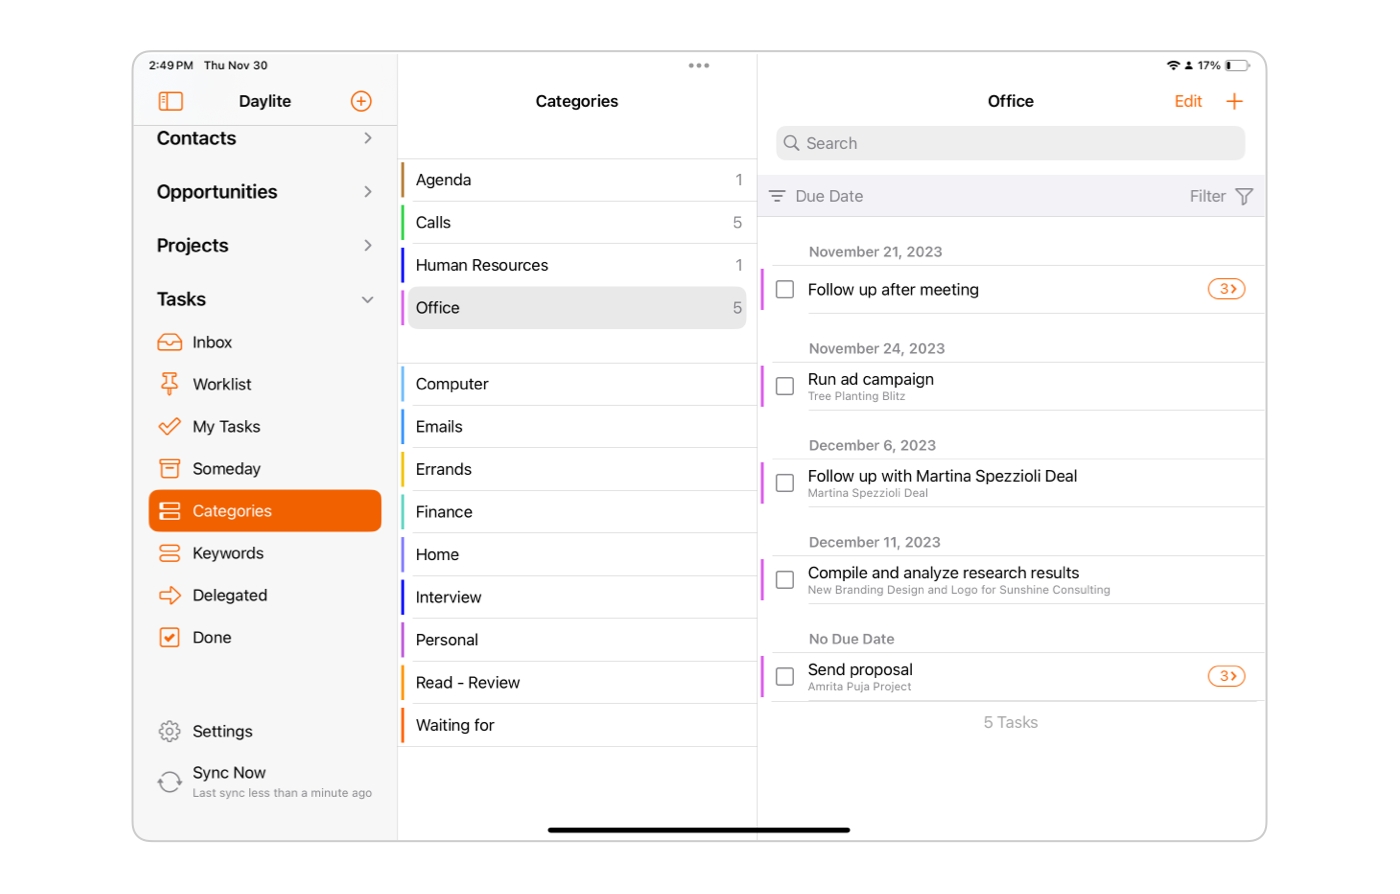
Tasks
The Tasks section is grouped into Inbox, Worklist, My Tasks, Delegated, Someday, Categories, Keywords, Delagated and Done.
The Tasks Inbox gets Tasks off of your mind quickly by adding them to your Inbox until you have time to categorize them later.
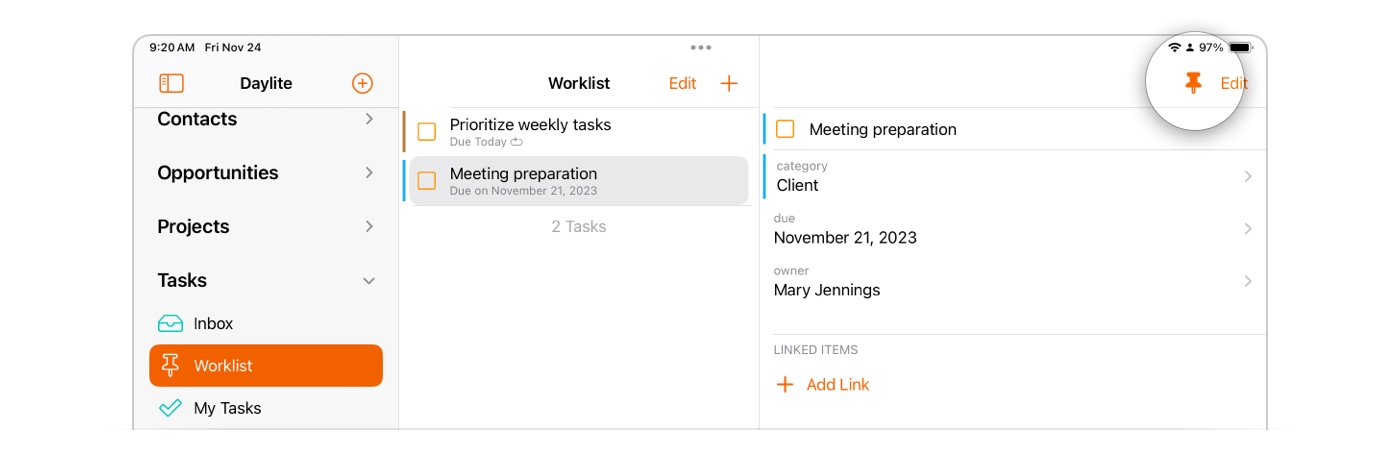
The Worklist is designed to help you focus on what needs to be done right away. It helps to think of it as your "priority" list. You can add a Task to the Worklist by checking the Pin in your Tasks Inbox or My Tasks Details pane. This Pin will show as filled in orange when you are viewing your Worklist, which indicates the Task has been moved successfully.
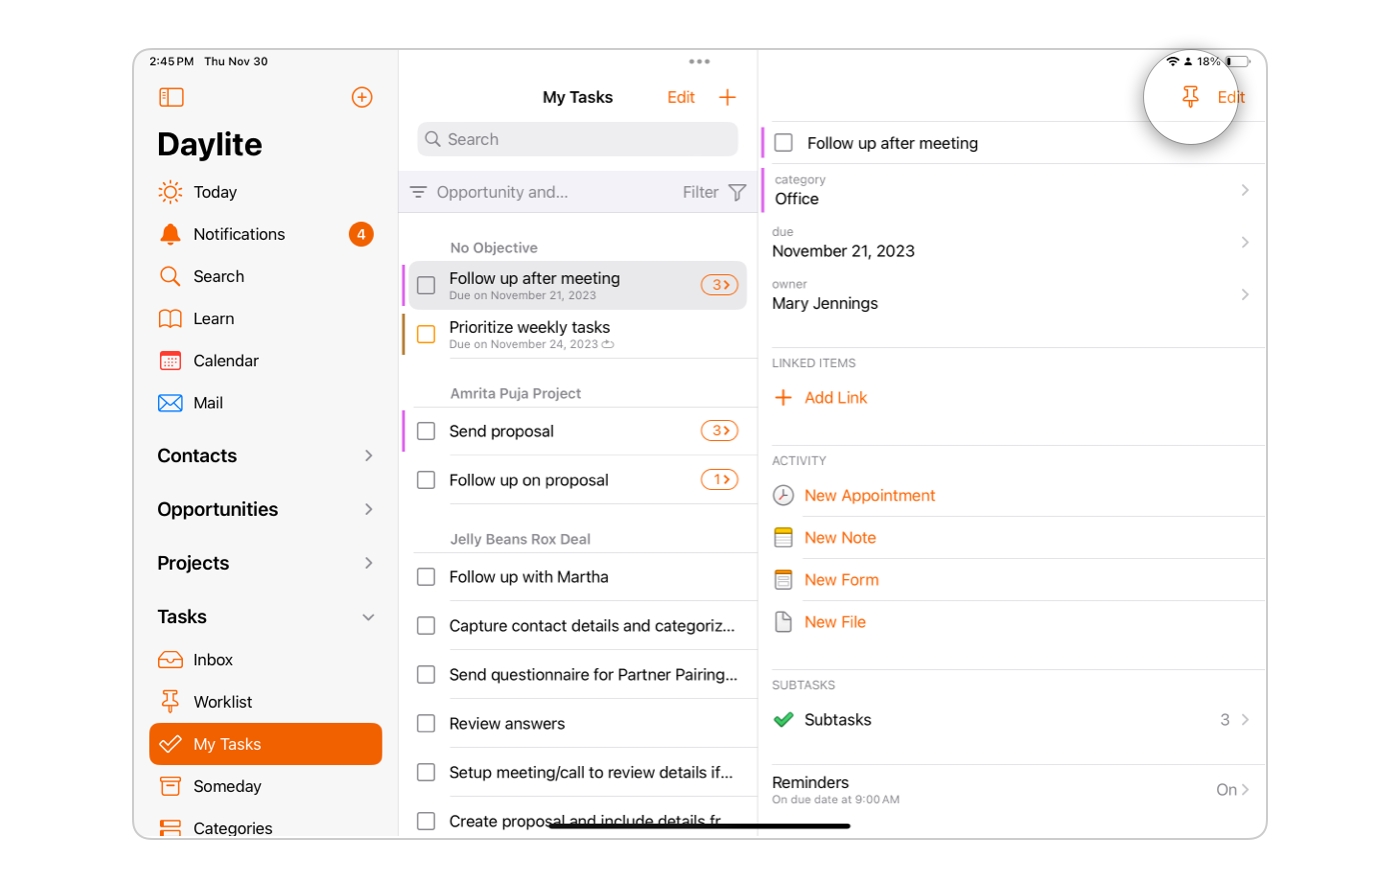
My Tasks will show you every Task that you have set for yourself, including those with Subtasks, which will be highlighted in orange next to the main Task in your list. Each of these Tasks are grouped under their respective Project.
If you have not assigned a due date to a Task then it wil be filed under Someday. If you update this Task with a due date, or pin it to the Worklist, the Task will be moved automatically to the appropriate folder.
When you are creating a Task, take the time to assign Categories and Keywords to it. Daylite will autiomatically filter your Tasks based on these criteria, including a description of both Task and Subtask if applicable.
Delegated Tasks have been assigned to a different user on your Team. These Tasks can be viewed here, giving you oversight on Task completion.
Once a Task has been marked as completed, it is moved to the Done folder.
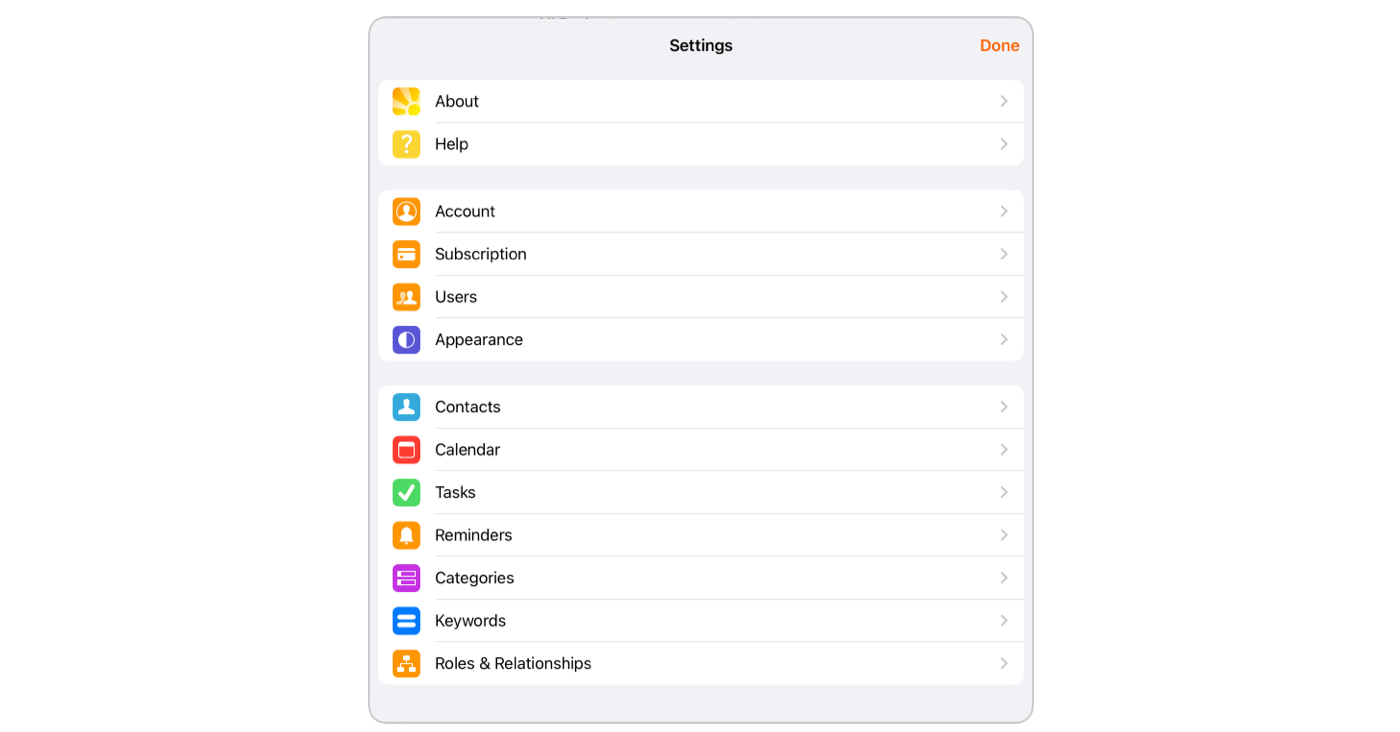
Settings
Setting up Daylite to look, feel and act the way that works best for you is crucial to your overall workflow. By customizing Daylite Settings you are setting yourself up for success.
Settings can be found in the near the bottom of the Sidebar.
Here are a few essentials to help you get the most out of your Daylite experience.
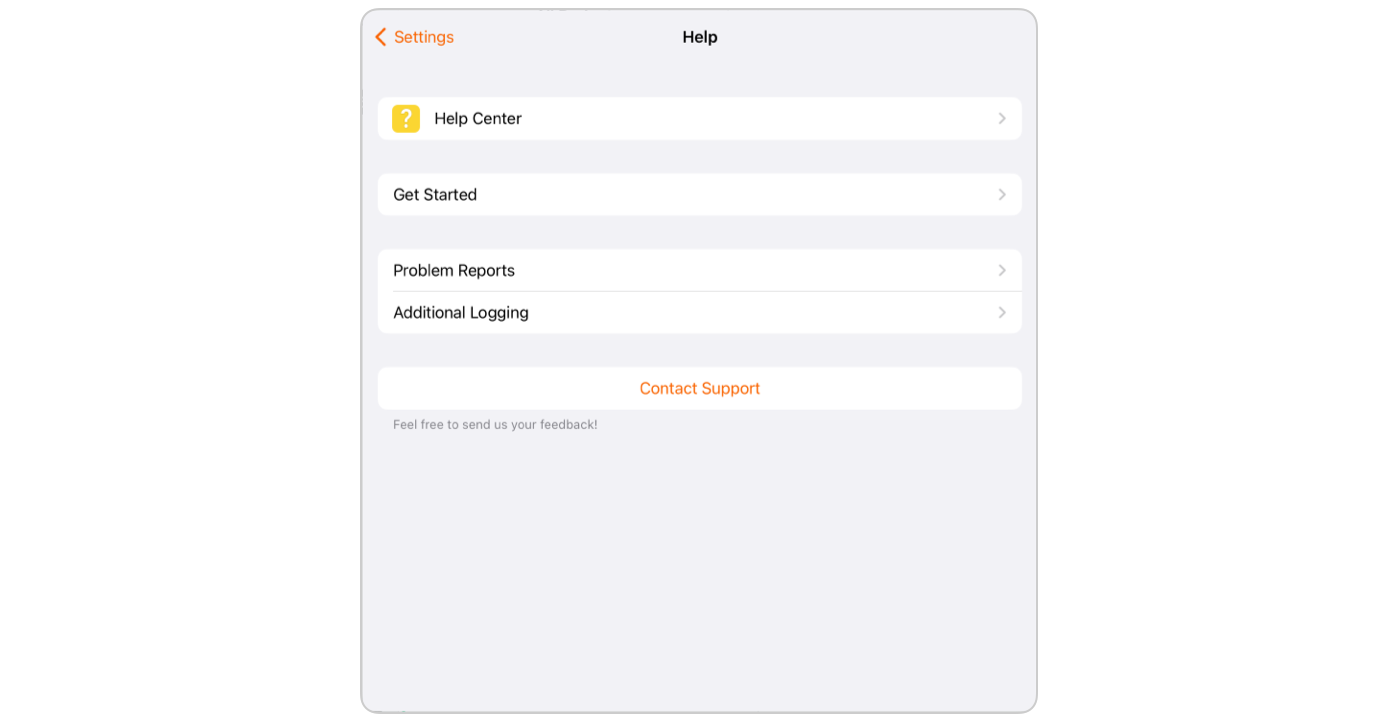
Setting > Help is arguably once of the most important things to know. After all, if you have a question, you need an answer. Between the Help Center and Getting Started, you are in good hands.
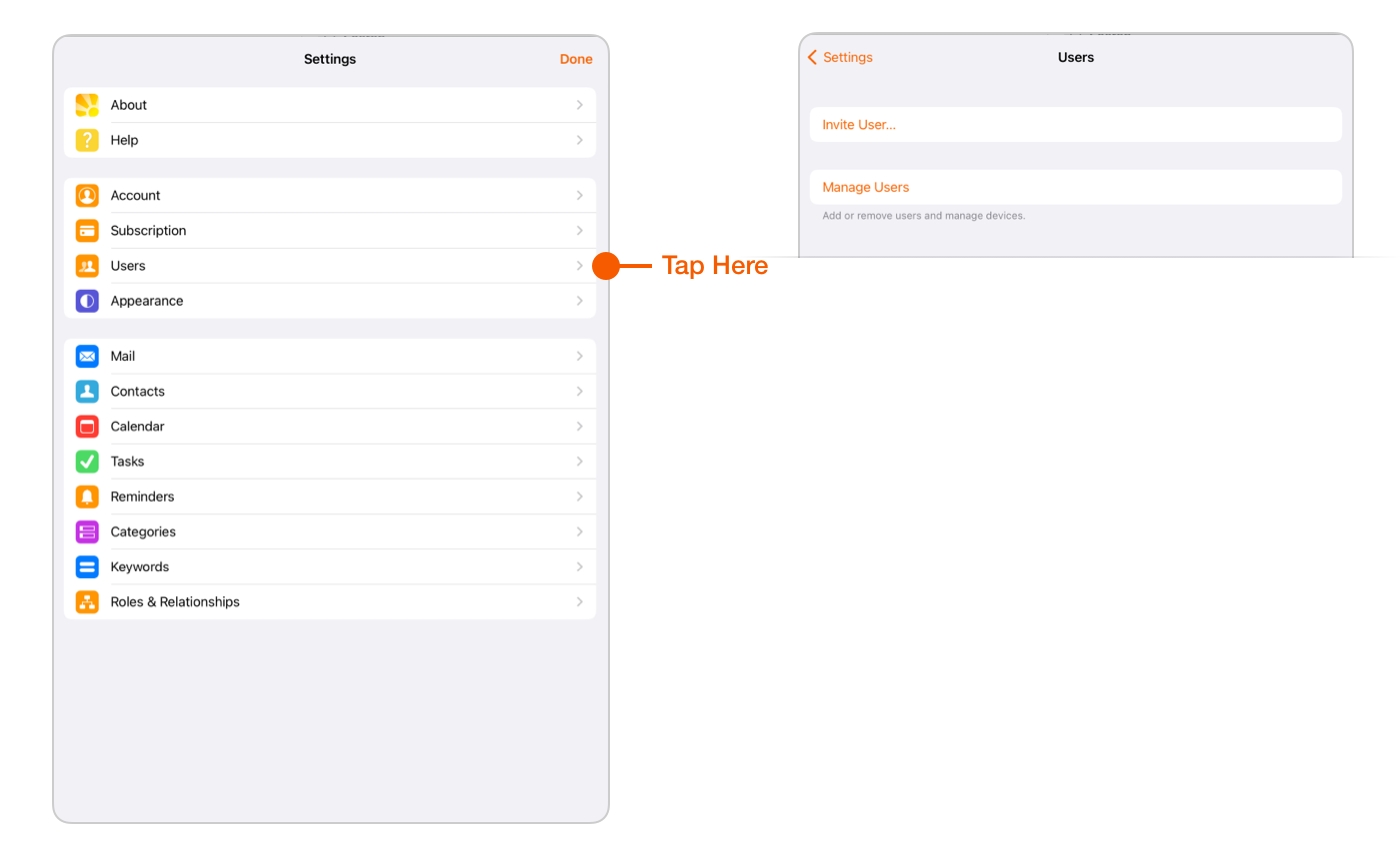
Managing your team has never been easier thanks to the Settings > Users menu, which is found here. You can add' users, delete accounts, and see which invites are still pending.
For more information on this feature, check out Invite Your Team.
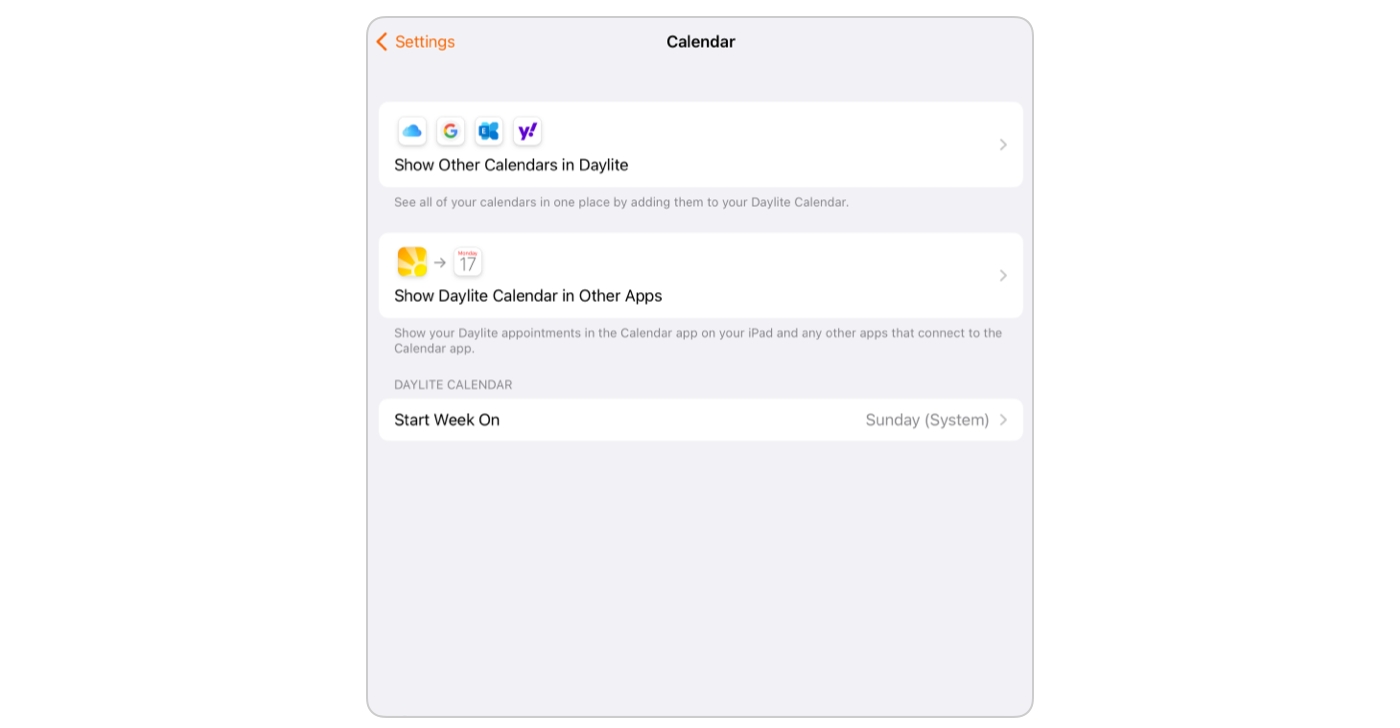
Set your other Calendars to show in Daylite, or show your Daylite Calendar in other apps. Don't forget to let Daylite know what day of the week to start on.
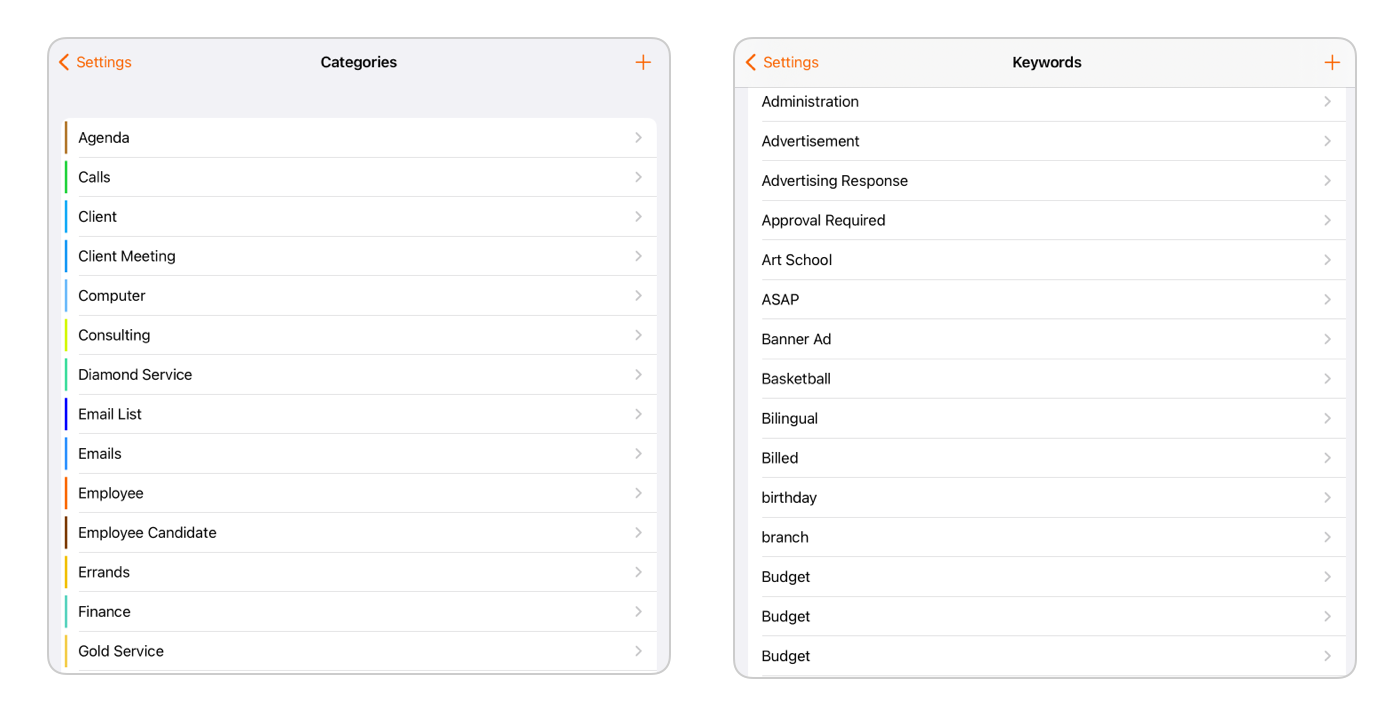
By customizing your Categories and Keywords, you will be able to identify, label, and search for your Contacts quickly and easily. Be sure to avoid unnecessary duplication, and be as precise as you can to avoid confusion.
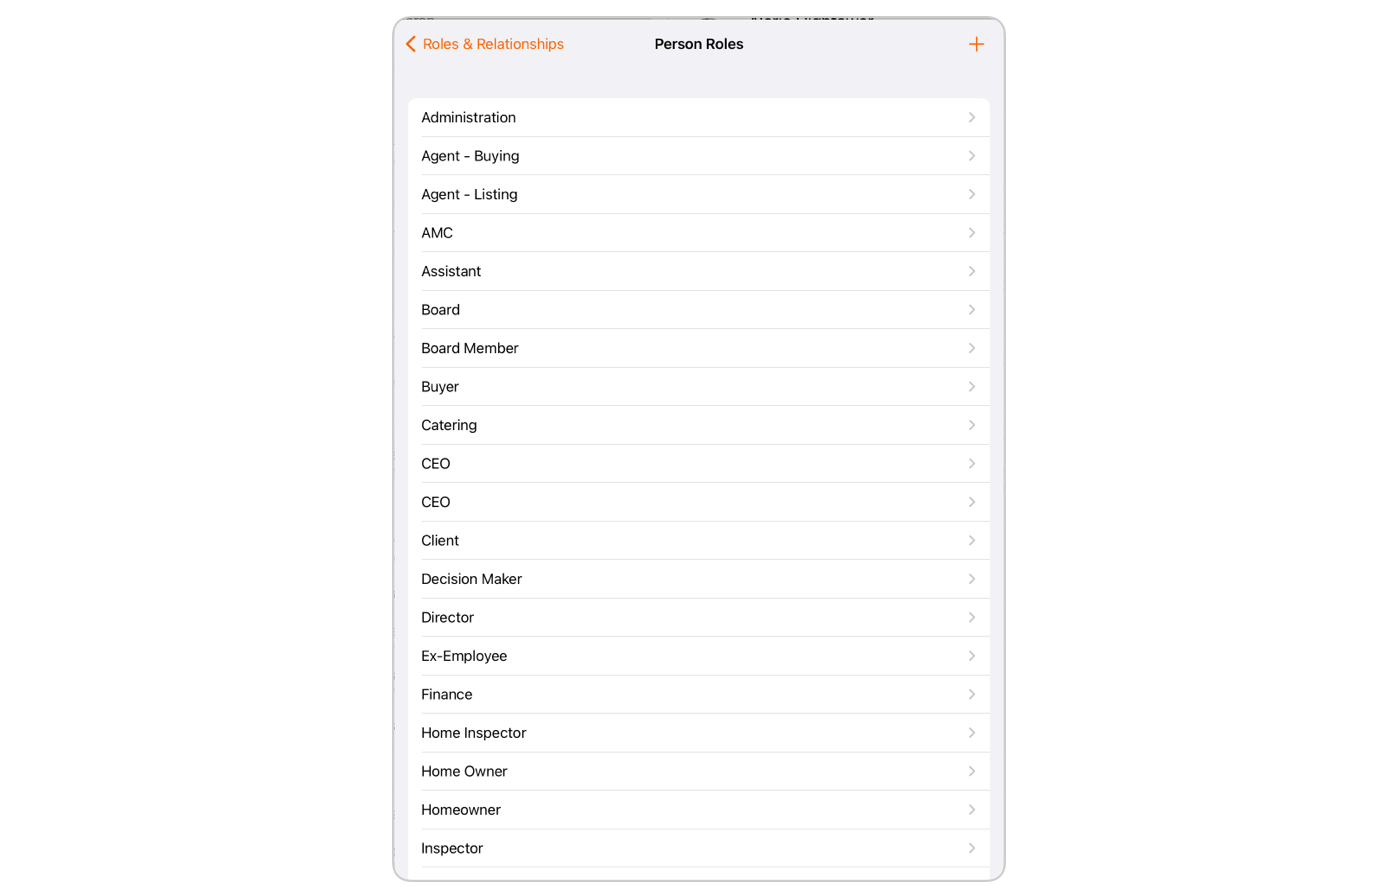
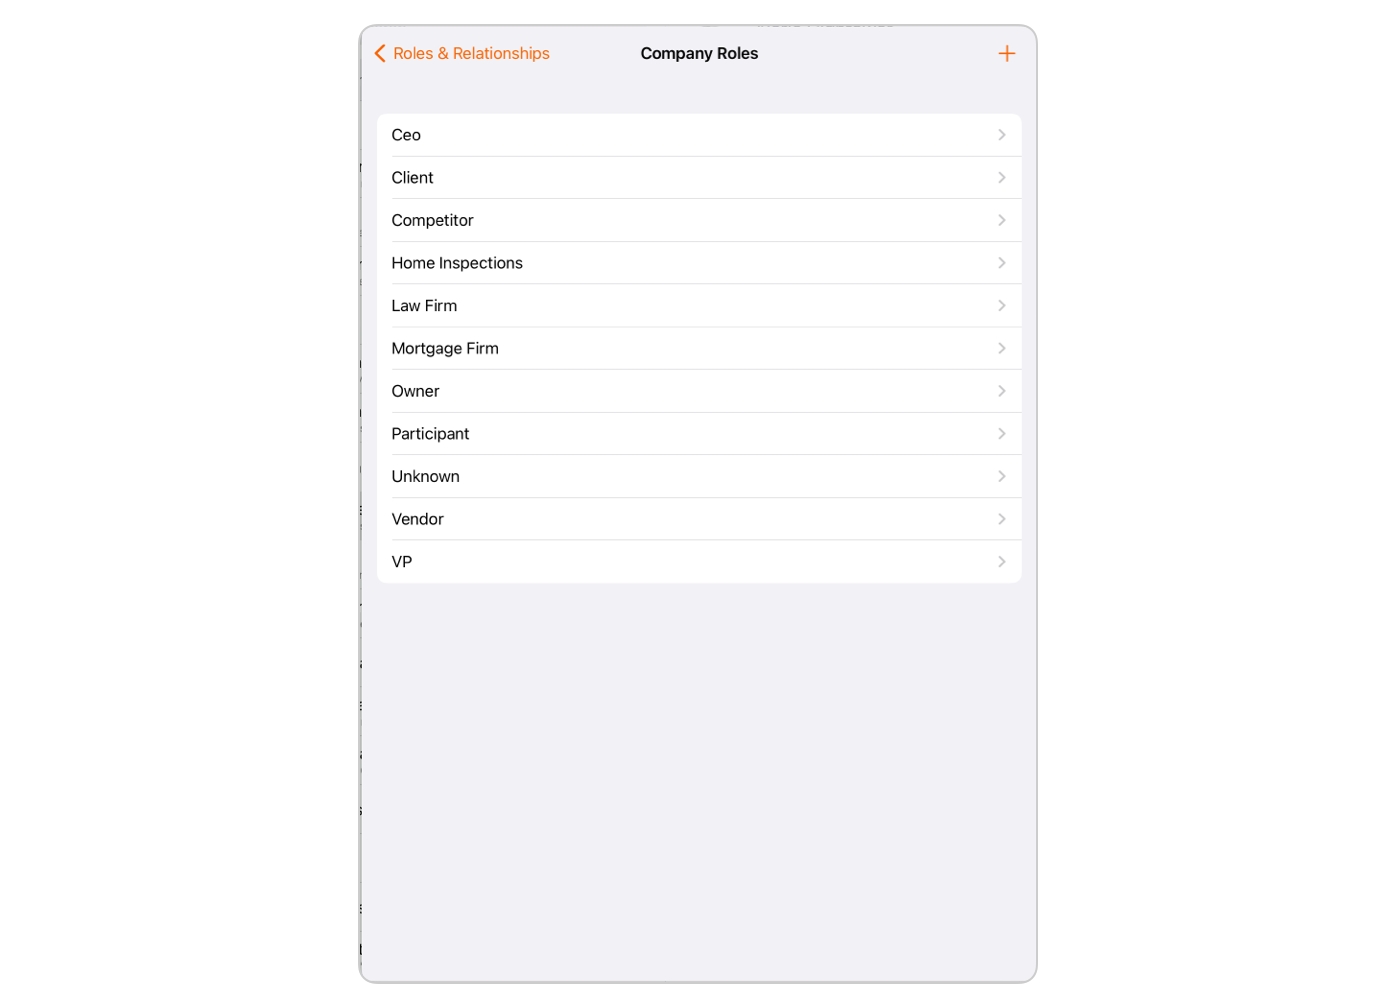
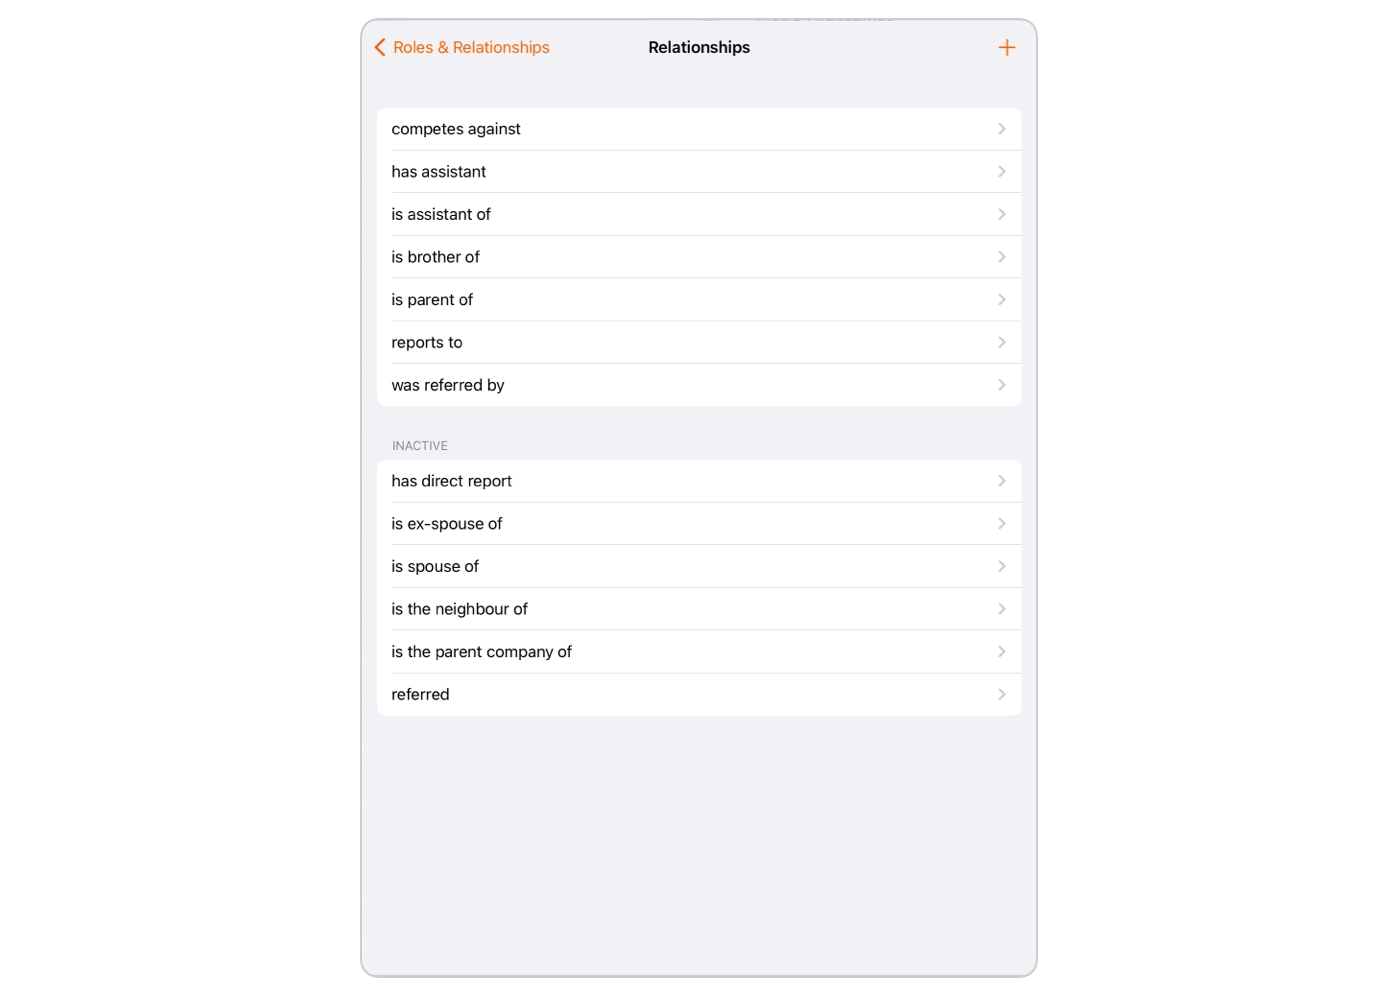
Roles and Relationships form the very core of your business. Not surprisingly, it's the core of Daylite as well. You can choose a:
Person's Role(s)
Company's Role(s)
Hierarchy or Equality based Relationships
These can then be chosen when creating or editing your Contact records.
Wrap Up
Daylite can help you organize your day, your business, and your life. Thanks to its intuitive structure, you can add that important Person to Contacts, check when your next Appointment is coming up in Calendars, and create Tasks and Notes so you never forget an important point during a call or meeting. All of these features, and more, tie together to guarantee your business runs smoothly.
Last updated