Integrating with Outlook
If you find yourself somewhat limited using Microsoft Outlook to file, manage, and organize your email messages, you can improve your Outlook experience with Daylite for Outlook.
Daylite for Outlook allows you to add emails to your Contacts, Client Projects, and Sales Opportunities directly from your Outlook inbox. This means that instead of trying to manage your emails by creating numerous folders, or possibly overlooking them in your inbox, you can save all your client history in Daylite, where it's conveniently linked to the appropriate Contact, Project, or Opportunity for future reference.
Installing Microsoft Outlook on your Mac
Already using Outlook?
If you are already using Microsoft Outlook for Mac, skip this step and advance to Installing Daylite for Outlook.
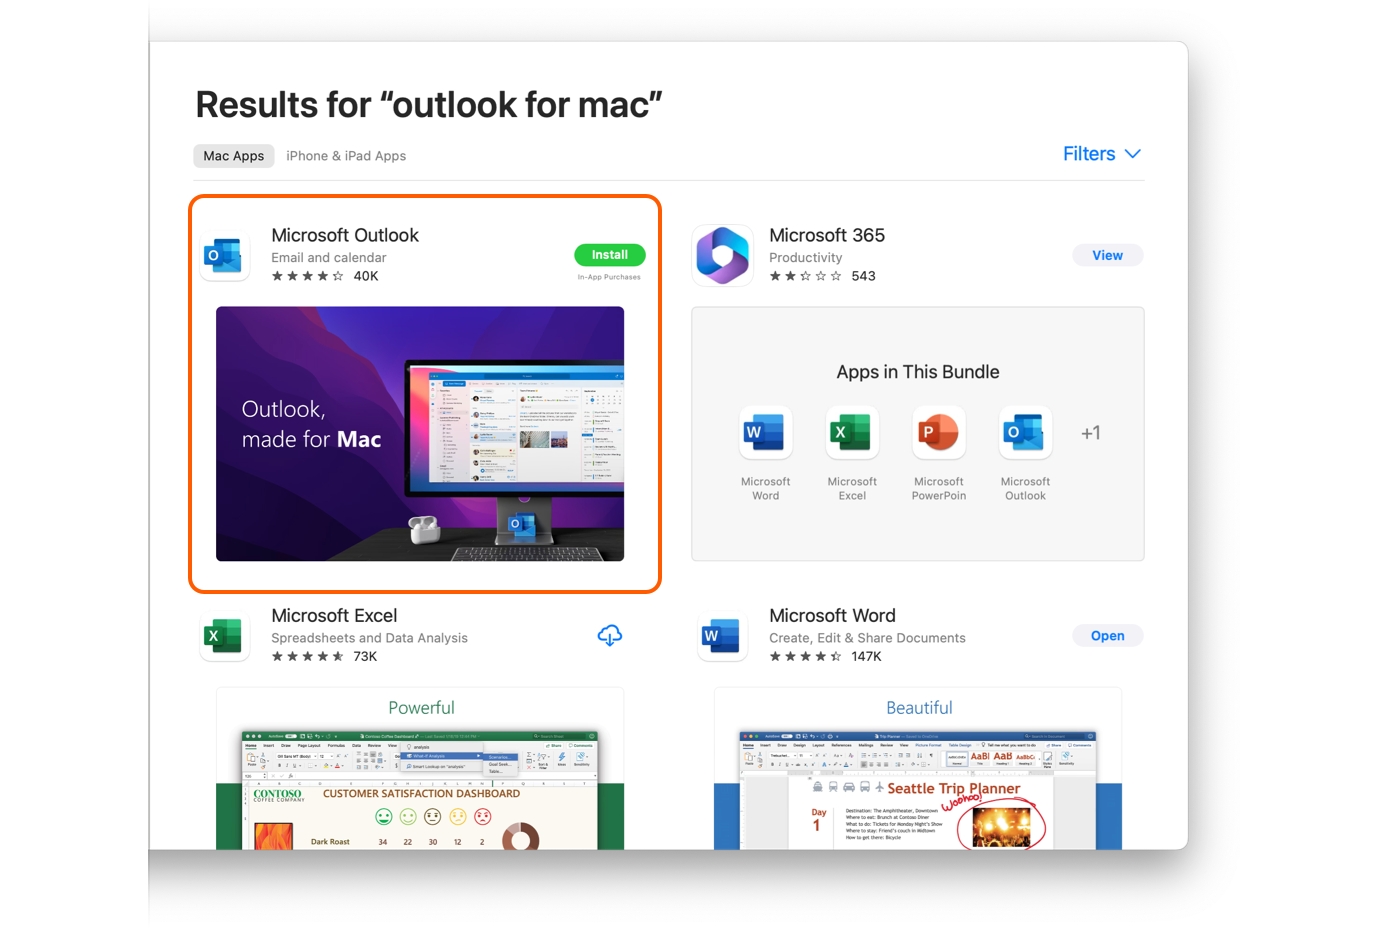
To begin, you will need to install Microsoft Outlook from the App Store.
Open the app, and enter the email address and password you wish to add to Outlook.
Did you know?
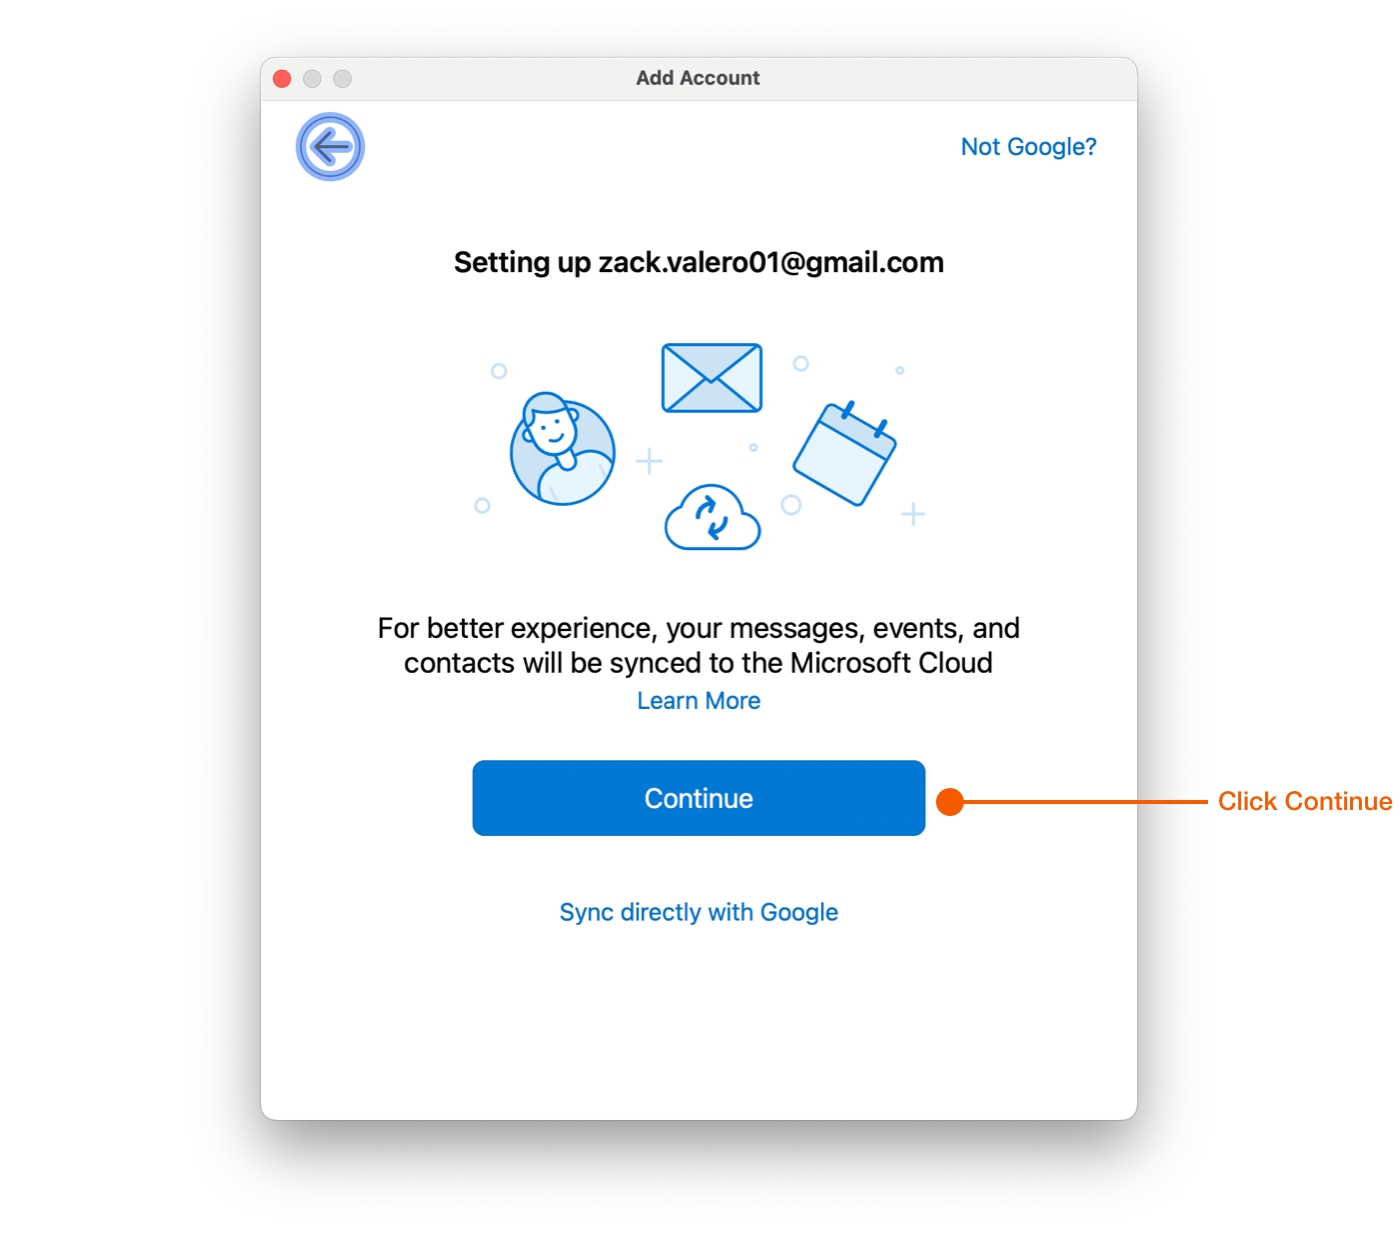
Outlook for Mac now supports non-Microsoft accounts such as IMAP, Google, and iCloud, however, you must agree to sync your email messages to the Microsoft Cloud.
If you are adding a non-Microsoft account click Continue when you're prompted to sync your messages to the Microsoft Cloud.
If you choose to Sync directly you will not be able to install Daylite for Outlook, or any other add-ins. For more info, see this Microsoft article.
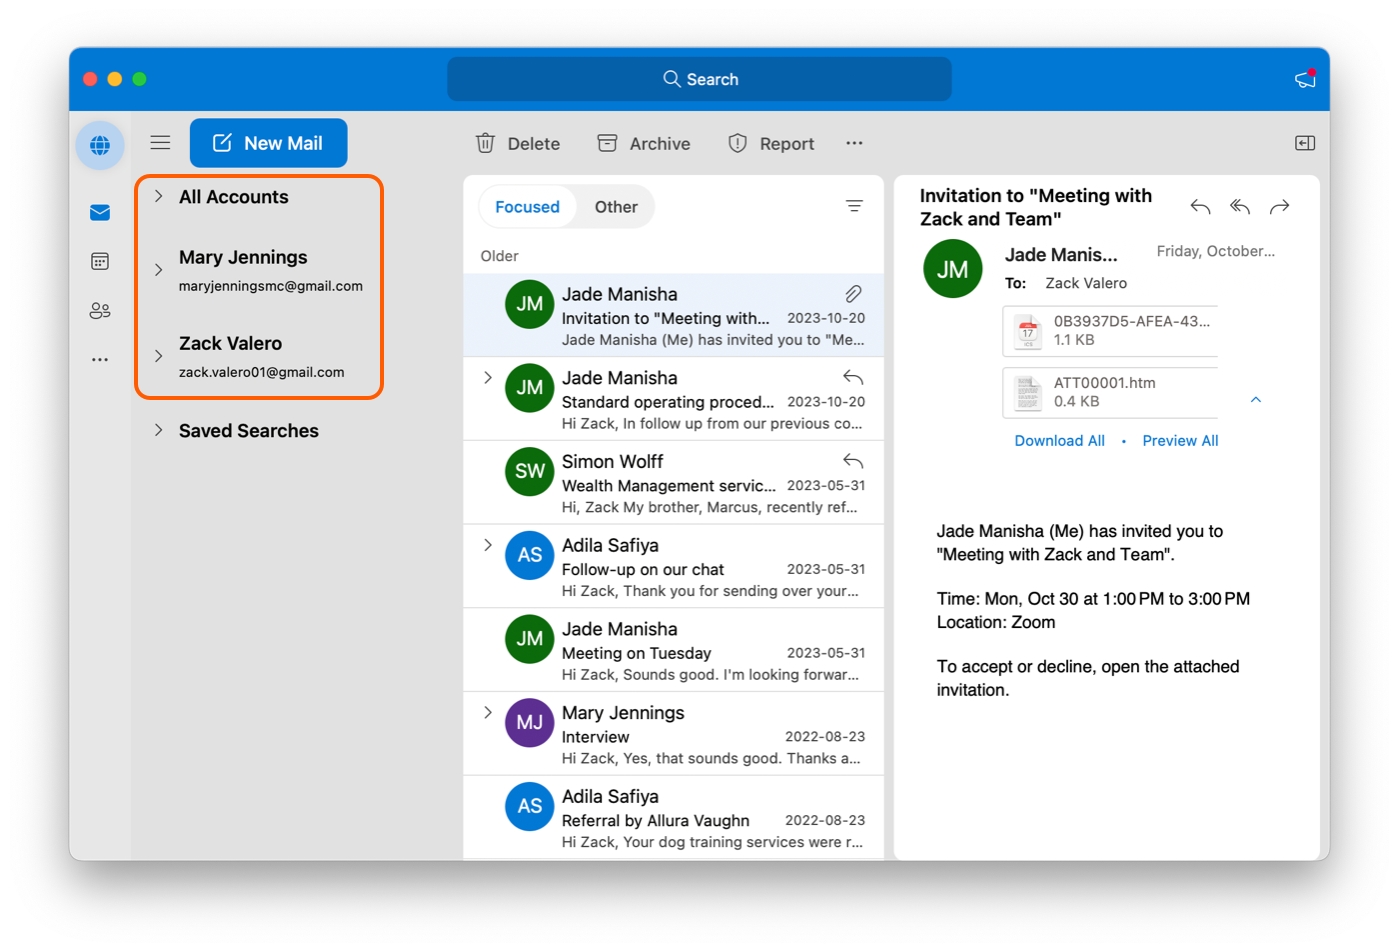
Outlook will now display your email accounts on the left hand side of the app.
Installing Daylite for Outlook
Daylite for Outlook is what we refer to as an add-in. This means Daylite acts alongside Outlook, blending in seamlessly with the app to give you the very best experience possible.
Additional Support
How you install add-ins varies depending on the version of Outlook you’re using. If you're using Outlook for Mac, continue reading our instructions below, otherwise you can refer to these Microsoft Support articles:
If you are using the Outlook app: please see the article Get an Office Add-in for Outlook.
If you are using Outlook on the Web: please see the article Using add-ins in Outlook on the web.
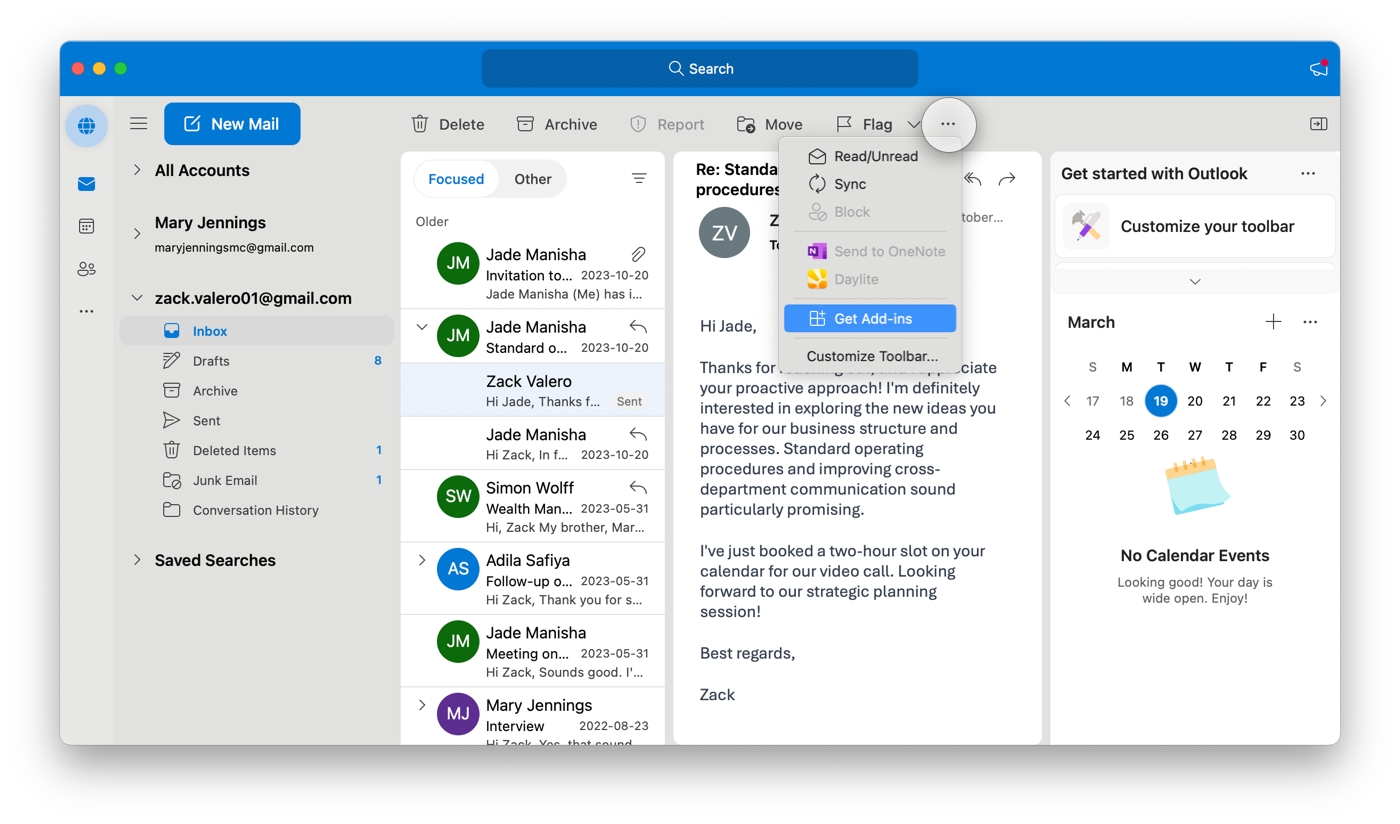
Select an email account, then tap the ... icon and choose Get Add-ins.
If the Get Add-ins row is greyed out and you can't click it, make sure you set up your email account in Outlook correctly. See the section above "Installing Microsoft Outlook on Your Mac".
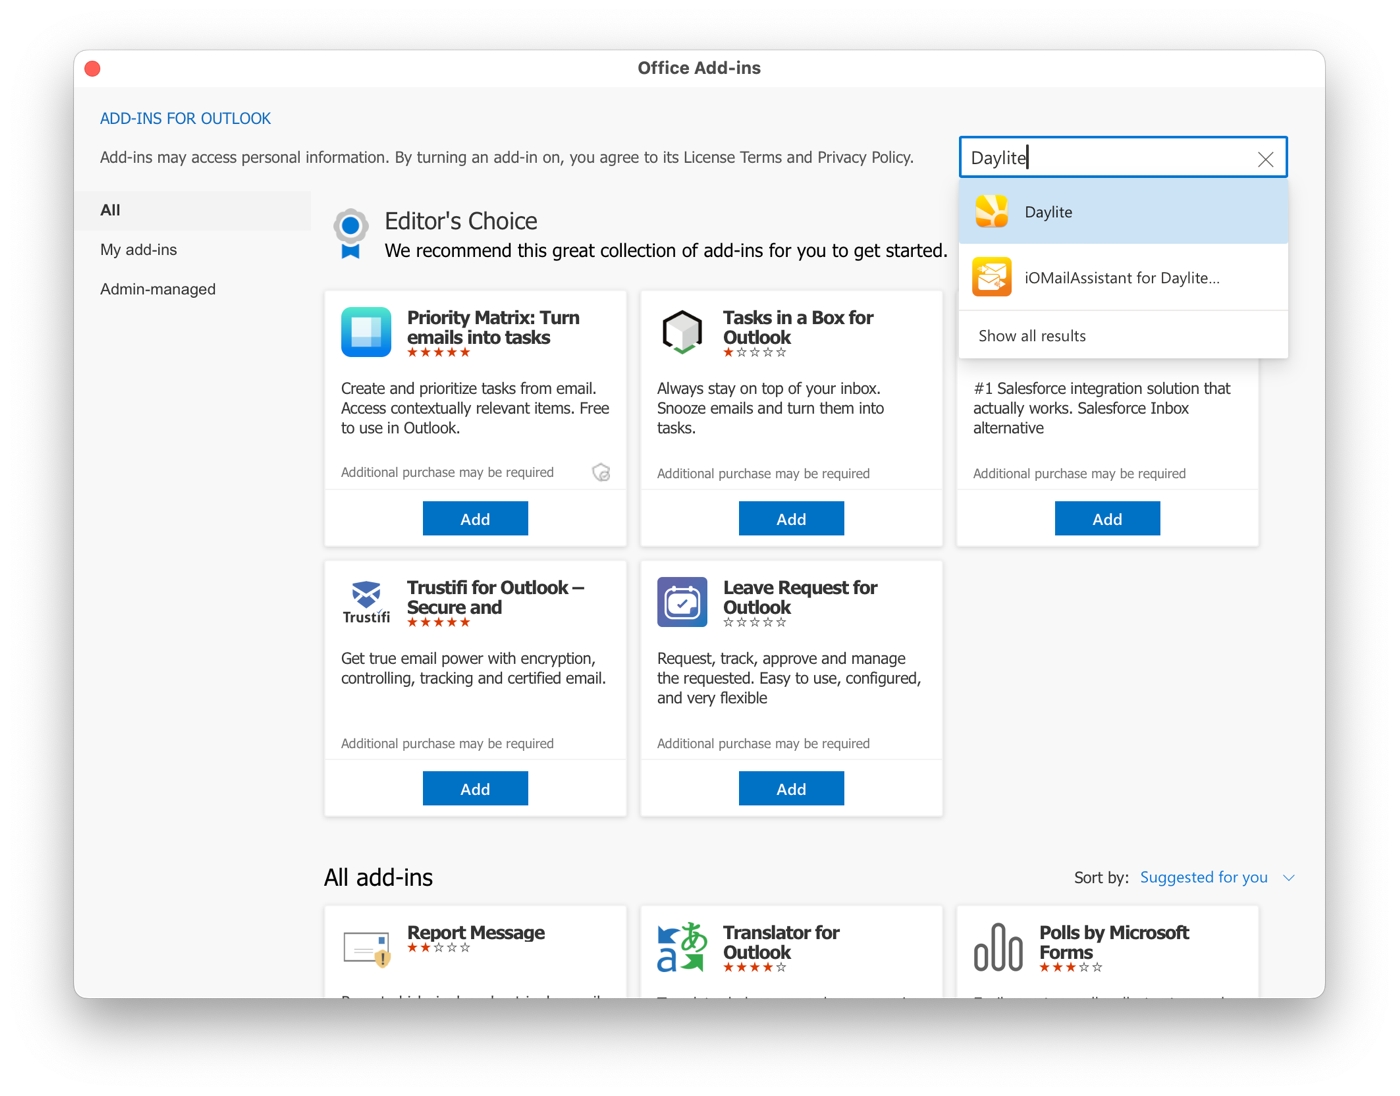
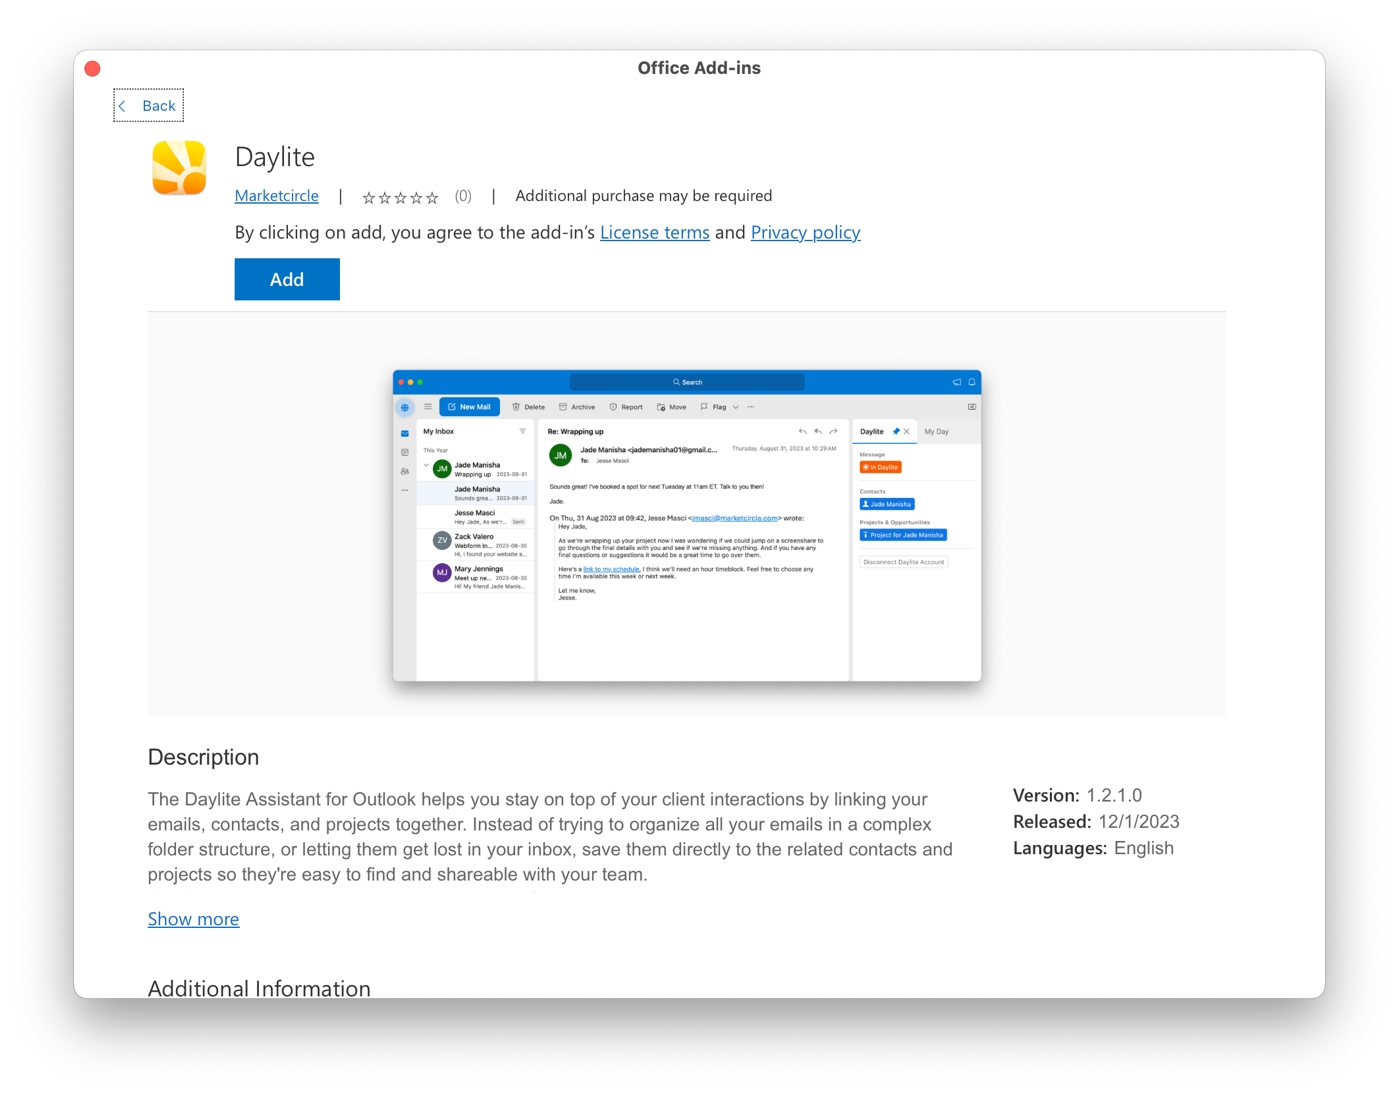
You will need to add the Daylite add-in from the Office Add-ins page. Begin by searching for "Daylite" and clicking it from the search results.
Install the Daylite add-in by clicking Add.
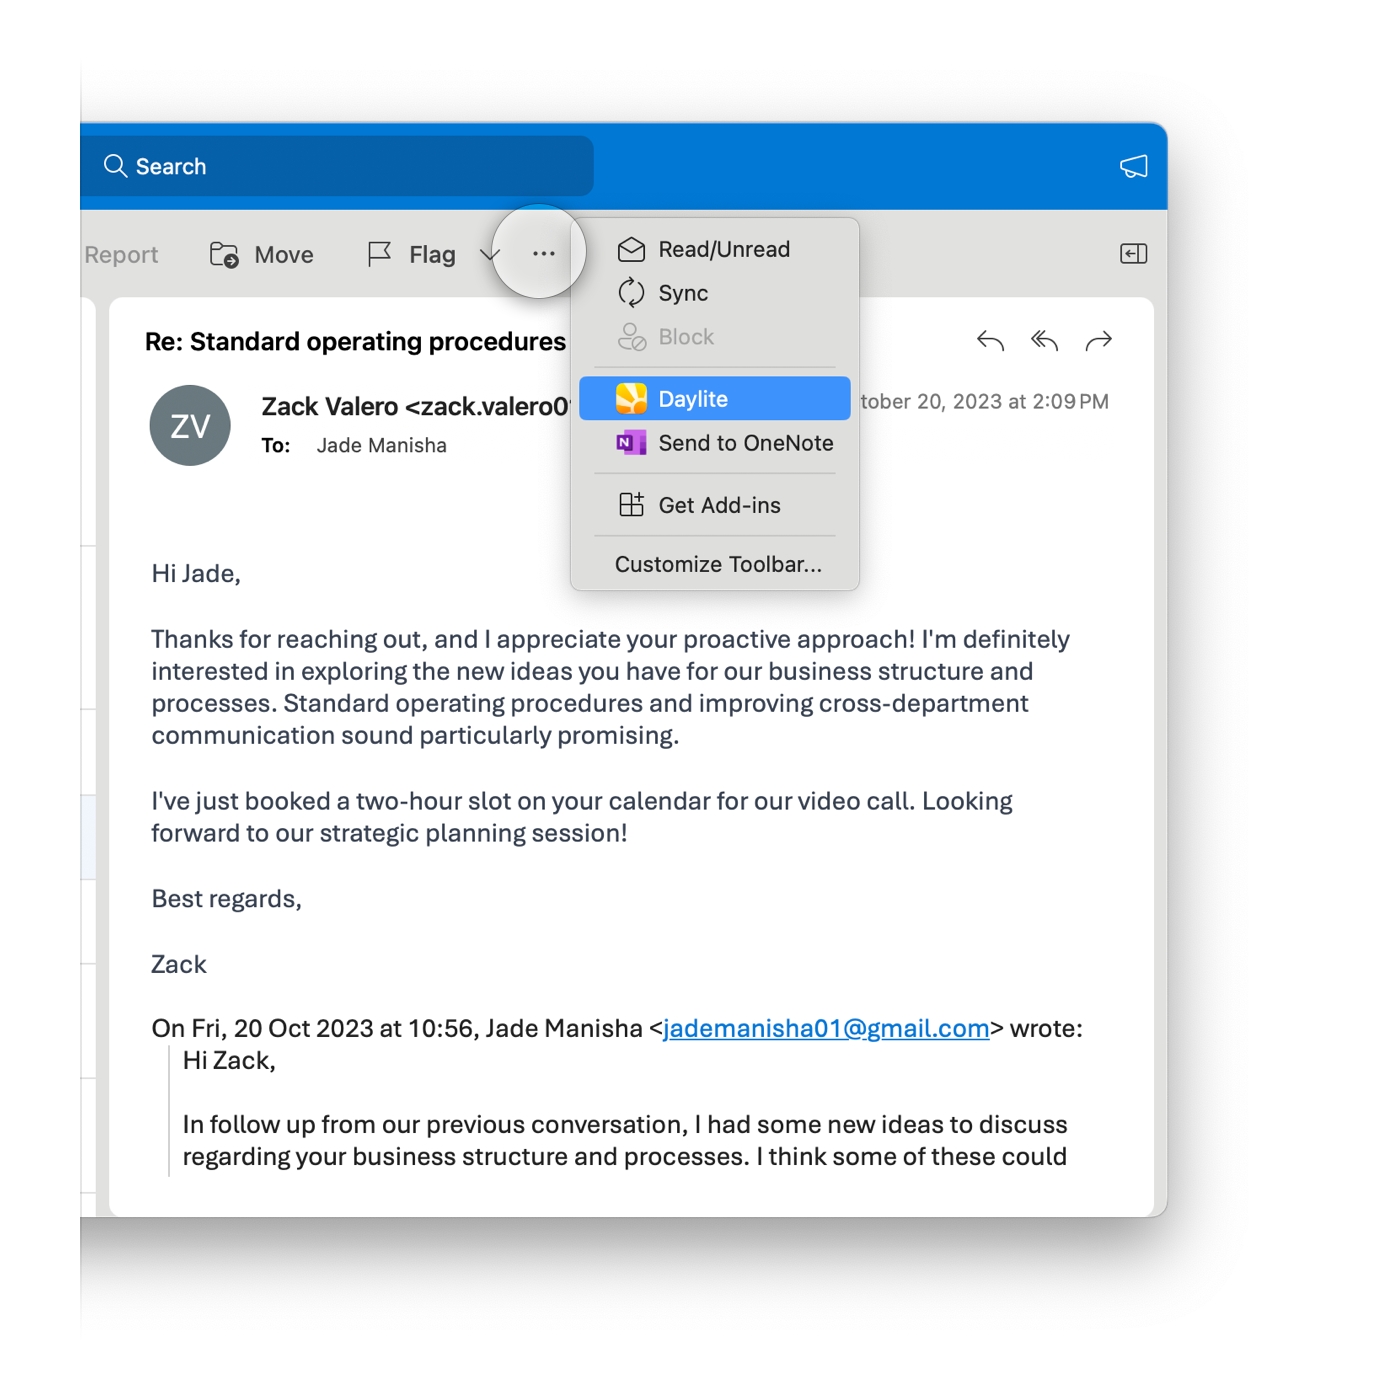
Now that you have added the Daylite add-in to Outlook, select an email message.
Select the ... menu and choose Daylite.
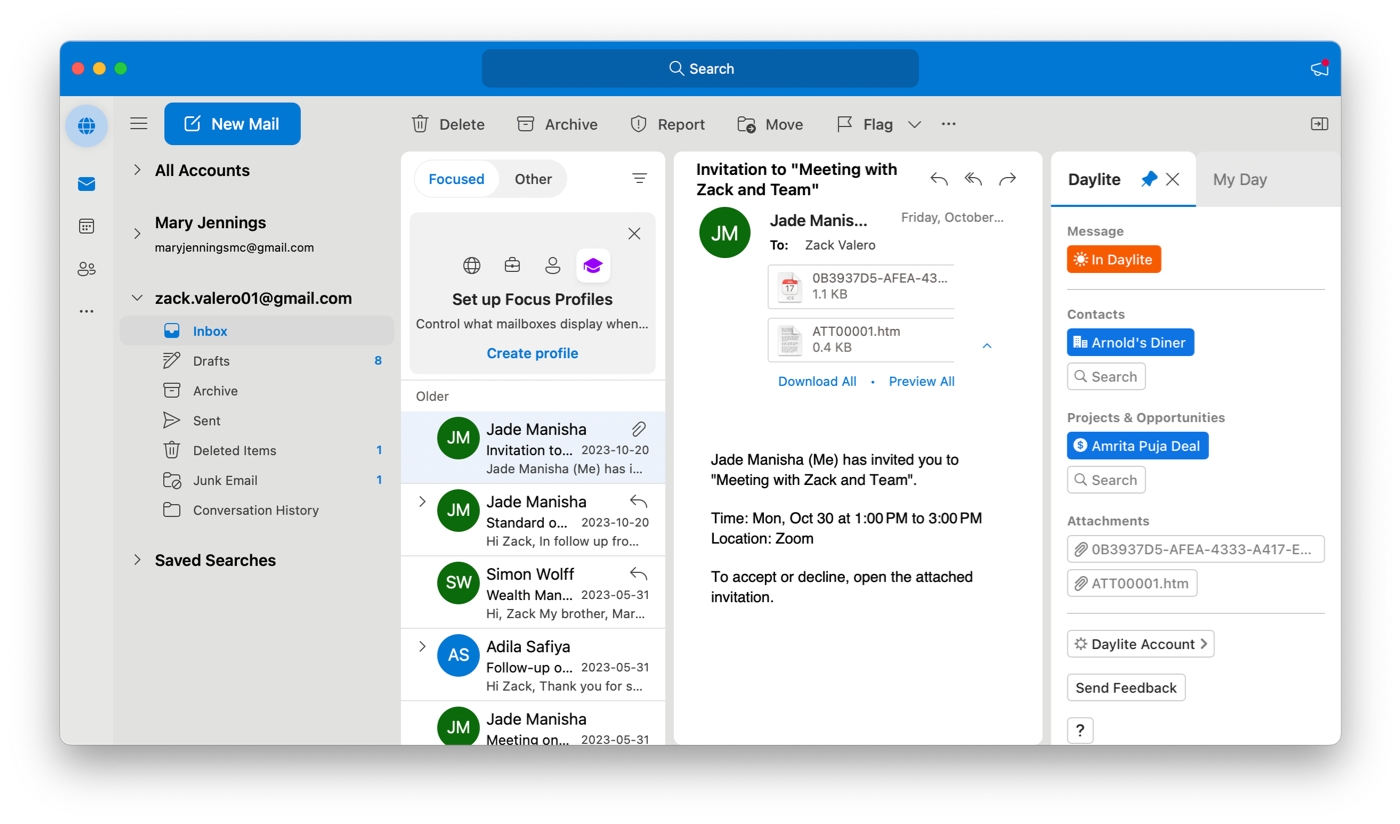
The pane will now be displayed on the right hand side of Outlook.
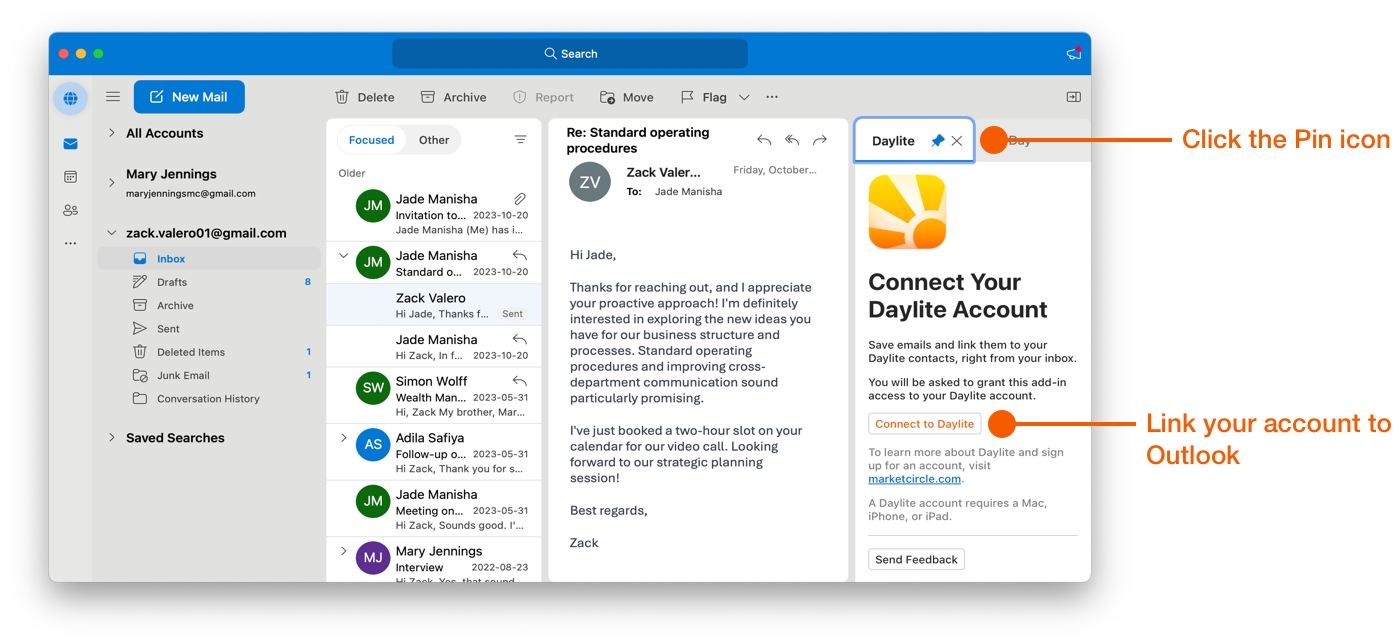
Be sure to click the Pin icon so that the Daylite pane will remain open at all times. If the Daylite pane isn't pinned, it will close each time you select a different email.
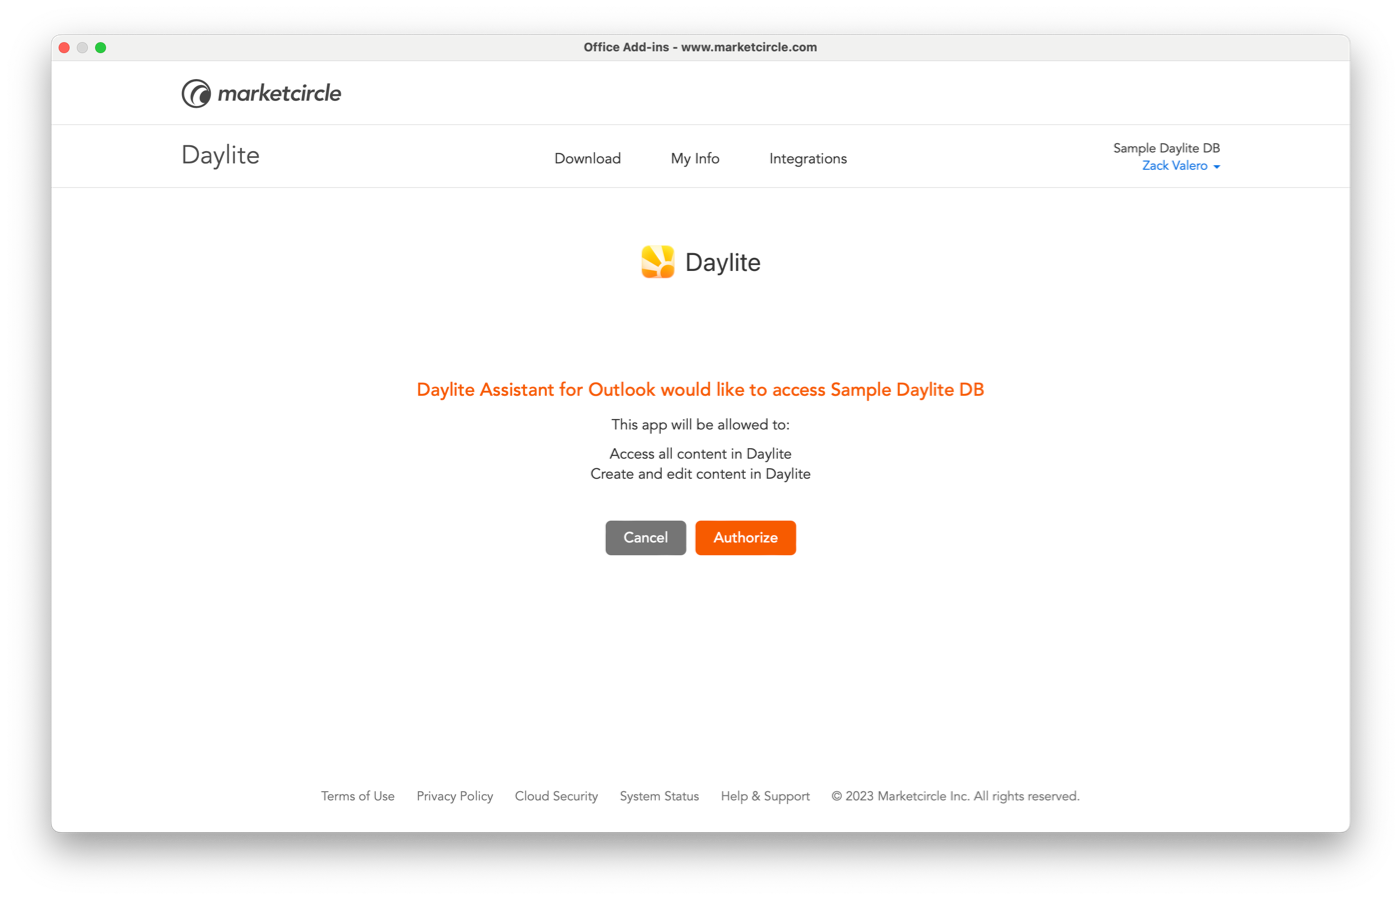
Select Connect to Daylite to link your Daylite account to the Outlook app.
Daylite for Outlook asks for your permission to access your Daylite account.
Once this is done, you can now add your Outlook emails to Daylite!
Do you have multiple email accounts?
You must install the Daylite add-in for each email account you're using in Outlook.
Taking a Tour of Daylite for Outlook
How can Daylite for Outlook make your business more productive?
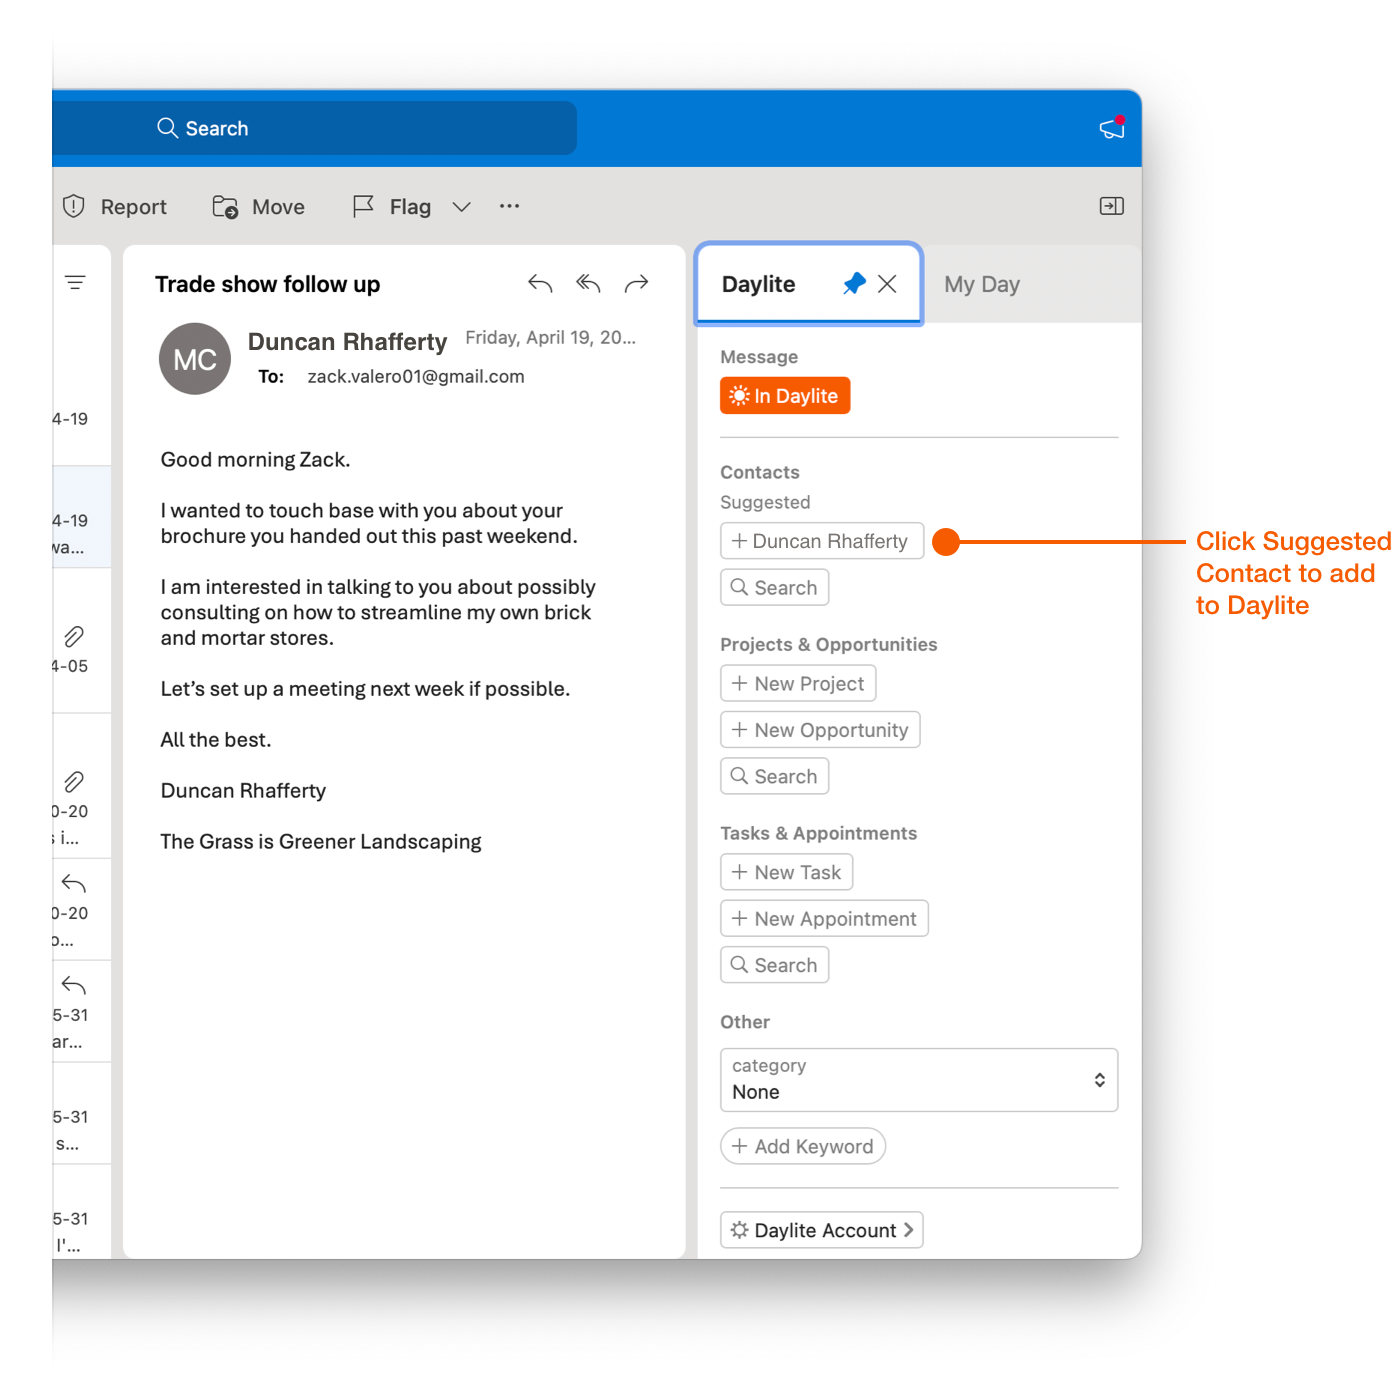
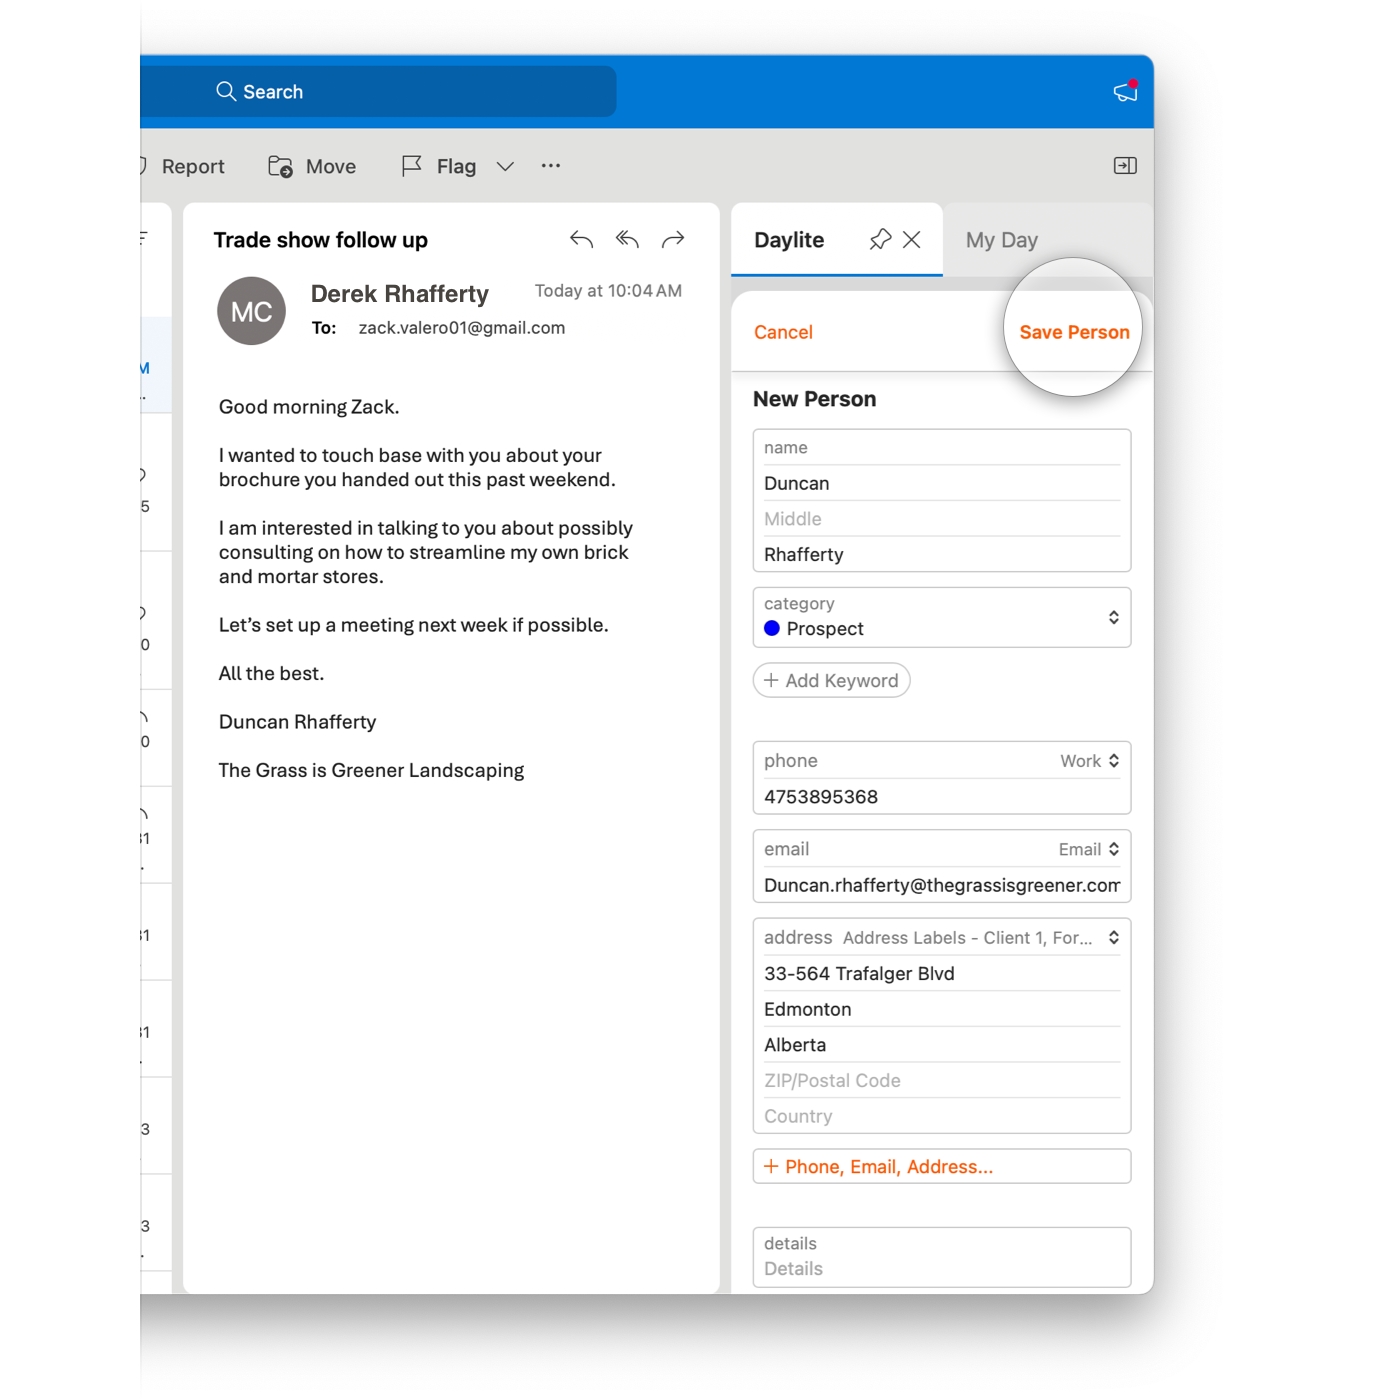
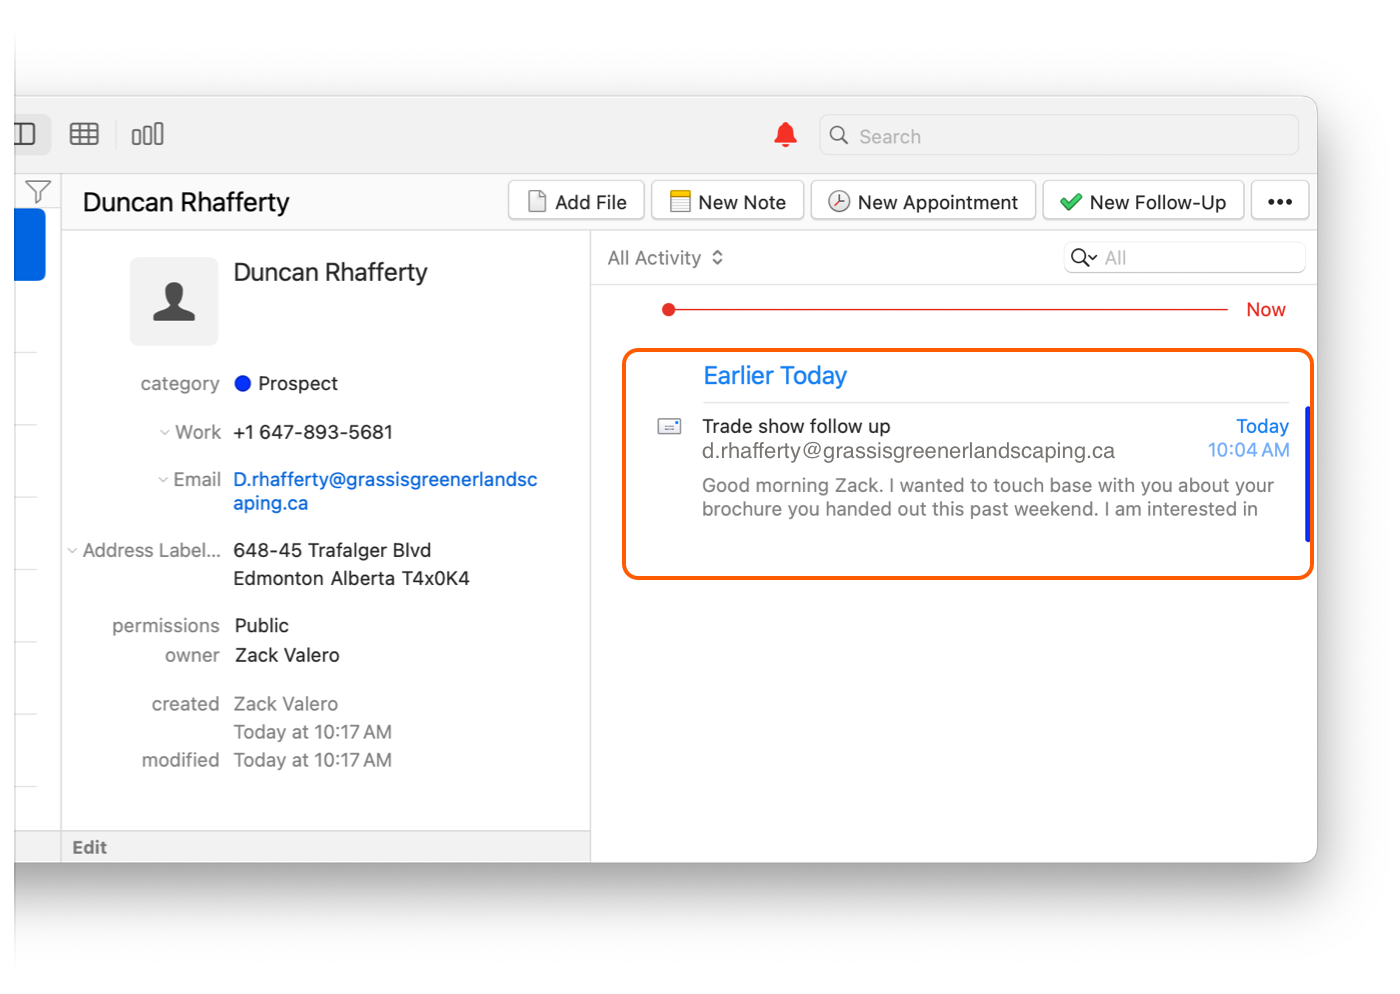
Let's say you attended a trade show this past weekend, where you handed out brochures with your contact information on them. This morning when you checked your inbox there was a message from one of the attendees, asking about your services.
Click the grey + Add to Daylite button to add this email message to Daylite.
Once added, this button will change to orange, and now says In Daylite.
Daylite will scan the participants of the message and the attendee would appear in the Daylite pane as a Suggested Contact.
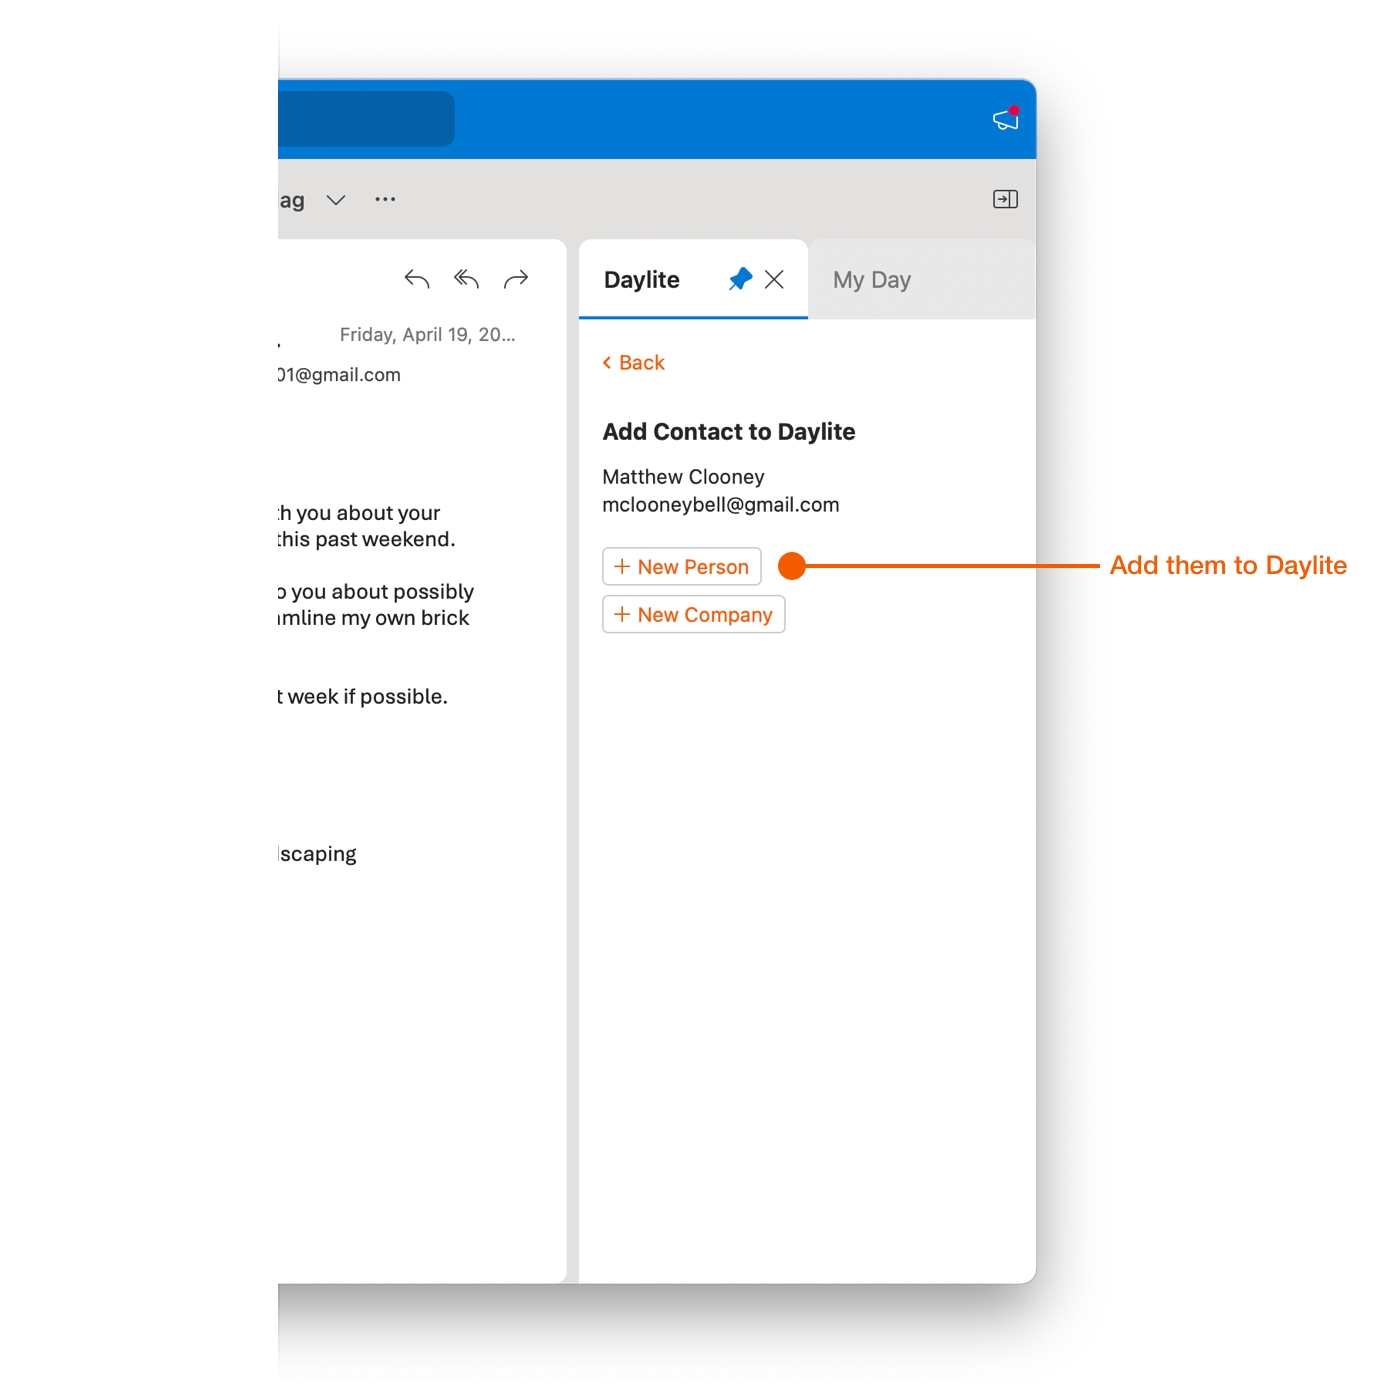
Click the Suggested Contact's name to add them as a Contact to Daylite.
Now you can enter in all of the information you have on hand for this New Contact. Don't worry, you can always update this Person record as time goes on.
Click Save Person when you are done.
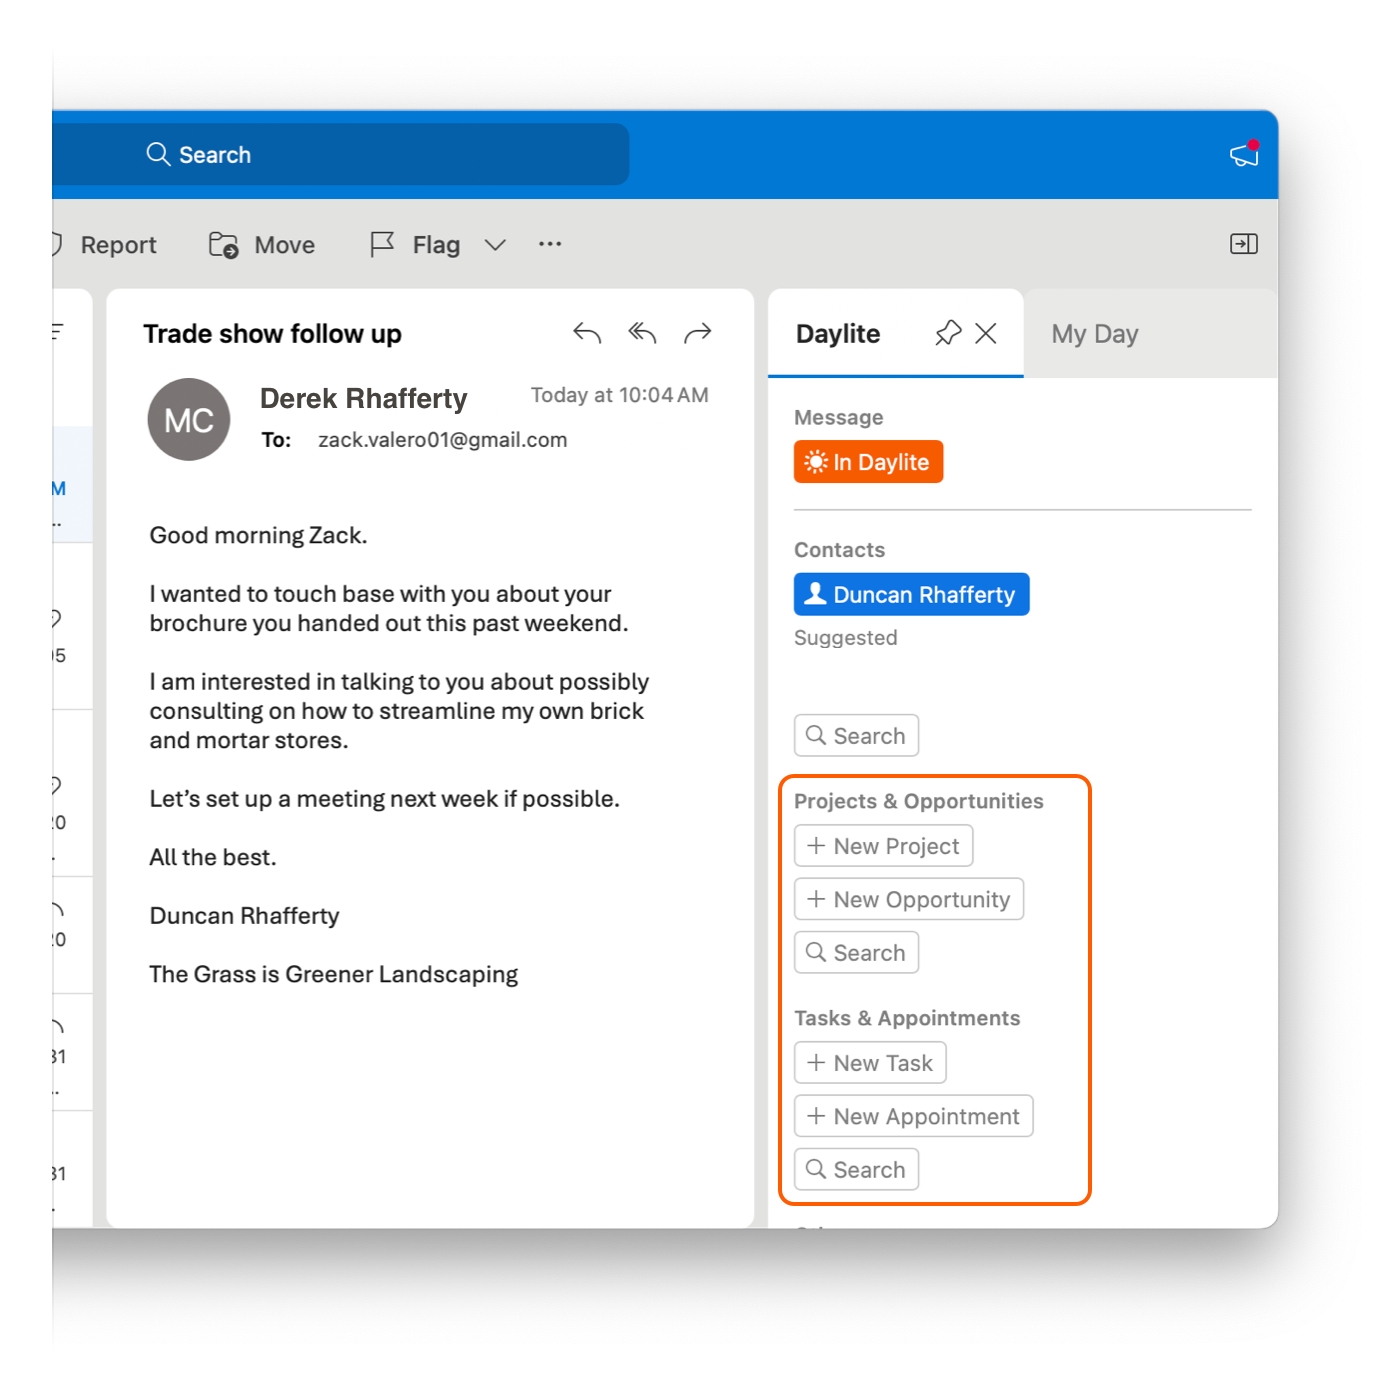
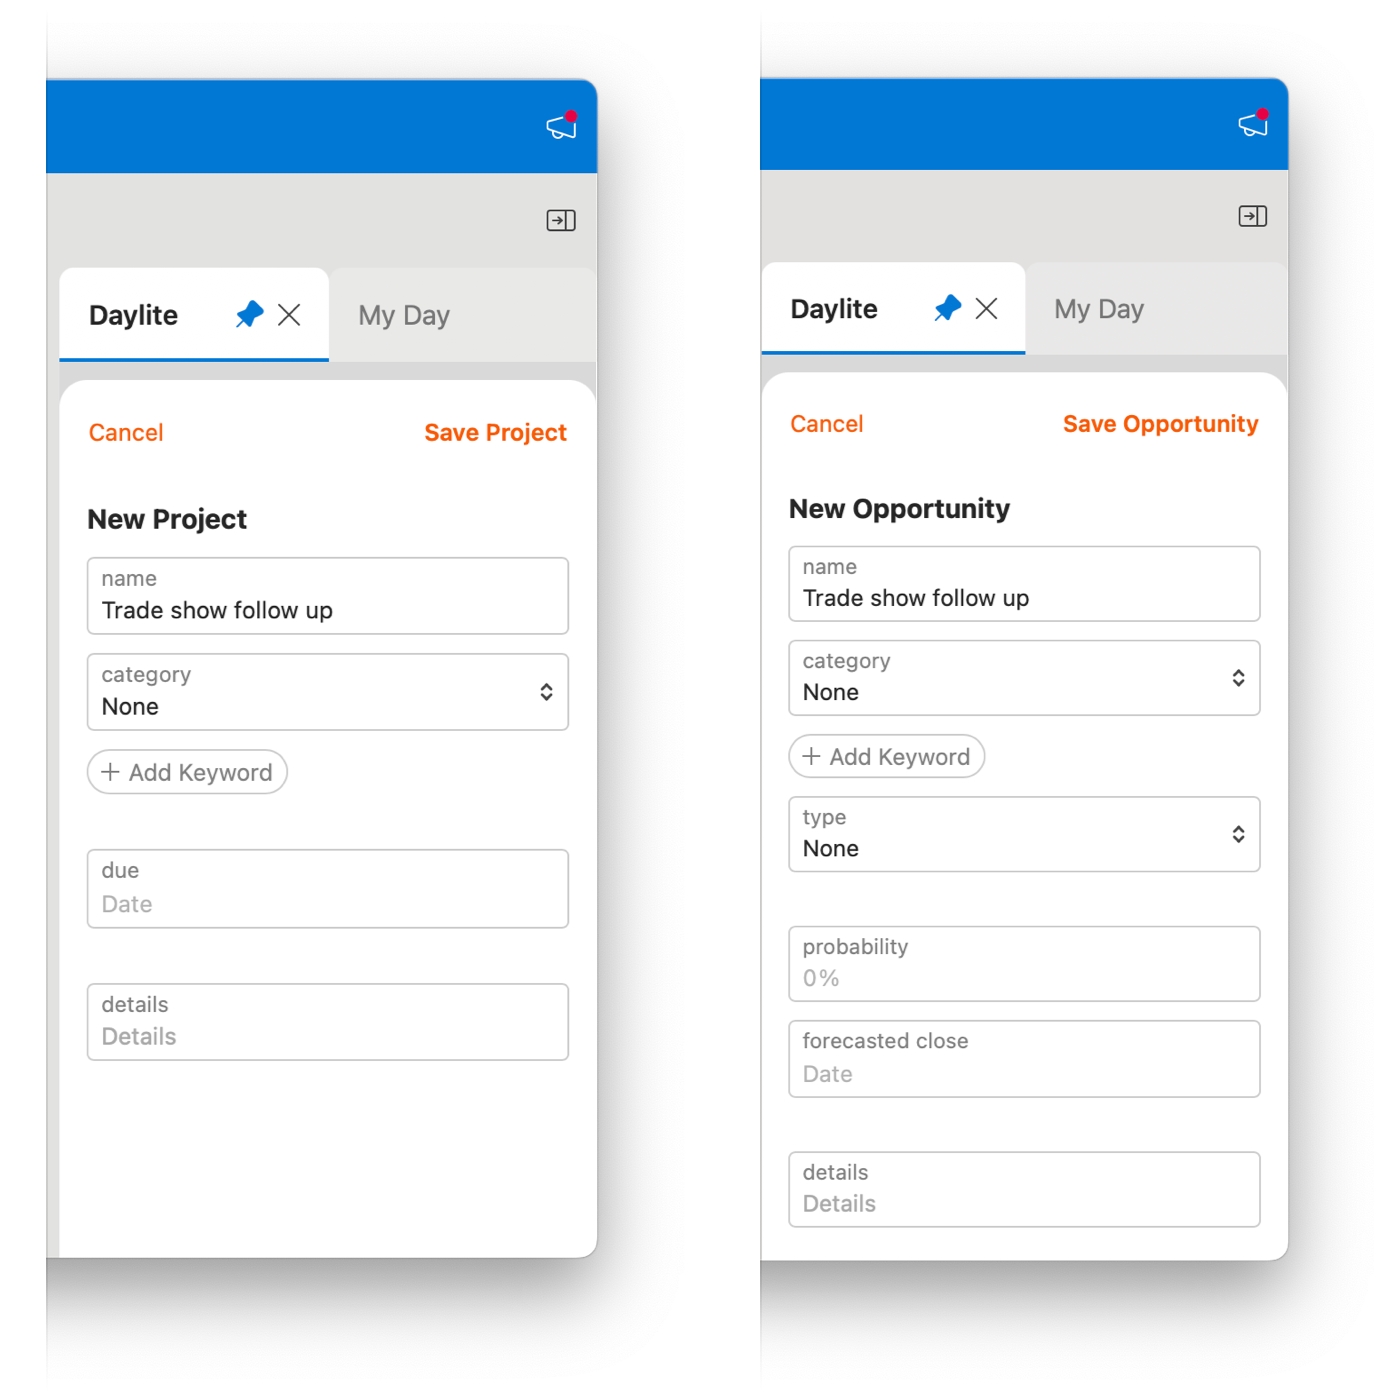
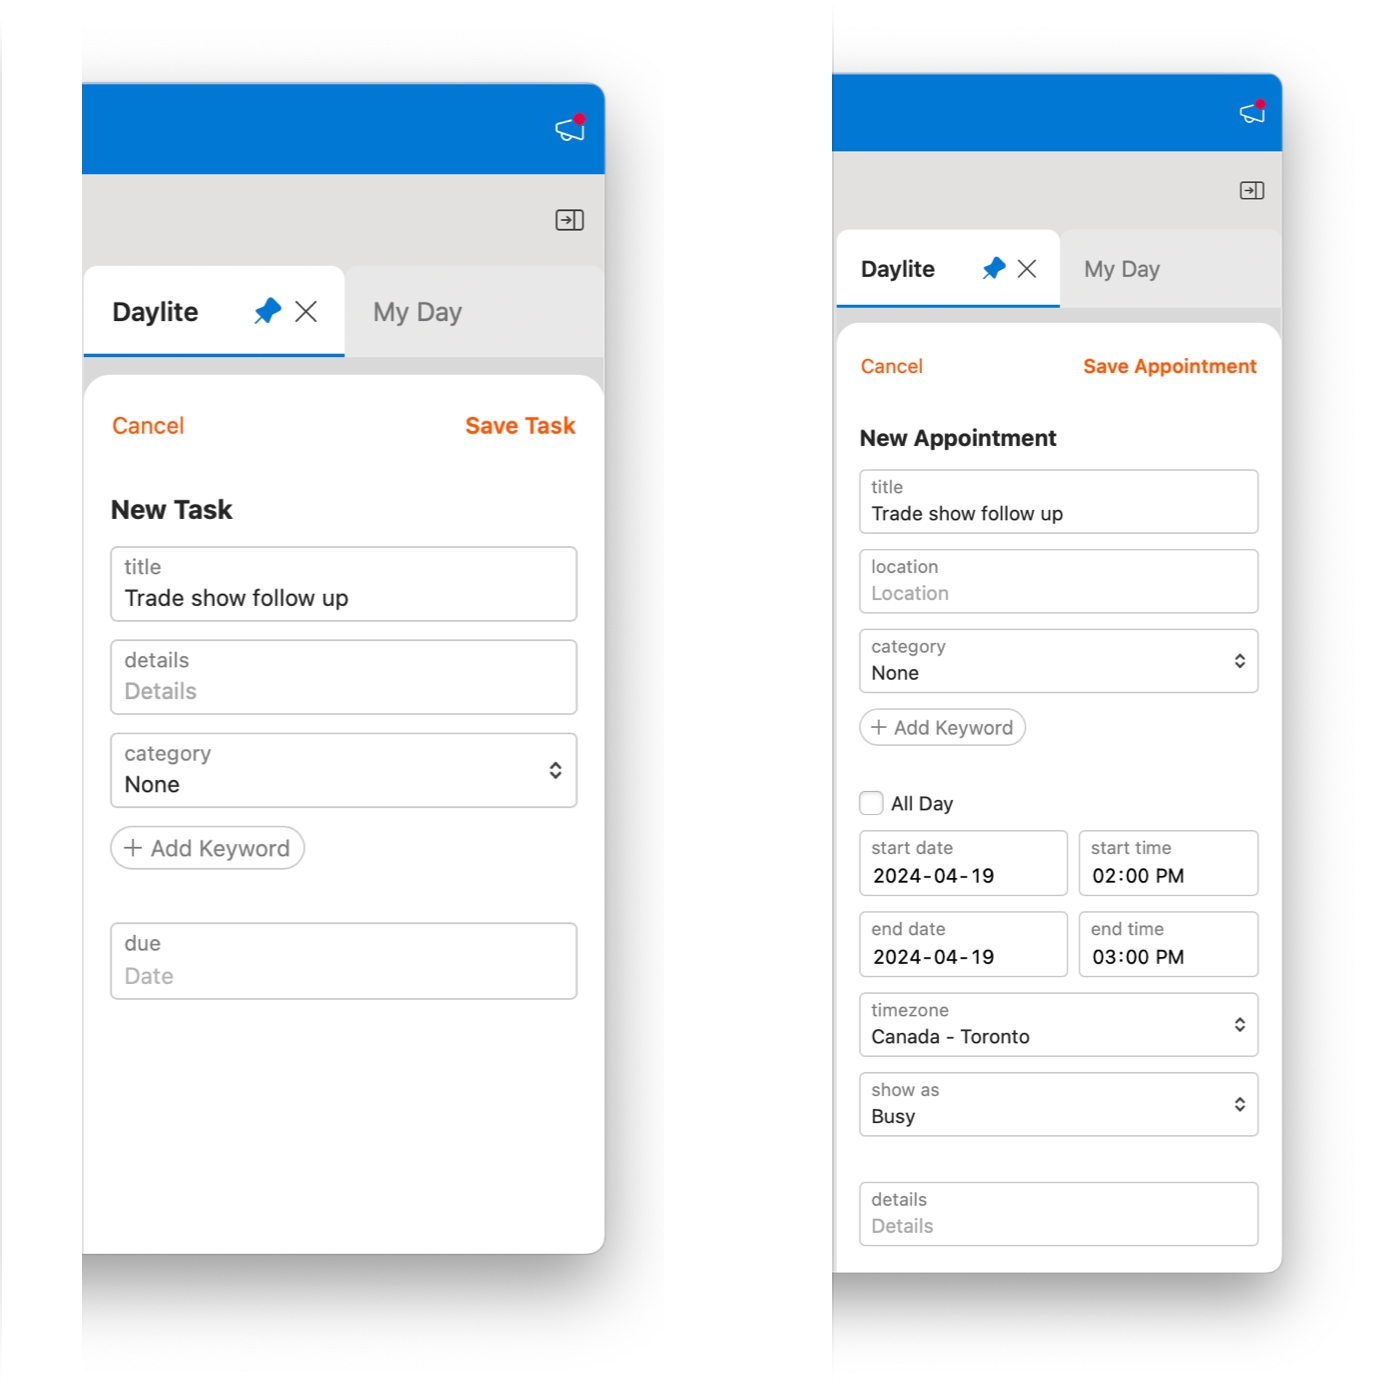
Adding New Projects, Opportunities, Tasks and Appointments
When adding a new Contact to Daylite, you may wish to add them immediately as a New Opportunity, or maybe you have a meeting scheduled with them and want to create a new appointment from this email.
Click which Object you want to add to the email and fill in the appropriate information.
Pro Tip:
You can use the Search button to link other Contacts to the email if they aren't suggested, but are related to the email. You can also do this with Projects, Tasks, Appointments and Opportunities.
View Your Email History in Daylite
If we continue the example above, now that you have used Daylite for Outlook to create a new contact and add the email to Daylite, it is now time to see what exactly that looks like in Daylite.
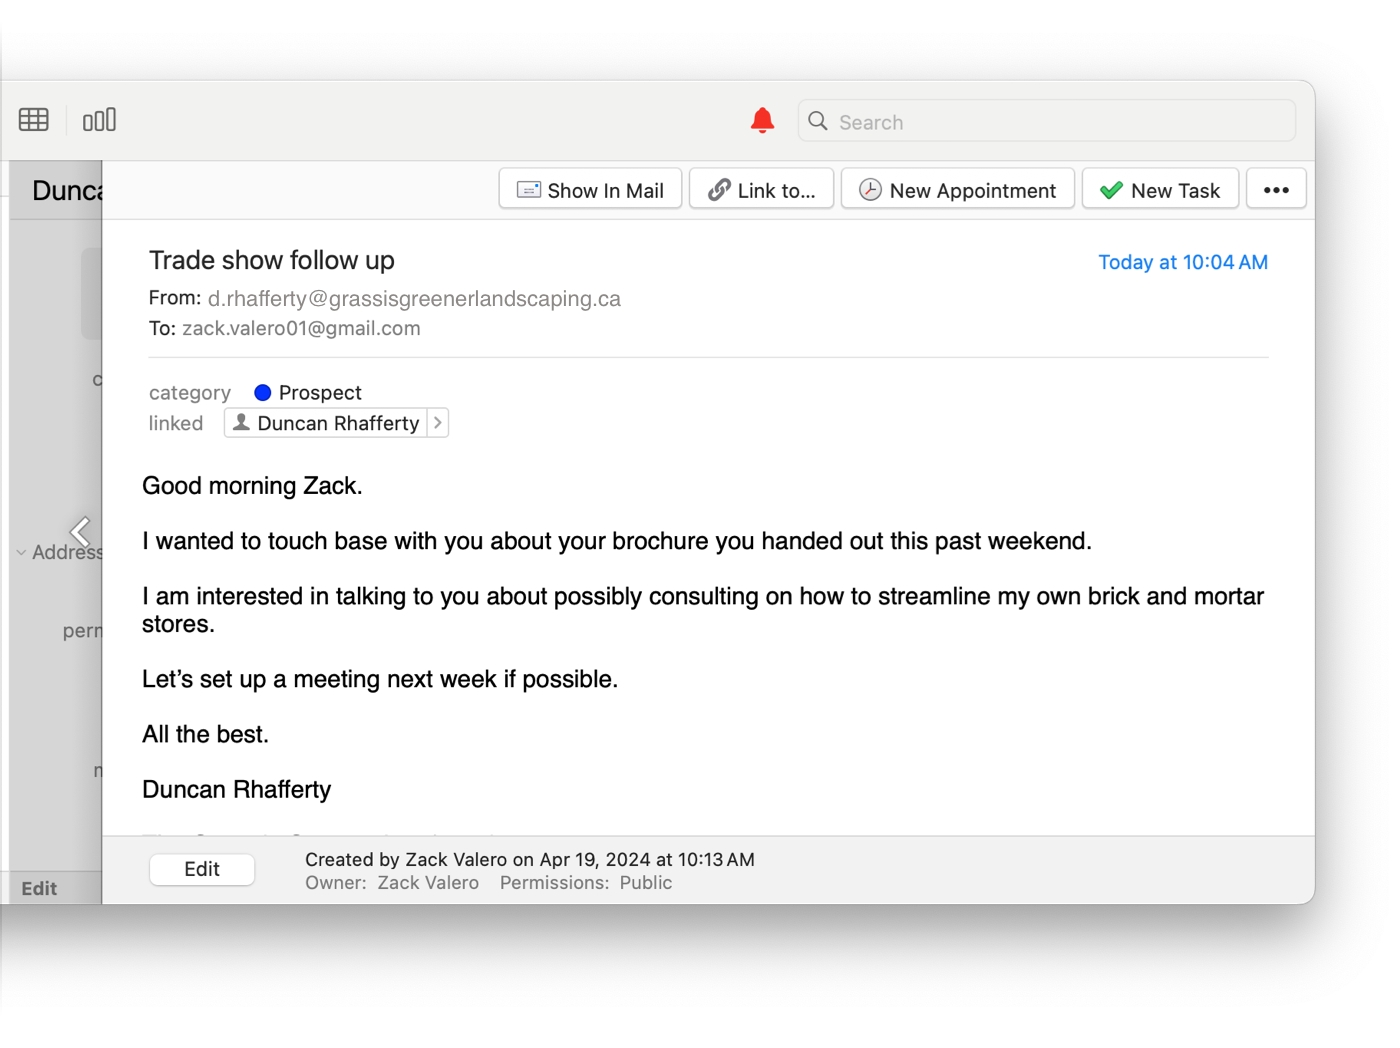
Daylite links the "Trade show follow up" email to the new Contact's record. You can view the email chronologically in the Activity View.
Double-clicking the email opens it in a slide-over view where you can see the full email content.
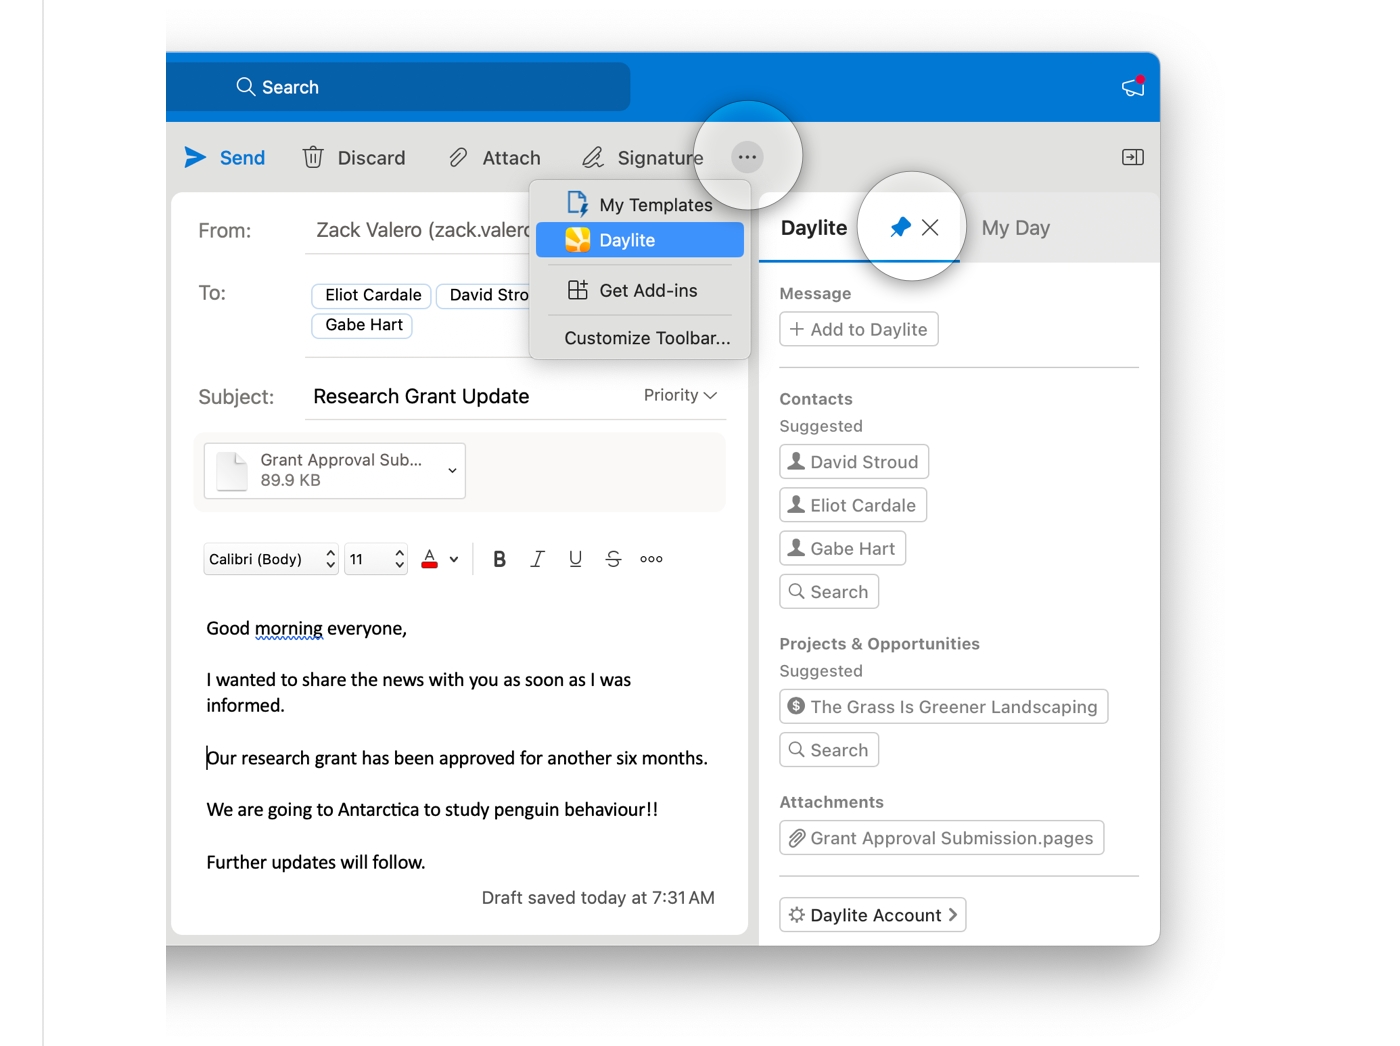
Adding a Composed Email to Daylite
Daylite for Outlook doesn't just keep track of email you receive, it can also add email messages you compose and send. You can link and create all the same things, too, including Contacts, Projects, Opportunities, Attachments, Tasks, and Appointments.
Before you begin to compose your new message, remember to select Daylite from the … menu and pin it to the Outlook sidebar.
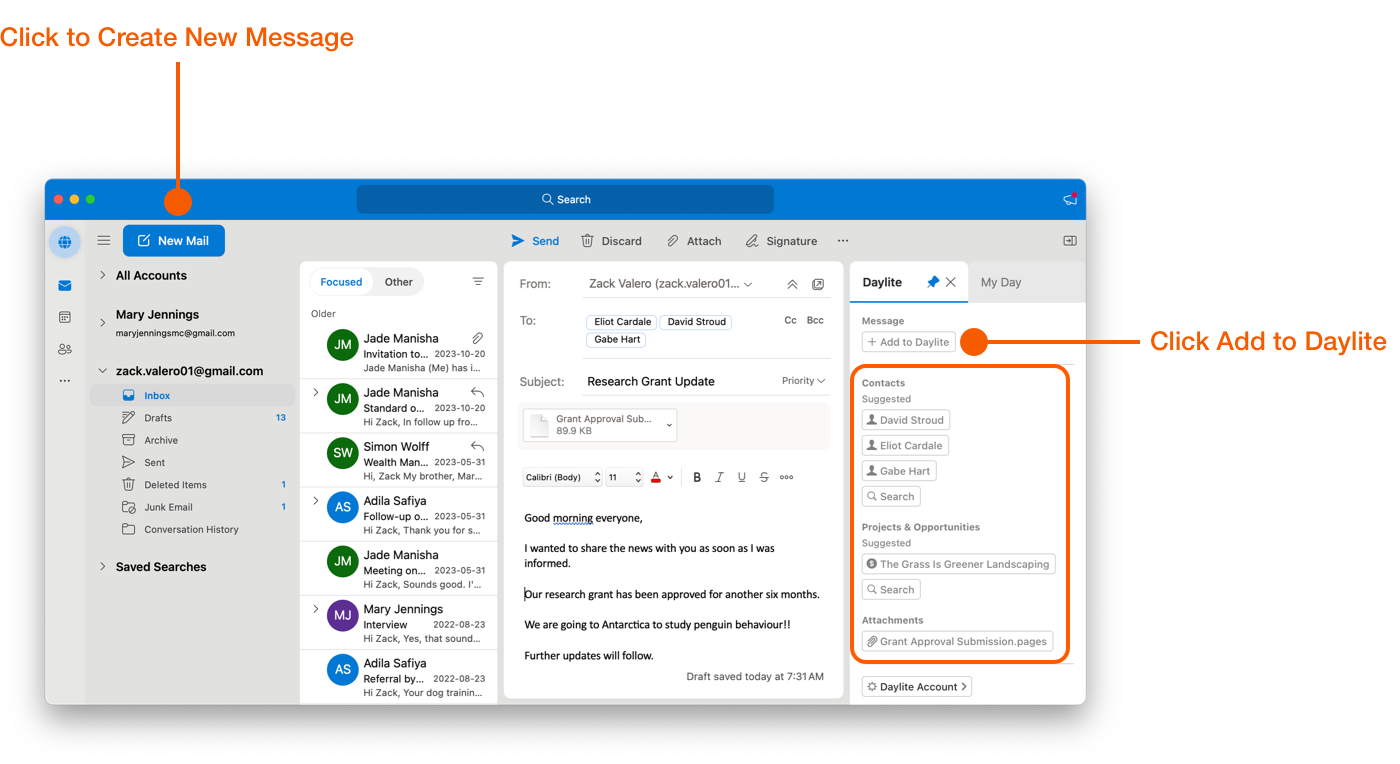
Click the New Mail button in Outlook.
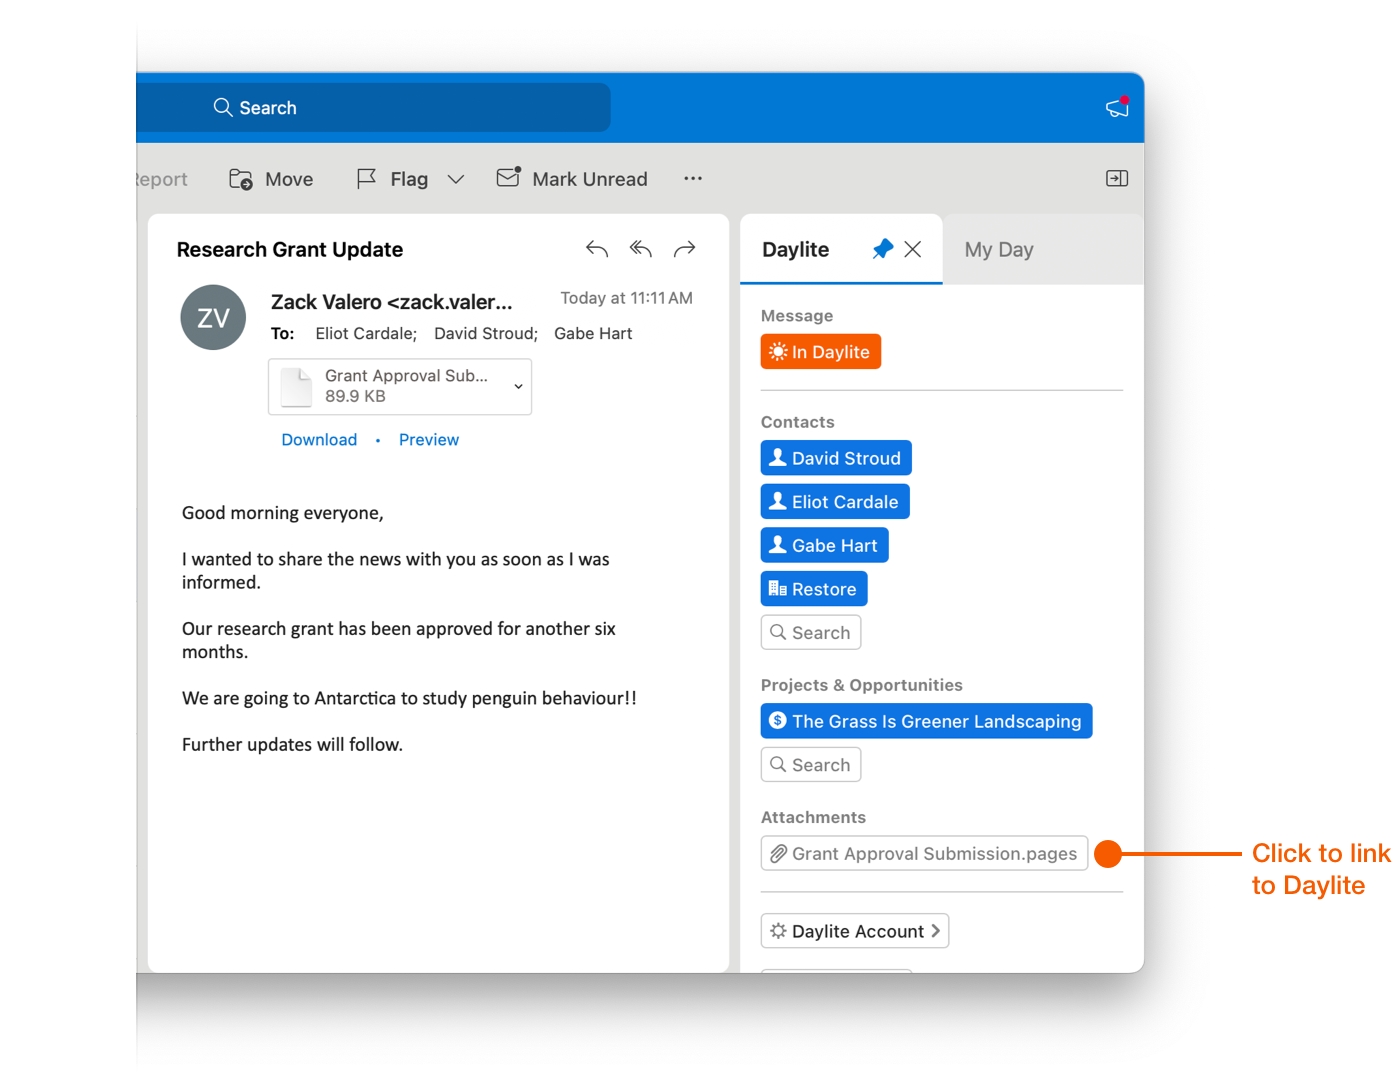
Click Add to Daylite to link the email to the Contact's record in Daylite.As you add recipients and attachments to your email they will appear in the Daylite sidebar as greyed out Suggestions, as well as any associated Projects or Opportunities.
You can click the Search button if you need to link additional items to the email.
If any of these items are not added to Daylite after clicking the Add to Daylite button, you can manually add them by clicking on the individual Item.
Attachments will also appear in grey, which means they have not been added to Daylite yet. Click on the attachments to add them to Daylite. They will change from grey to blue.
Attaching Files
Daylite will not recognize an attachment that has been dragged and dropped onto the main body of a composed message as an inline image. When adding attachements, a file must be dragged onto the upper fields (From, To, Subject), or by clicking Attach in the Outlook Toolbar.
Last updated