The Hiring Process, Onboarding New Employees and Daylite
Hiring the right candidate for an open position can be a time consuming, and often daunting endevour. You and your candidate both have a lot riding on this process.
With Daylite, you can track all your candidates, keep your correspondence in one place, and even streamline your onboarding process.
Tracking and Screening Candidates
Tracking and screening candidates can be hard. You may be receiving emails from candidates sourced from multiple job posting websites, each with their own resume. It's a lot to track. If you’re hiring for multiple positions, sorting everyone out can seem impossible.
Fortunately, with Daylite, you can easily manage and track your candidates.
Adding a New Candidate
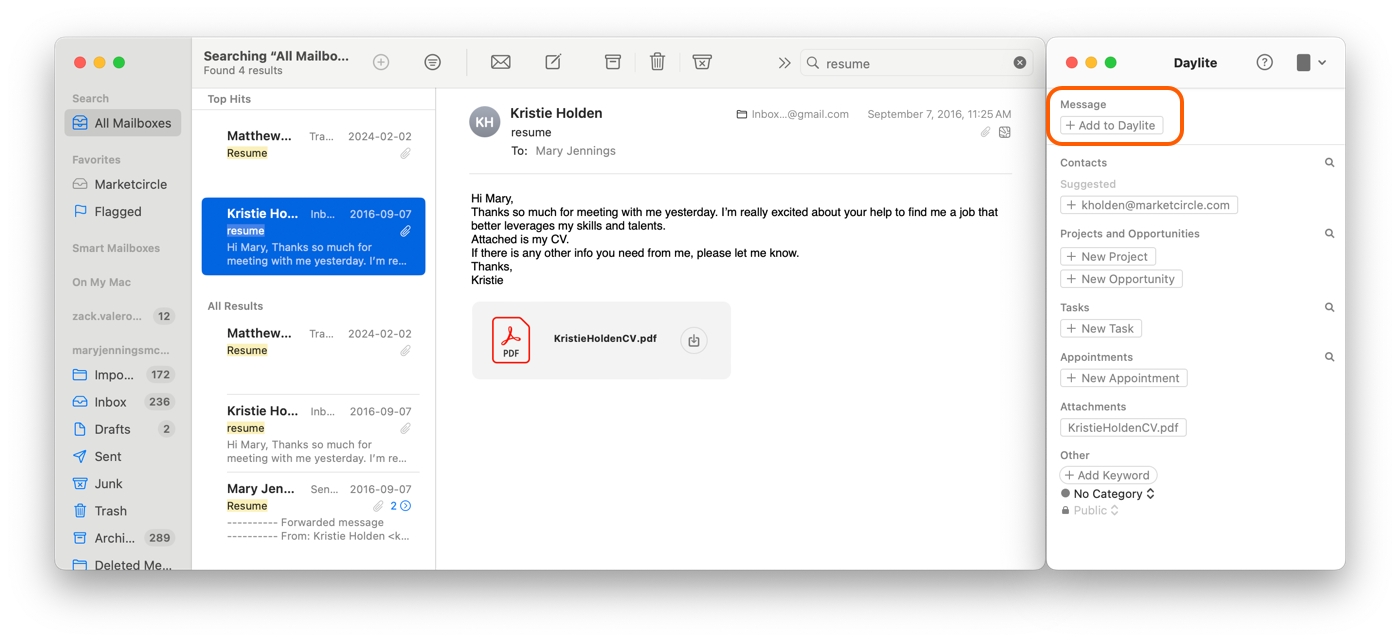
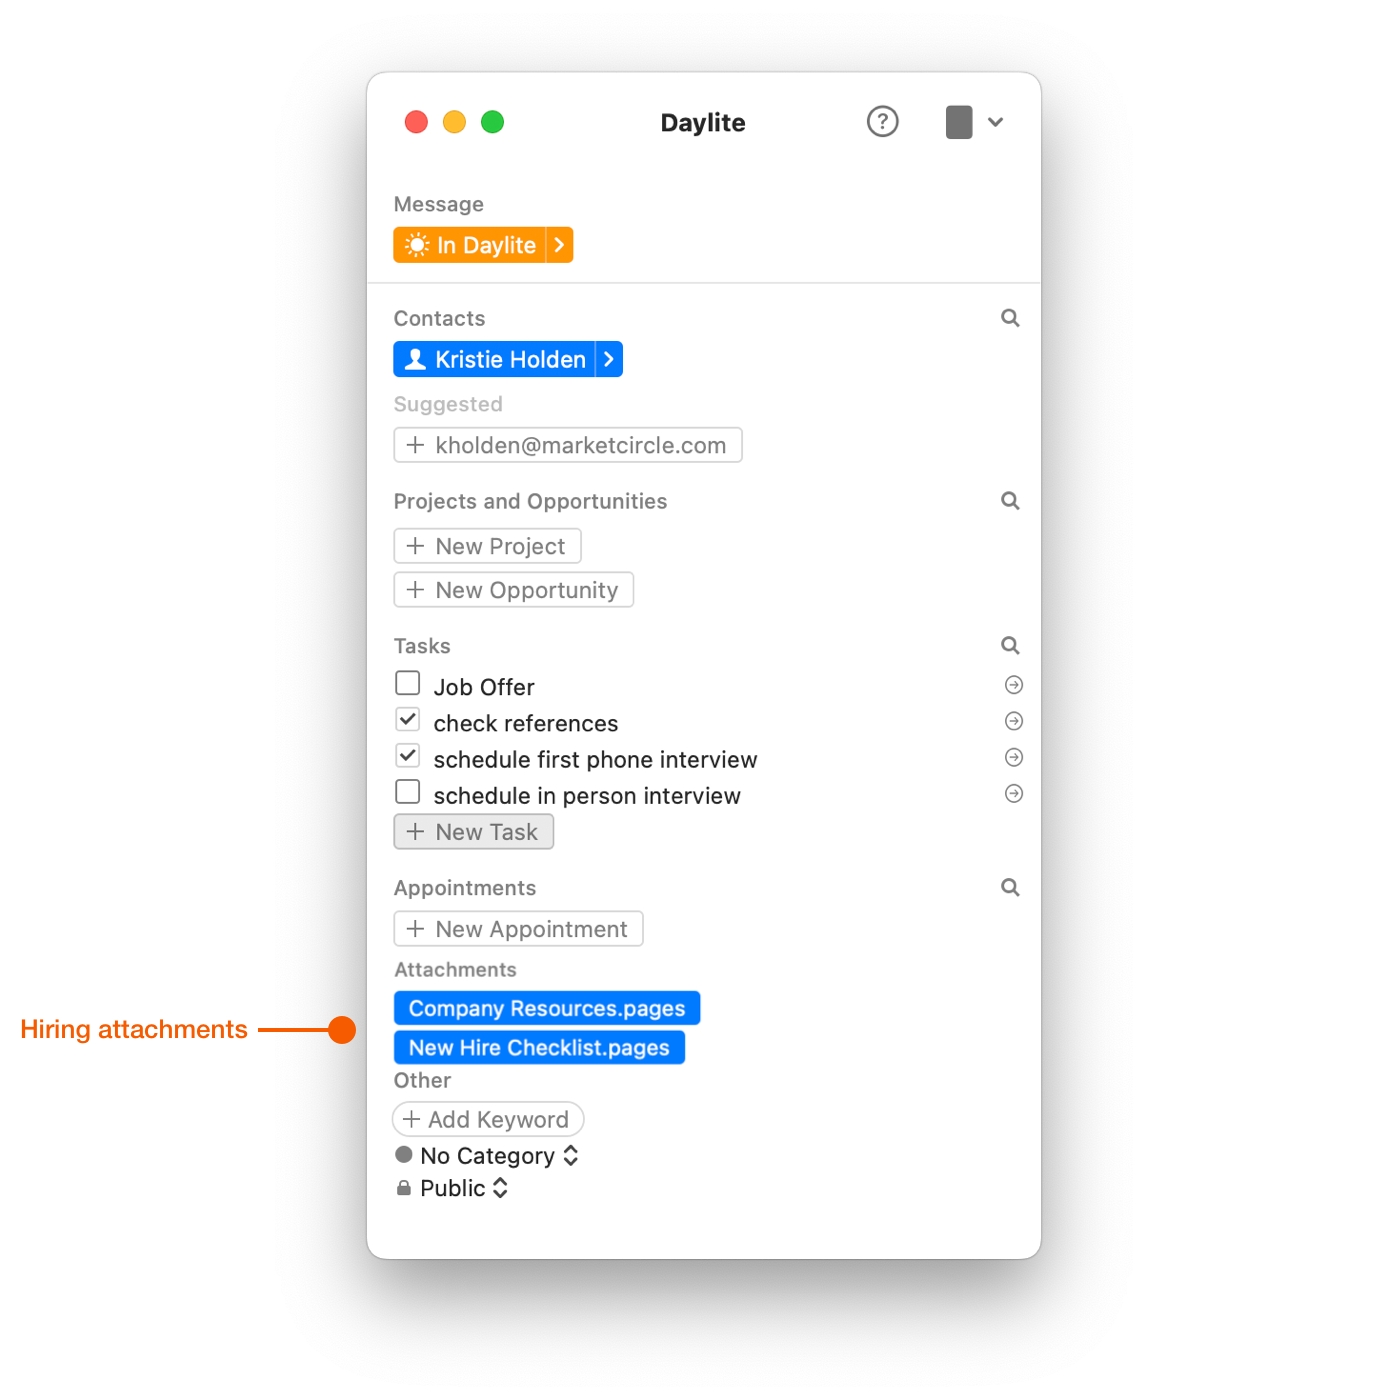
Most candidates applying to the position will come from your email inbox. Thanks to Daylite Mail Assistant, you can capture those new candidates, link their resume, and create a Task or Time Block to review their information right from your inbox.
To add a new candidate to Daylite:
Select Add to Daylite from the Daylite Mail Assistant banner in Mail.
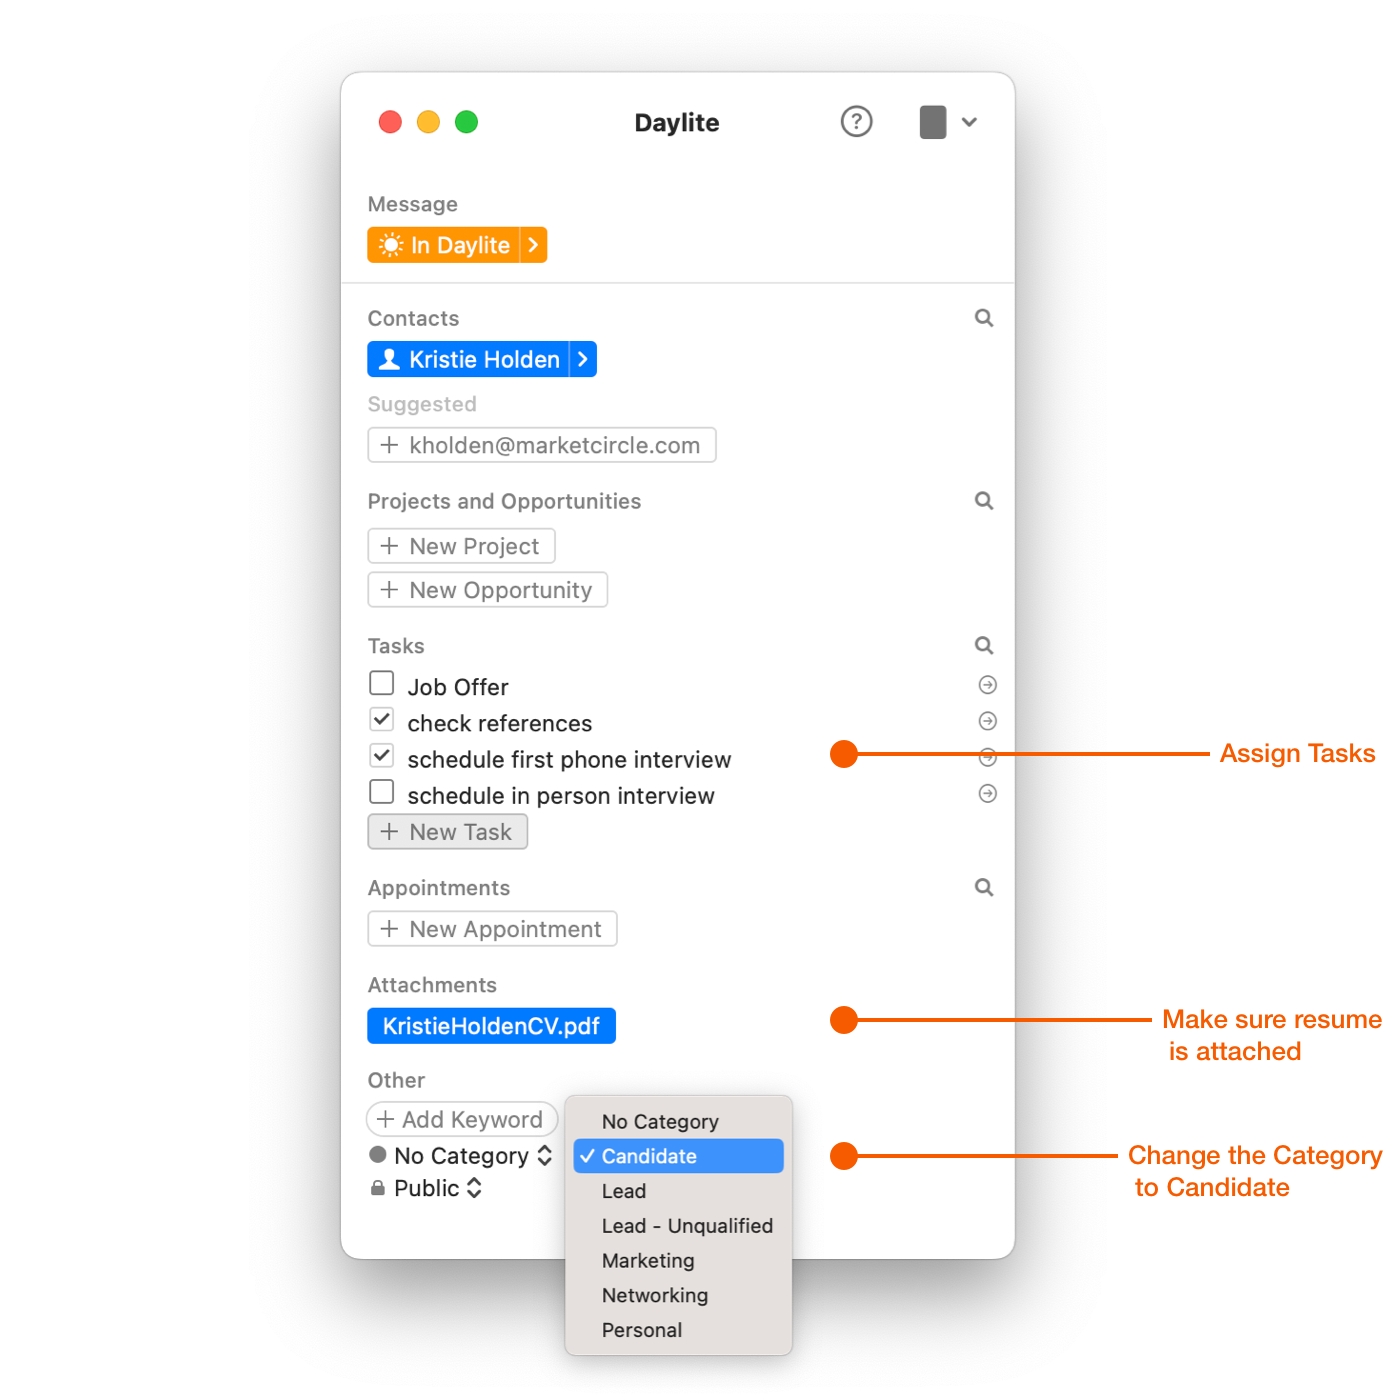
Assign any Tasks that need to occur during the hiring process.
Link any attached files such as a resume.
Choose Candidate from the Category menu. You may need to create this Category by navigating to Daylite > Settings > Categories > Emails.
Pro Tip:
You can also use Keywords to tag Contacts with additional information.
Add Keywords for each job posting, the source of the job posting, if you're interested in inverviewing them, etc.
Screening Candidates
Now it’s time to review your candidates. With Daylite, you can create a list of each of the candidates, and quickly locate all their information.
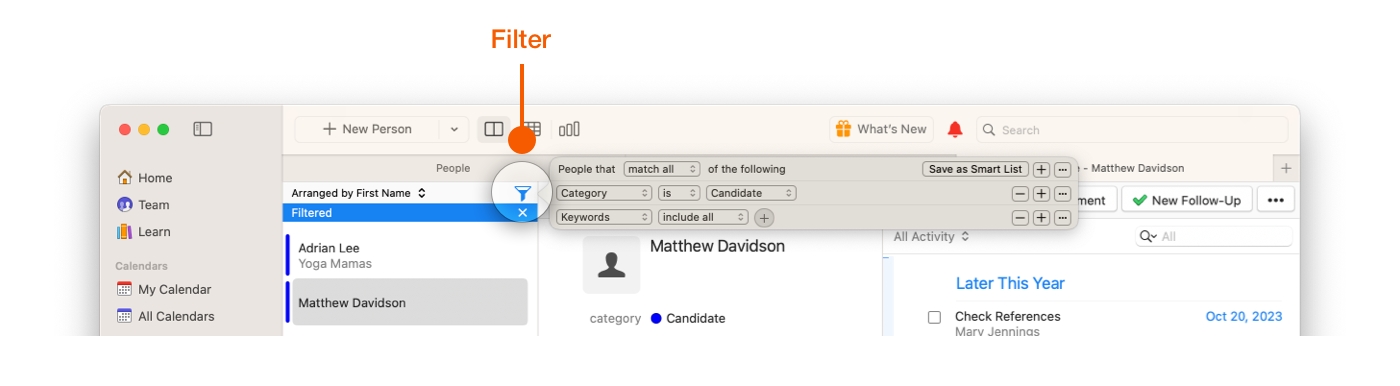
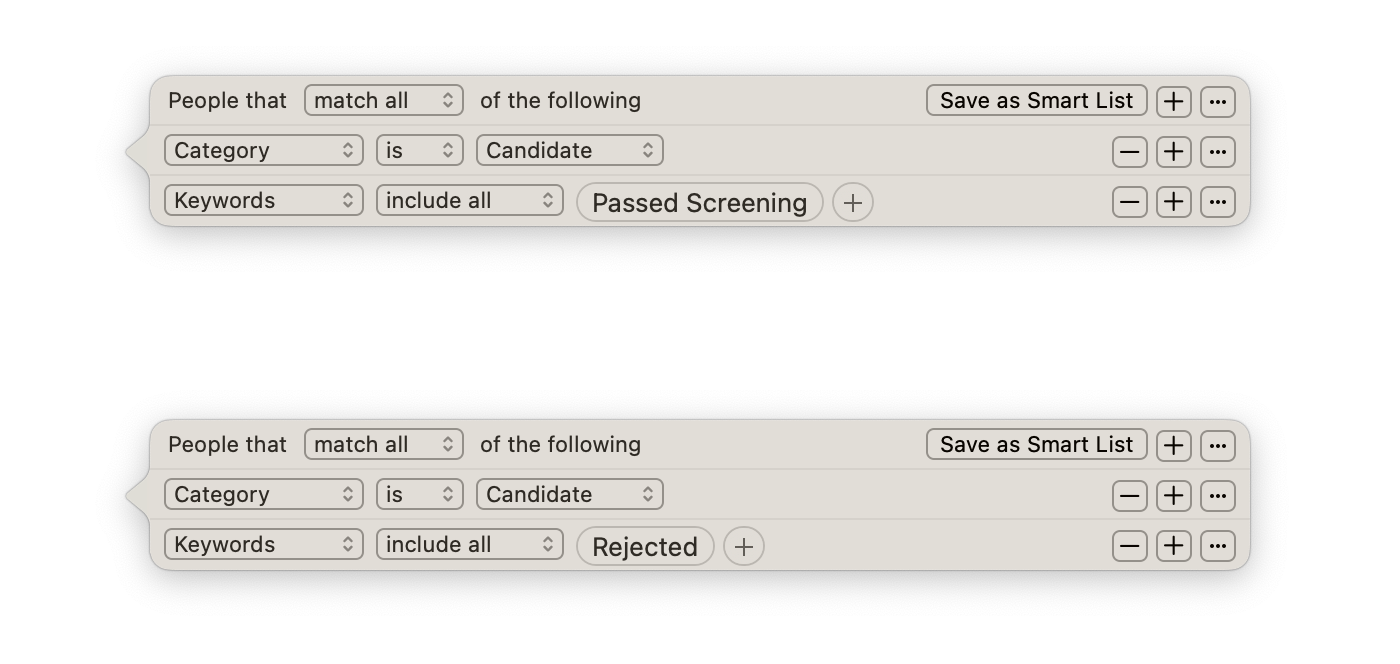
First, you need to create a list of all your candidates. To do this, select People for the Sidebar, and choose the Filter icon. Next, select Category is Candidate to filter your possible job hires.
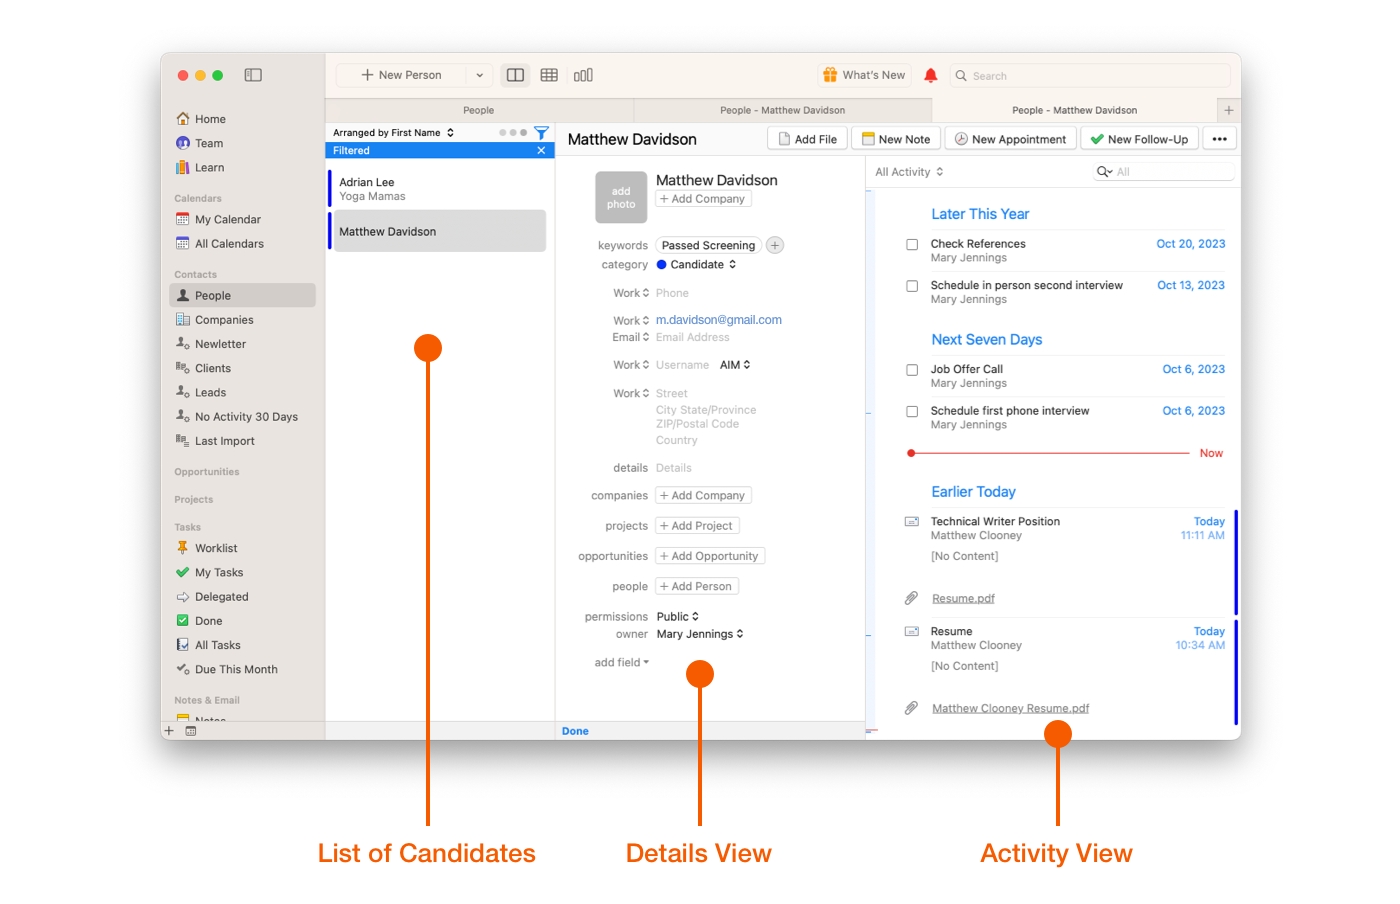
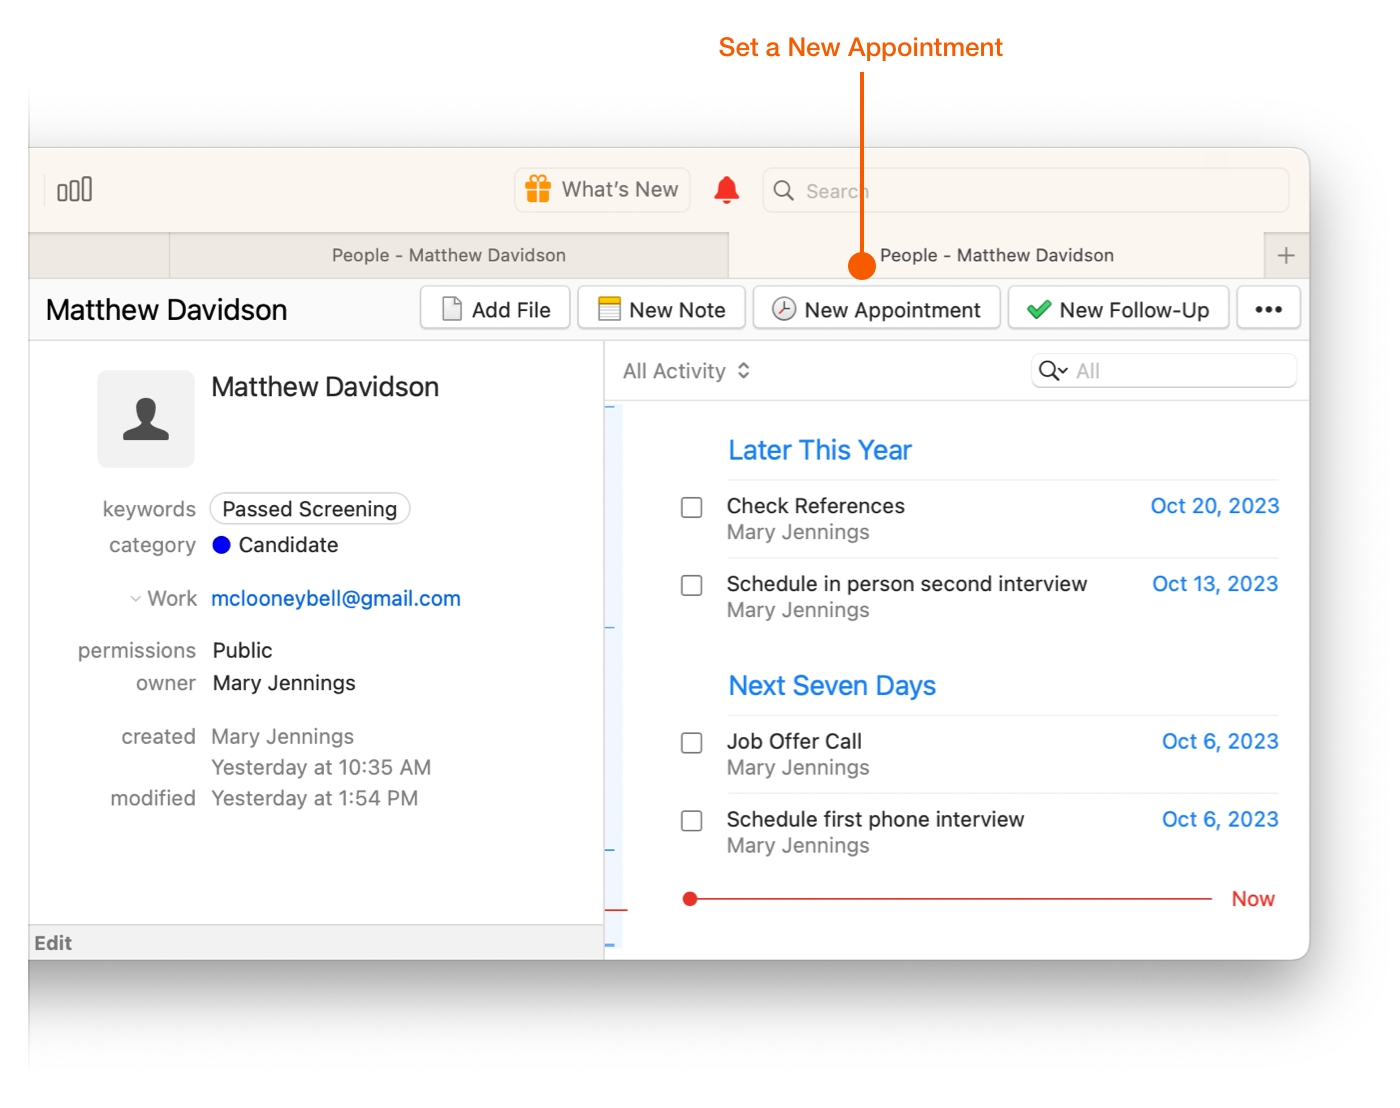
Your Candidates are now displayed in alphabetical order, along with their Details and any Activity associated with the Contact card.
You can review the Candidate's contact information, linked resume, any Notes that have been recorded, and check off Tasks as they have been completed, all with the end goal of moving the Candidate along in the hiring process.
After you’ve done the initial screening, remember to add the Keyword "Rejected" or "Passed Screening" on their Contact card.
Replying to Candidates
Now that you have candidates you’ve passed on, and others you want to want to interview, you can follow up with each of them. To do that, modify your filter and add the Keywords “Rejected” to create a list of those you’ve moved on from, and adding the Keyword “Passed Screening” for those you want to interview.
Once you have your list, select a Person, and then click on their email address to send a reply.
If you are sending out a large number of replies or using a standard reply, check out how to send a Letter Template.
Running Interviews
Now it's time to hold interviews.
Start by booking a meeting with each candidate, and be sure to invite anyone on your team who should be there.
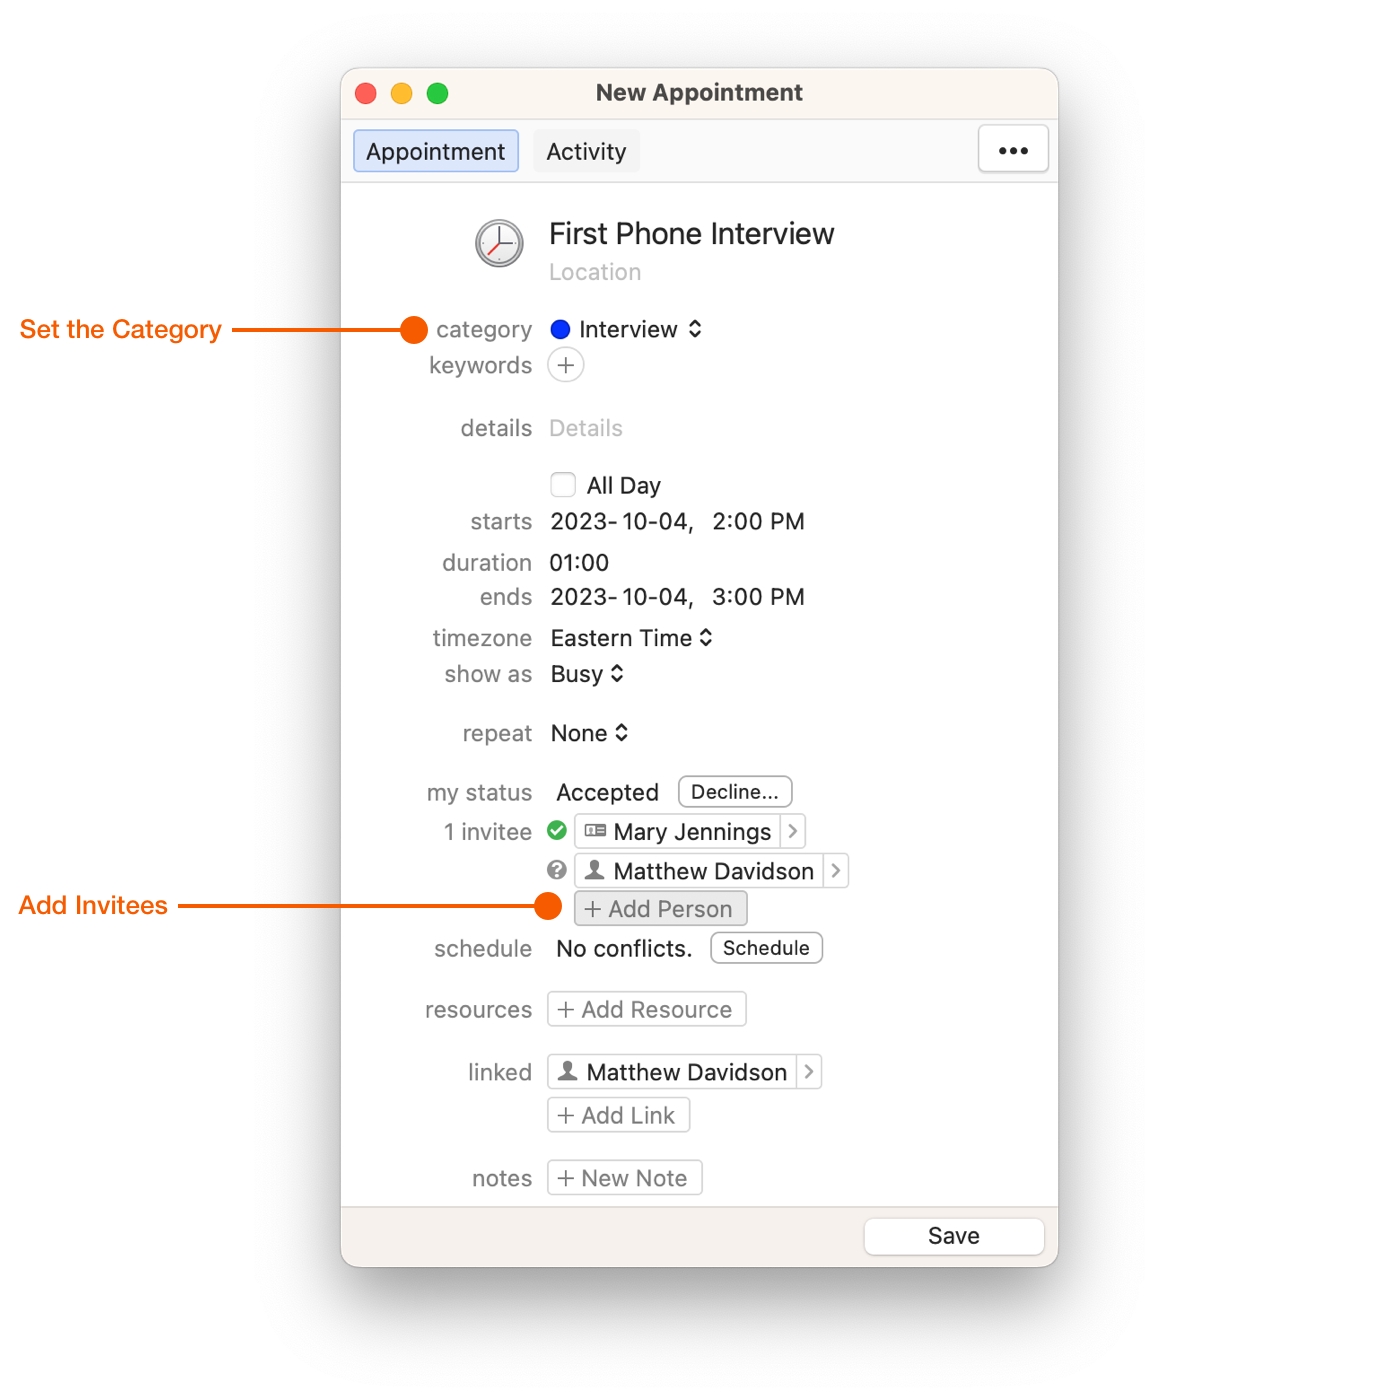
Click New Appointment.
Set the Category to Interview.
Invite the candidate, as well as other members of your team who may be part of the decision process.
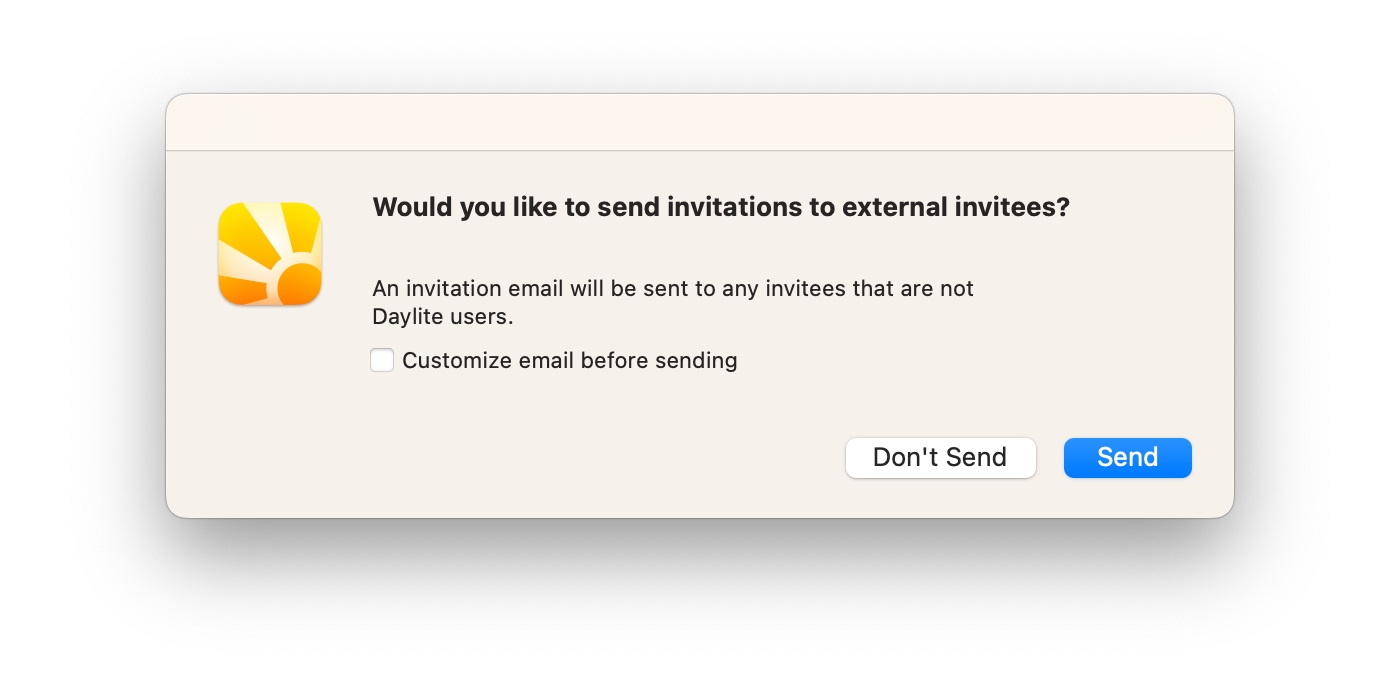
Daylite will ask if you wish to send the invitation to external invitees when you press Save.
Follow the steps in Replying to Candidates and Running Interviews, until you’ve gone through your hiring process and made your decision.
Hiring and Onboarding
After due consideration, you have decided who you want to hire. Once they accept your offer it’s time to get them onboarded. Daylite helps with the onboarding process by keeping all their data in one place.
Link all hiring documentation that you have sent to them by email with Daylite Mail Assistant.
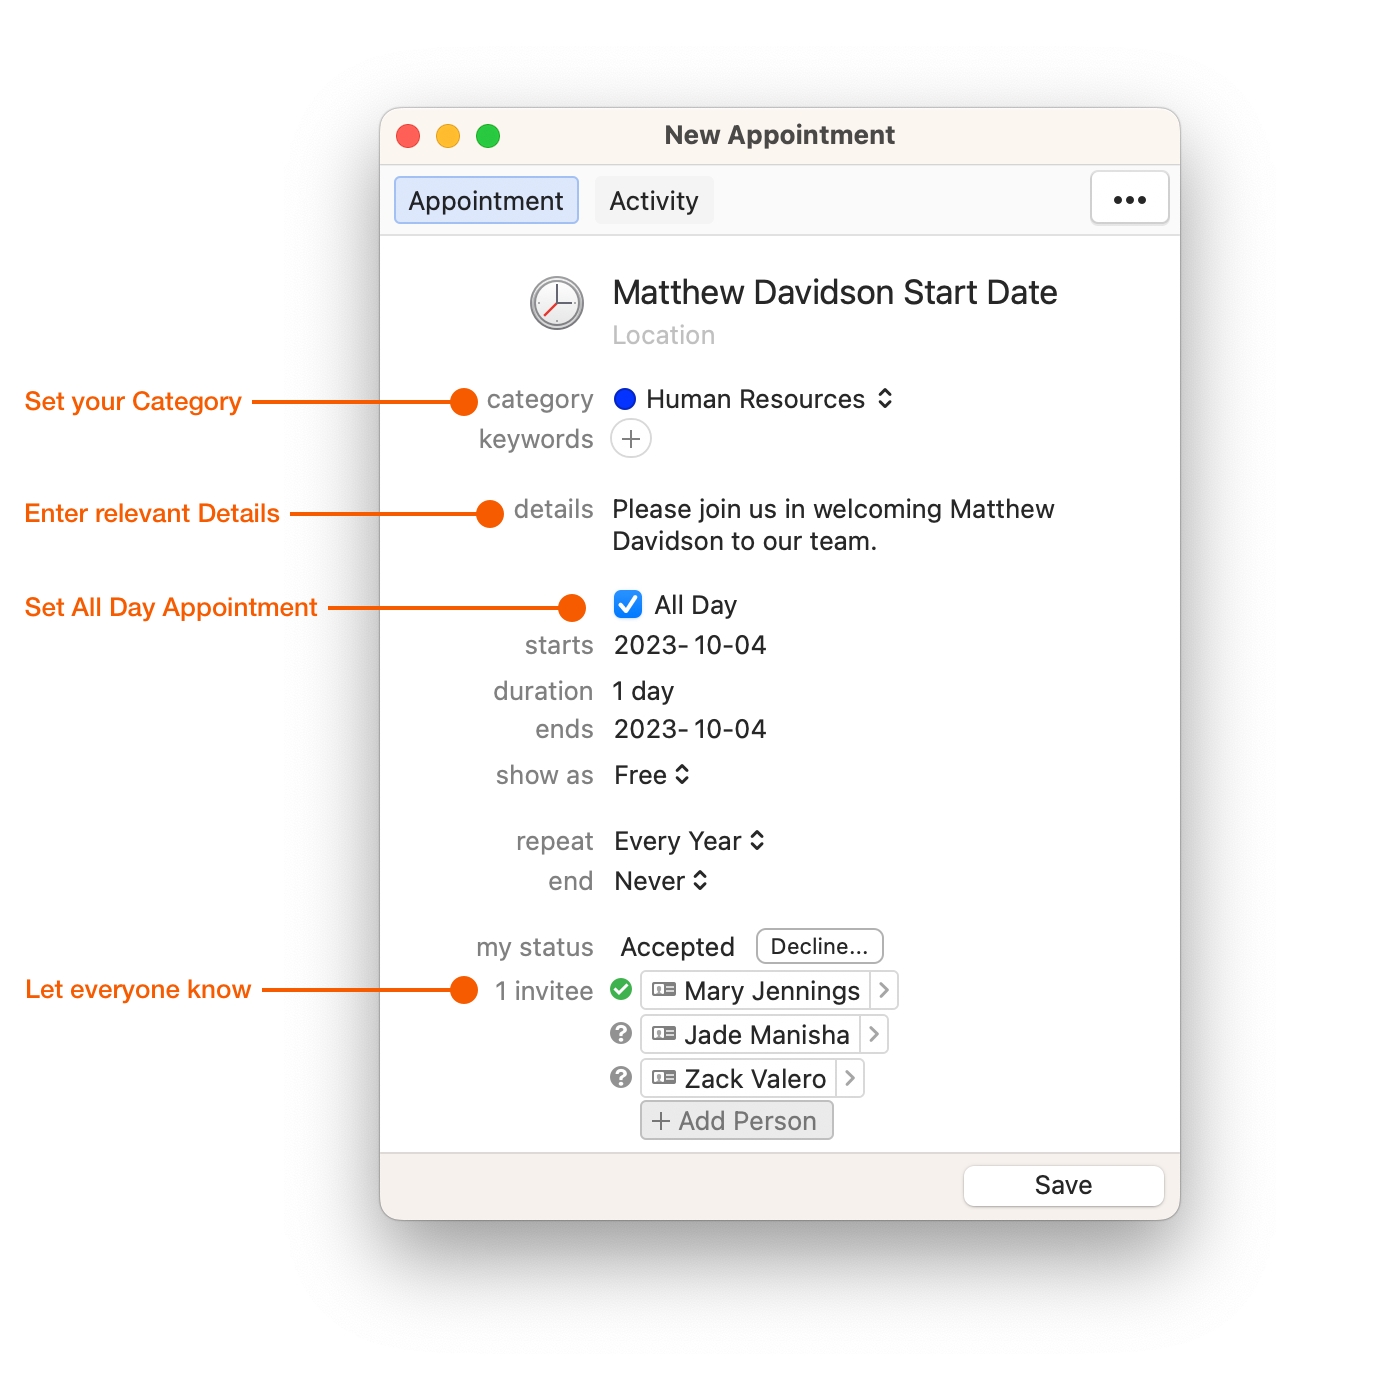
Create an all day appointment to document their start date, and link anyone who needs to know about it.
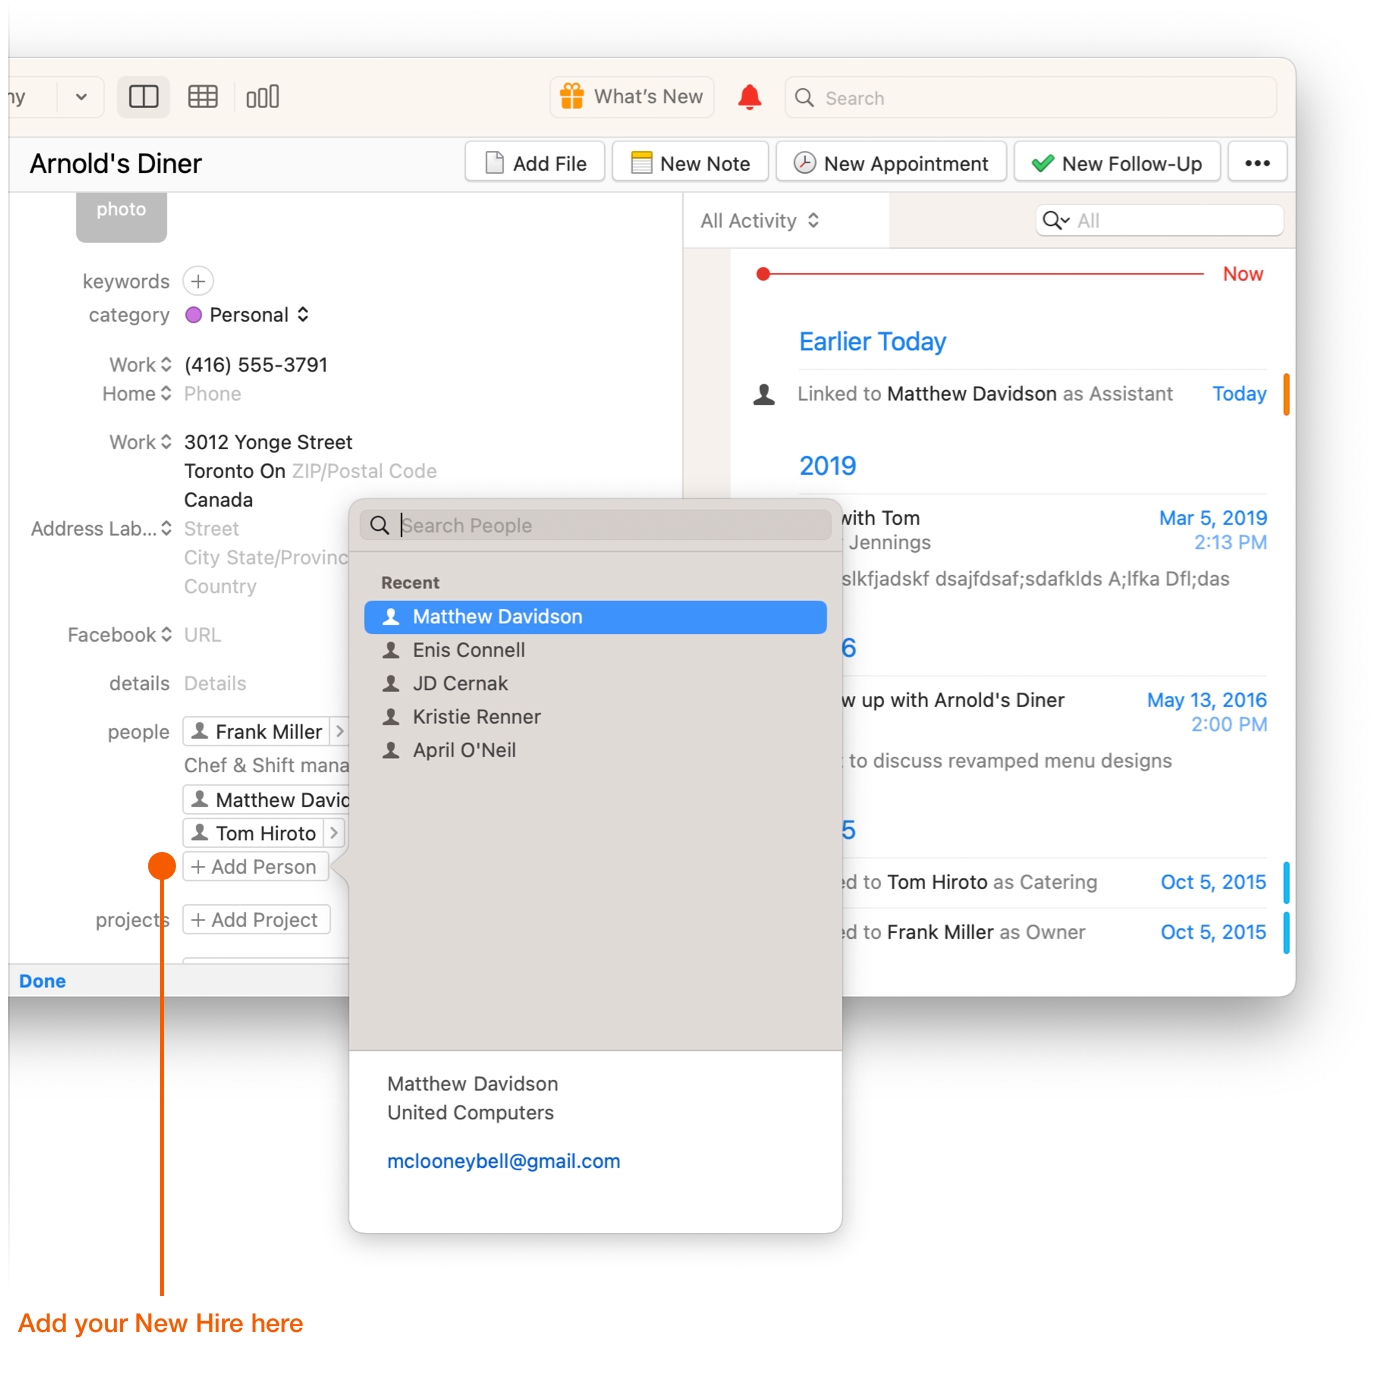
Link the new hire's Contact record to your Company in Daylite.
Choose your Company record.
Select the Edit button.
Scroll down to people and select +Add Person.
Choose your new hire's Contact record.
Pro Tip:
If you have a more complicated onboarding process, or you have an onboarding process that is the same every time, create an onboarding checklist with an Activity Set.
Wrap Up
Now that you've gone through the process of hiring and onboarding a new employee, check out How to Delegate Tasks.
Last updated